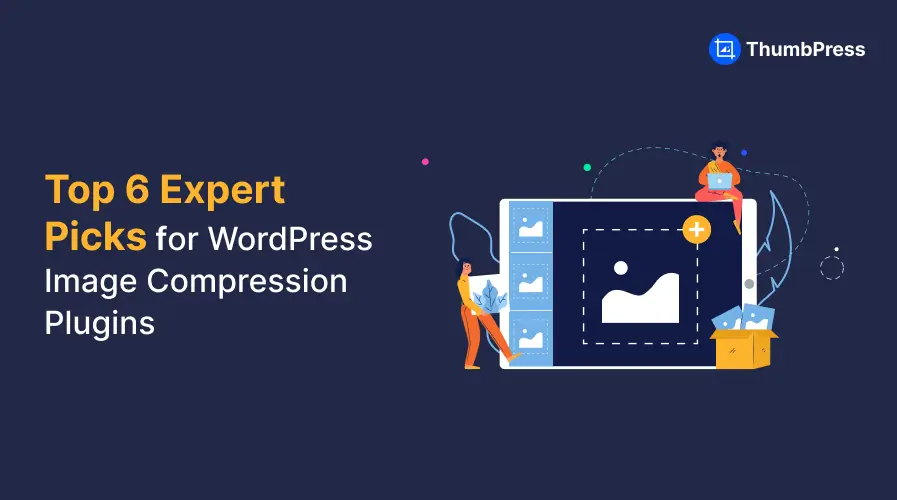
Compress Images in WordPress – A Step by Step Guide


According to Forbes, retailers lose a staggering $2.6 billion in sales annually due to slow-loading websites. This highlights the critical importance of optimizing website performance to retain sales and customers.
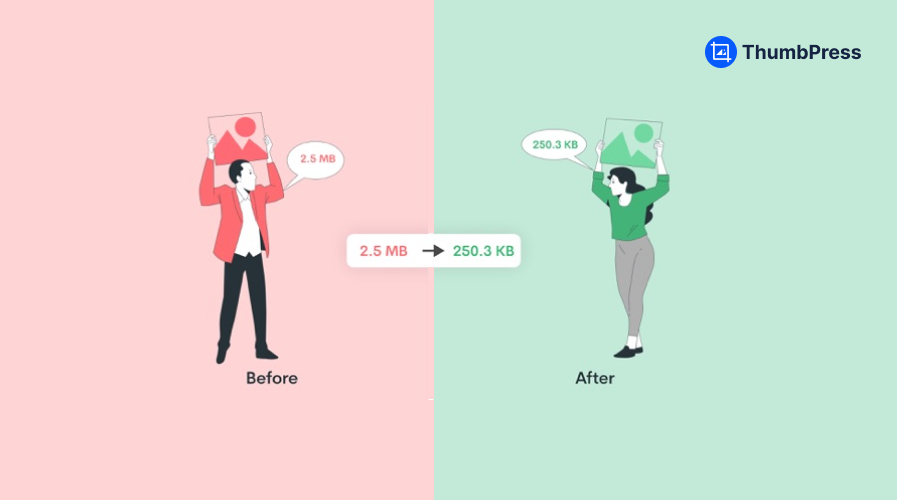
One key factor in improving WordPress website load times is image compression. Image compression reduces file size by eliminating unnecessary data and blending similar pixels. This process maintains image quality while significantly improving loading speed.
Proper image compression reduces loading time and preserves storage and bandwidth, enhancing your website’s search engine ranking. By following the right guide to image compression, you can make your website load quickly, improve user experience, and boost customer conversions.
So, let’s dive into the perfect guide to image compression and discover how to compress images using a WordPress plugin.
Understanding image Compression
Each image contains a certain amount of information, which determines its file size. This information includes the number of pixels, the number of colors, and the dimensions of the image. Compressing an image works by combining similar pixels to reduce the amount of storage the proto uses, without compromising much of the quality.
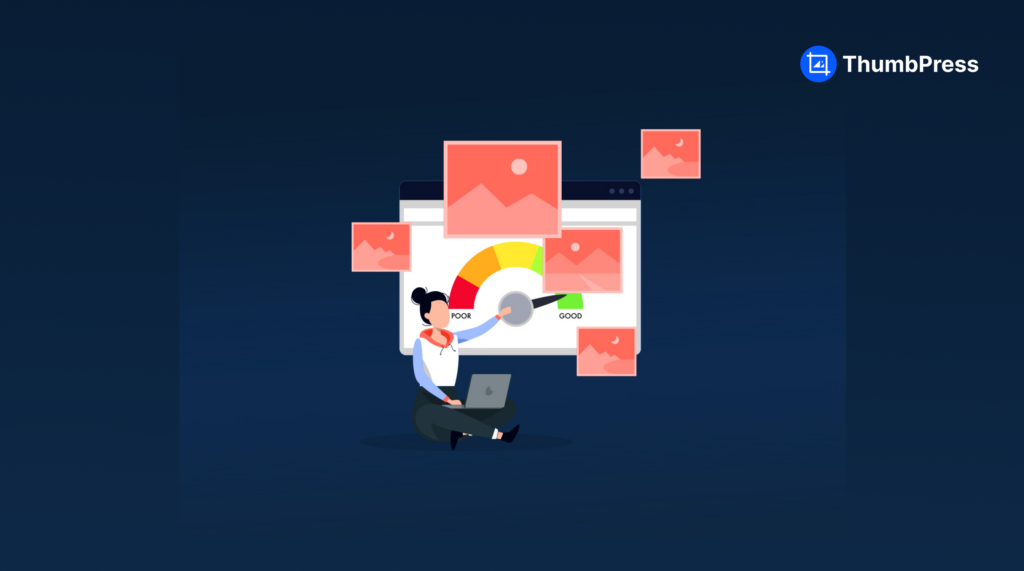
Image Compression is crucial for improving WordPress website performance, as smaller image files load faster, which enhances user experience and reduces overall data usage. Additionally, efficient image compression helps save storage space and bandwidth, and it can even boost your website’s search engine ranking by improving load times.
In essence, image compression optimizes the balance between image quality and file size, making your WordPress site more efficient and user-friendly. By understanding and applying image compression techniques, you can ensure your images look great and your website runs smoothly.
Types of Image Compression
There are two types of image compression: lossy and lossless. These two types of compression have different features and capabilities that will make your image compression easier.
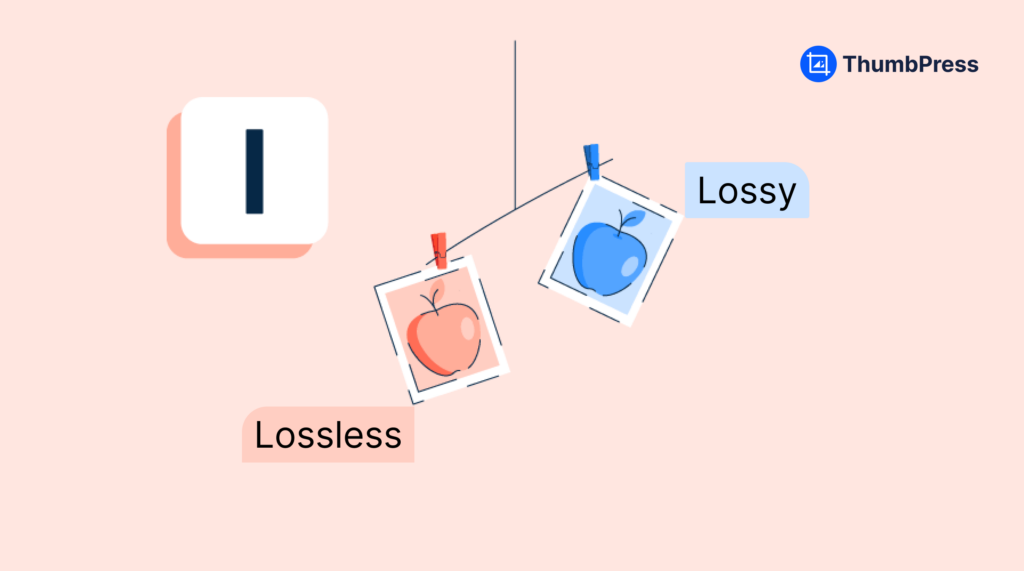
Lossy Compression
In lossy compression, some of the non-essential parts of the image will be eliminated. Images may lose some of the parts while resizing. However, you can get a very similar version of the image in lossy compression in a smaller size. That will enhance your website speed and overall performance.
With lossy compression, placing the image carefully is essential so you do not lose any important parts.
Lossless Compression
Lossless image compression is a way of compressing images into a smaller version without losing any data. This includes an efficient way to compact all the existing data of an image into a smaller file size. Here you would not have to worry about losing any data while compressing.
Benefits of Image Compression in WordPress Website
Faster Loading Time
Image compression is crucial for improving WordPress website performance. It reduces the amount of data needed for each image, leading to faster page loading times. Studies show that even a 0.85-second delay in page load time can decrease conversion rates by up to 7%.
By compressing images, you can significantly speed up your website, enhancing the user experience. Compressing images reduces bandwidth usage, lowering hosting costs and making your site more efficient. Overall, optimizing your images is a key step in creating a faster, more user-friendly WordPress website.
Mobile-Optimized Website
To optimize your WordPress site for mobile users, it’s crucial to reduce the size of your images. Mobile devices typically handle less data than desktops, so compressing images can significantly improve loading times for mobile users.
Given that 60.67% of web traffic comes from mobile devices, optimizing for mobile is essential for reaching your audience effectively. Ensuring your website is mobile-friendly will help you attract and retain more visitors, ultimately driving more traffic and achieving better engagement.
Reduced Bounce Rate
Compressed images will help your website load faster, improving the user experience by displaying content more quickly. This can lead to longer visits and lower bounce rates. By optimizing image sizes, you ensure that your WordPress site is more efficient and accessible, which is crucial for retaining users and enhancing overall performance.
Better SEO Performance
Compressing images can improve your search engine rankings. Smaller image sizes make your website load faster, providing accurate information quickly. Since your site will use less bandwidth it loads faster and users will have a better experience; eventually increasing their trust and satisfaction.
This enhanced user experience can boost your SEO, helping your website appear higher in search results. Google mentions page load time as one of their most important ranking factors.
Additionally, faster loading times reduce bounce rates and increase user engagement, further contributing to better search engine performance.
Image Compression Techniques
As you can see image compression is a great way to enhance your website’s overall performance and appear professional in front of your customers. Now you may wonder about the best image compression techniques.
Here we will be discussing both manual image compression and image compression using a plugin.
Manual Image Compression
You can compress images using an online image compressor or you can edit images from an image editor. There are a lot of free image compressors available where you can compress images. But often these tools ruin picture quality and have a limited image compression ability. Also compressing each image one by one and then uploading them is time-consuming and not efficient if you have a lot of images.
Image Compression with a WordPress Plugin
For a convenient image-compressing experience we suggest you use a WordPress plugin that has incredible image-compression features. ThumbPress is a complete image management plugin for your WordPress site. With ThumbPress you can compress images easily in seconds.
You can either compress images in bulk or make your images compress while being uploaded. The steps are super simple and user-friendly. Here’s how you can compress images easily.
Step 1: Get ThumbPress Pro
First, you have to get a ThumbPress Pro subscription. Then Go to Your Dashboard > Plugins > Add New Plugin and click the Upload Plugin button to add the pro plugin to your dashboard.
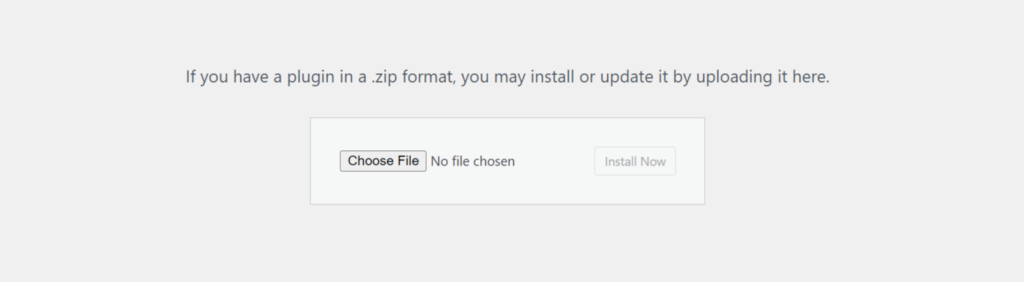
Note: You have to install ThumbPress and activate it on your dashboard too. Plugin > Add New Plugin > Install ThumbPress > Activate
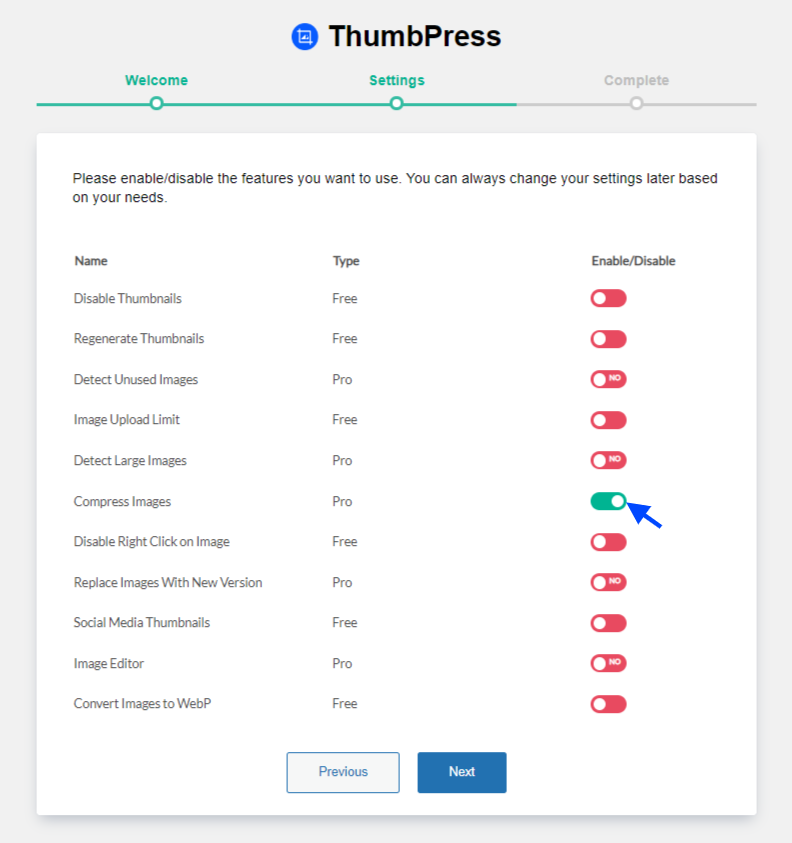
Step 2: Enable Compress Image Feature
After you have activated both ThumbPress Pro and ThumbPress, we are off to the next step.
You have to enable the Compress Images feature.
For that, you can head over to the setup wizard page and enable the feature from the settings page.
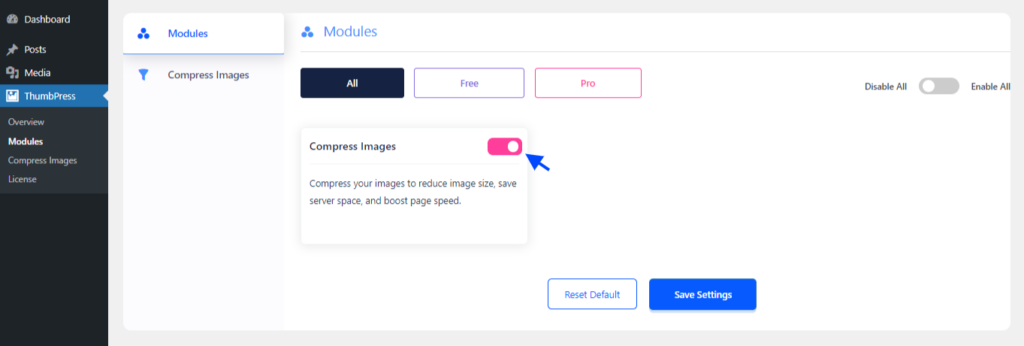
Or you can enable the feature directly from the modules page.
That’s all now you are all set to compress images.
Step 3: Compress all Images at Once
With ThumbPress, you can compress images in bulk, individually from the media gallery, or automatically during upload.
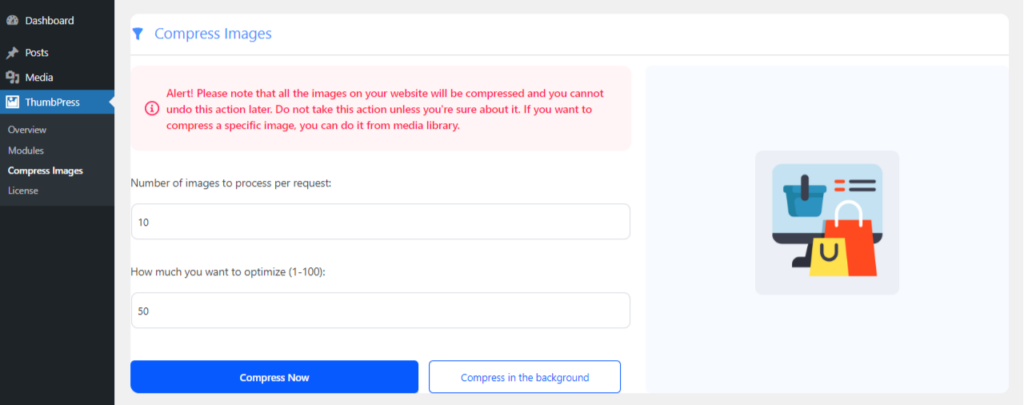
For bulk compression, go to the “Compress Images” option and set the number of images you want to compress in one request. Simply input your desired number and click the “Compress” button.
This flexibility ensures that you can efficiently manage your image compression needs, saving time and improving your WordPress site’s performance.
Keep in mind that compressing images might take some time, and you need to keep the tab open until it’s finished. To avoid this inconvenience, you can select ‘Compress in Background.’ This option allows you to continue with other tasks while the compression process runs.
Note: When using this feature, all the images in your media library will be compressed and you cannot undo this action later.
Step 4: Compress Images While Uploading
To enable image compression during uploads, simply enable the Compress Automatically During Upload button from the settings. This will automatically compress all images as you upload them.
You can also set a compression percentage for your images to decide how much you want them to be compressed.
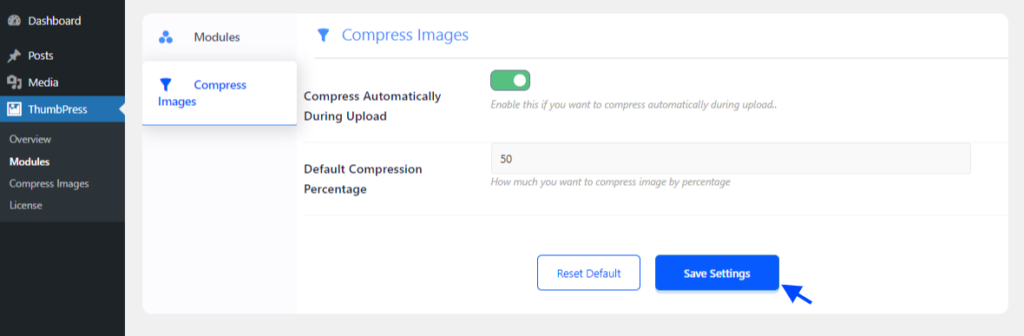
Don’t forget to save your settings afterward.
With these features, you can easily compress your images upon upload, individually, or in bulk from the dashboard and media library, making your website more efficient and user-friendly.
Remarks
Image compression blends similar data within an image, reducing the file size without compromising quality. This technique allows you to display high-quality images to your customers while saving storage space.
Using image compression can significantly reduce the load on your WordPress website, enhancing its performance. Given the advantages, having a tool to compress images during upload automatically is essential, especially for image-heavy websites.
ThumbPress is the ideal solution for this. It compresses high-quality images as per your preferences, ensuring your website remains fast and efficient. Implementing ThumbPress can make your site lighter and more responsive, providing a better experience for your users.
Subscribe to Our Newsletter
Get the latest WordPress tutorials, trends, and resources right in your inbox. No Spamming, Unsubscribe Anytime.

Thank you for subscribing to our newsletter!


Table of Content
- Understanding image Compression
- Types of Image Compression
- Lossy Compression
- Lossless Compression
- Benefits of Image Compression in WordPress Website
- Faster Loading Time
- Mobile-Optimized Website
- Reduced Bounce Rate
- Better SEO Performance
- Image Compression Techniques
- Manual Image Compression
- Image Compression with a WordPress Plugin
- Step 1: Get ThumbPress Pro
- Step 2: Enable Compress Image Feature
- Step 3: Compress all Images at Once
- Step 4: Compress Images While Uploading
- Remarks