Disable Unnecessary Thumbnails for Efficient Media Management


Uploading images to WordPress creates tons of extra thumbnails, eating up storage and slowing down your site. ThumbPress, a freemium and user-friendly plugin, lets you easily disable these unnecessary thumbnails with a few clicks to keep your website fast and efficient.
This blog will guide you through the easiest way to manage and disable unnecessary thumbnails in WordPress using ThumbPress. Keep reading to learn how to clean up your website and improve its performance with just a few clicks.
Disable Thumbnails in WordPress in 3 Easy Steps
Manually disabling thumbnails can be a hassle. Why not simplify the process with ThumbPress? This user-friendly plugin offers a free feature to disable the thumbnails you don’t need—just by dragging and dropping.
Let ThumbPress be your go-to solution for a cleaner and faster website. Now, let’s explore how you can easily disable thumbnails using ThumbPress.
Step 1: Install ThumbPress
Start by installing ThumbPress in your dashboard. Go to Dashboard > Plugins > Add New Plugin. Search for ThumbPress in the search bar and click ‘Install Now’.
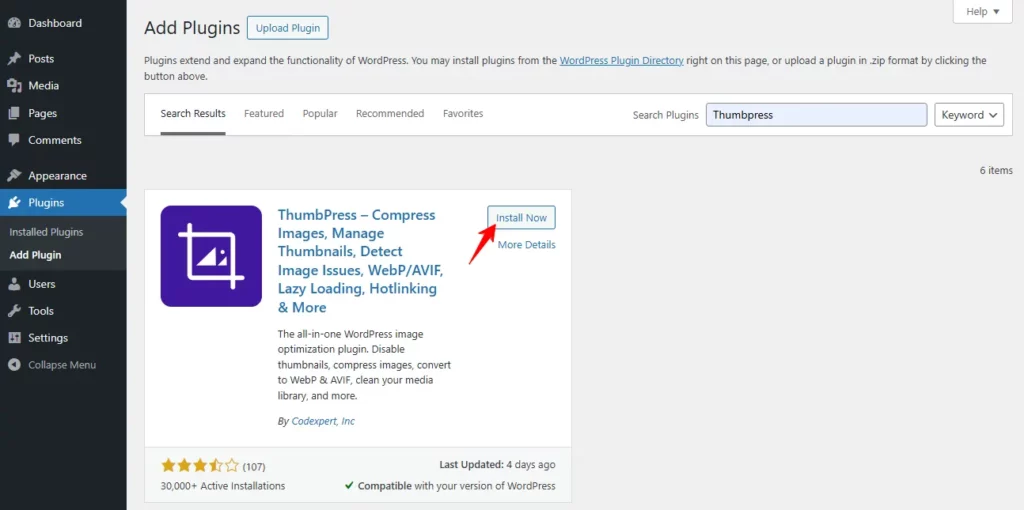
Now that you have the plugin activated, you are ready to go to the next step.
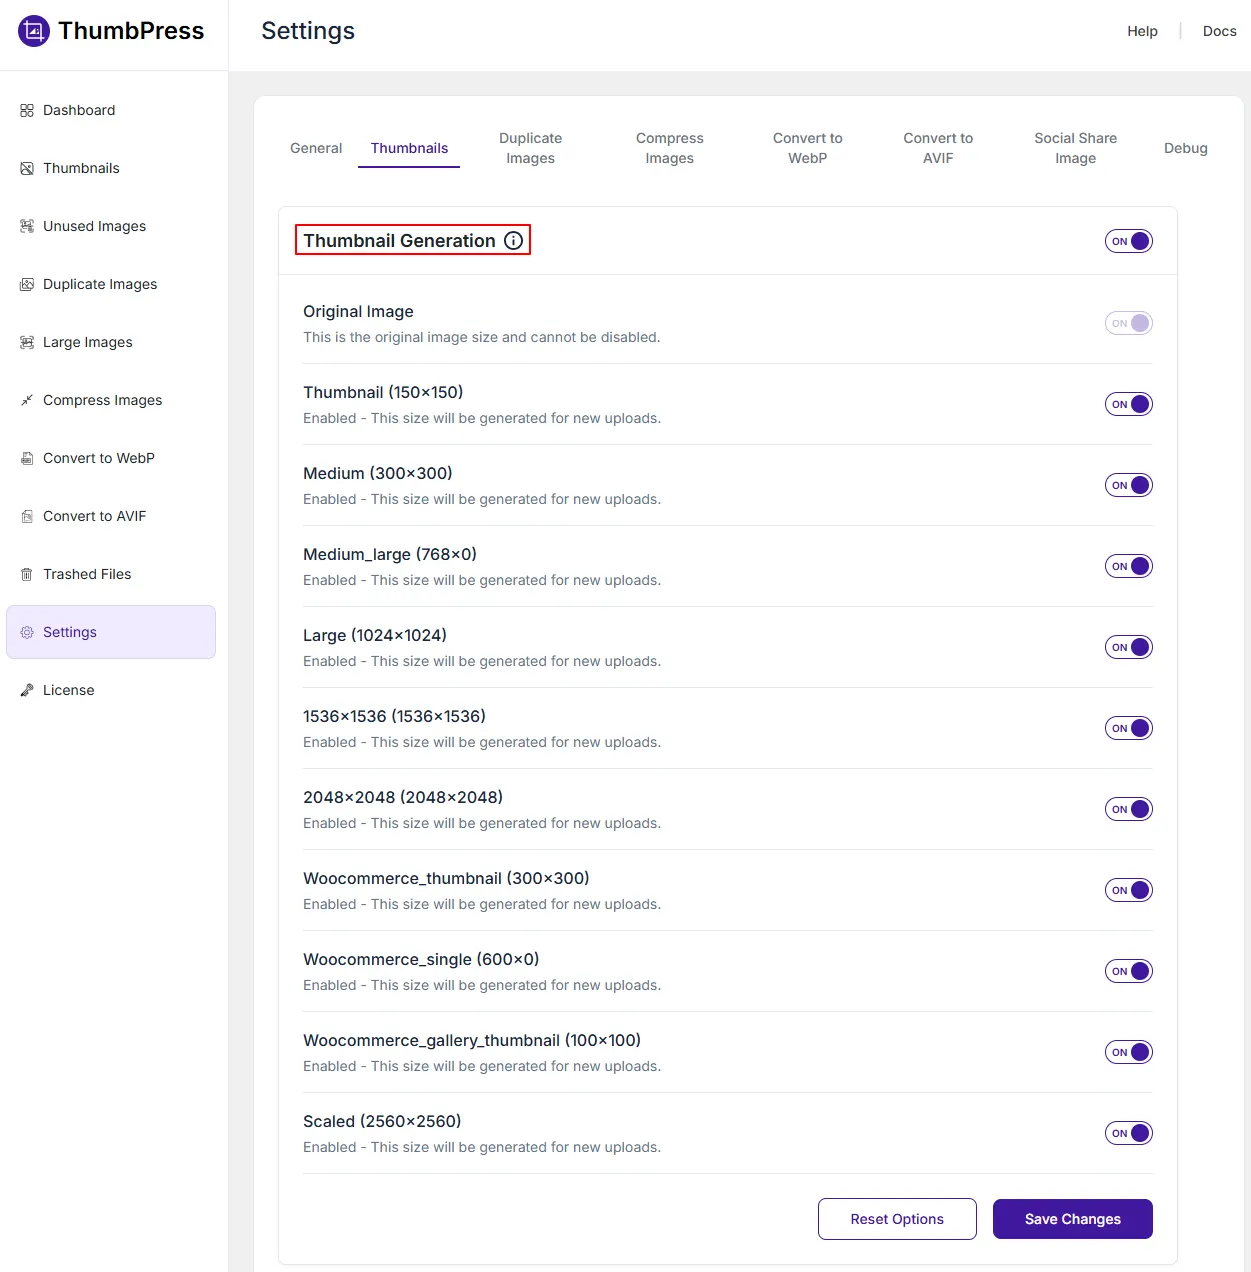
Step 2: Disable Thumbnails
To access this section, please go to
WordPress Dashboard > ThumbPress > Settings > Thumbnails
Each size has a toggle switch: Turn On- the size will be generated and available and turn off- the size will be disabled and not created for new uploads.
Now, hit the Save changes button.
Whenever you upload an image to your website the disabled thumbnails will not be generated. If you want to regenerate these thumbnails again, check out our Regenerate Thumbnails module here.
Final Thoughts
With ThumbPress, disabling unnecessary thumbnails in WordPress couldn’t be simpler. By following the step-by-step guide provided in this blog, you can quickly free up valuable server space, and reduce clutter.
Get ThumbPress today and see the difference it makes in keeping your digital space tidy and efficient!
Subscribe to Our Newsletter
Get the latest WordPress tutorials, trends, and resources right in your inbox. No Spamming, Unsubscribe Anytime.

Thank you for subscribing to our newsletter!