How to Optimize WordPress Images Easily in 2026


Have you ever noticed that your WordPress site is loading slowly?
The chances for this reason are mostly your images. A slow-loading website not only frustrates visitors but also hurts your search engine rankings.
In this article, we will show you beginner-friendly strategies to speed up your WordPress site by fixing your image. This includes optimizing their sizes, formats, and how you can remove large and unused images and more, all by yourself without the help of an expert.
Let’s go straight to the content!
Benefits of Optimizing Your Website Images

Speed Up Your Website
Large image files are one of the most common reasons websites load slowly. When you reduce the file size of your images without losing quality, your site can load much faster. This is especially important for visitors with slower internet connections or those browsing on mobile devices.
Save Server Space
Optimized images take up less storage on your server. This not only helps you stay within your hosting limits but also makes your site lighter and easier to maintain. It’s especially useful if you upload lots of images regularly.
Improve Website SEO
Google and other search engines consider site speed when deciding how high to rank your pages. A faster website means better chances of showing up higher in search results. Also, using the right image formats, file names, alt text, and image sitemaps helps search engines understand your content better.
Better Performance on Different Devices
People visit websites from all kinds of devices like phones, tablets, laptops, and desktops. Optimized images adjust better across screen sizes, load faster on mobile networks, and make your site look good everywhere.
Quicker Backups and Easier Site Management
When your image files are smaller, your entire website becomes lighter. This means your backups take less time and storage space, and it’s easier to move or clone your site if needed. If you ever need to migrate or restore your site after an issue, optimized images can make the process smoother.
Top 7 Strategies to Optimize WordPress Images
There are several ways to optimize images for a WordPress site, but we’re going to focus on the top 7 strategies to make the process easier. In this section, we’ll show you how to optimize WordPress images using a plugin.
At first, you have to install and activate ThumbPress and ThumbPress Pro on your WordPress site. Once they’re activated, you’ll need to enable a few feature settings to begin optimizing your images.
In the next section, we will explore how ThumbPress can help you optimize your WordPress images efficiently with its features.
1. Disable Unnecessary Thumbnails
If you want to keep your WordPress site clean and fast, it’s important to remove unnecessary thumbnails. These extra image sizes can slow things down and clutter your media library, so let’s clean them up.
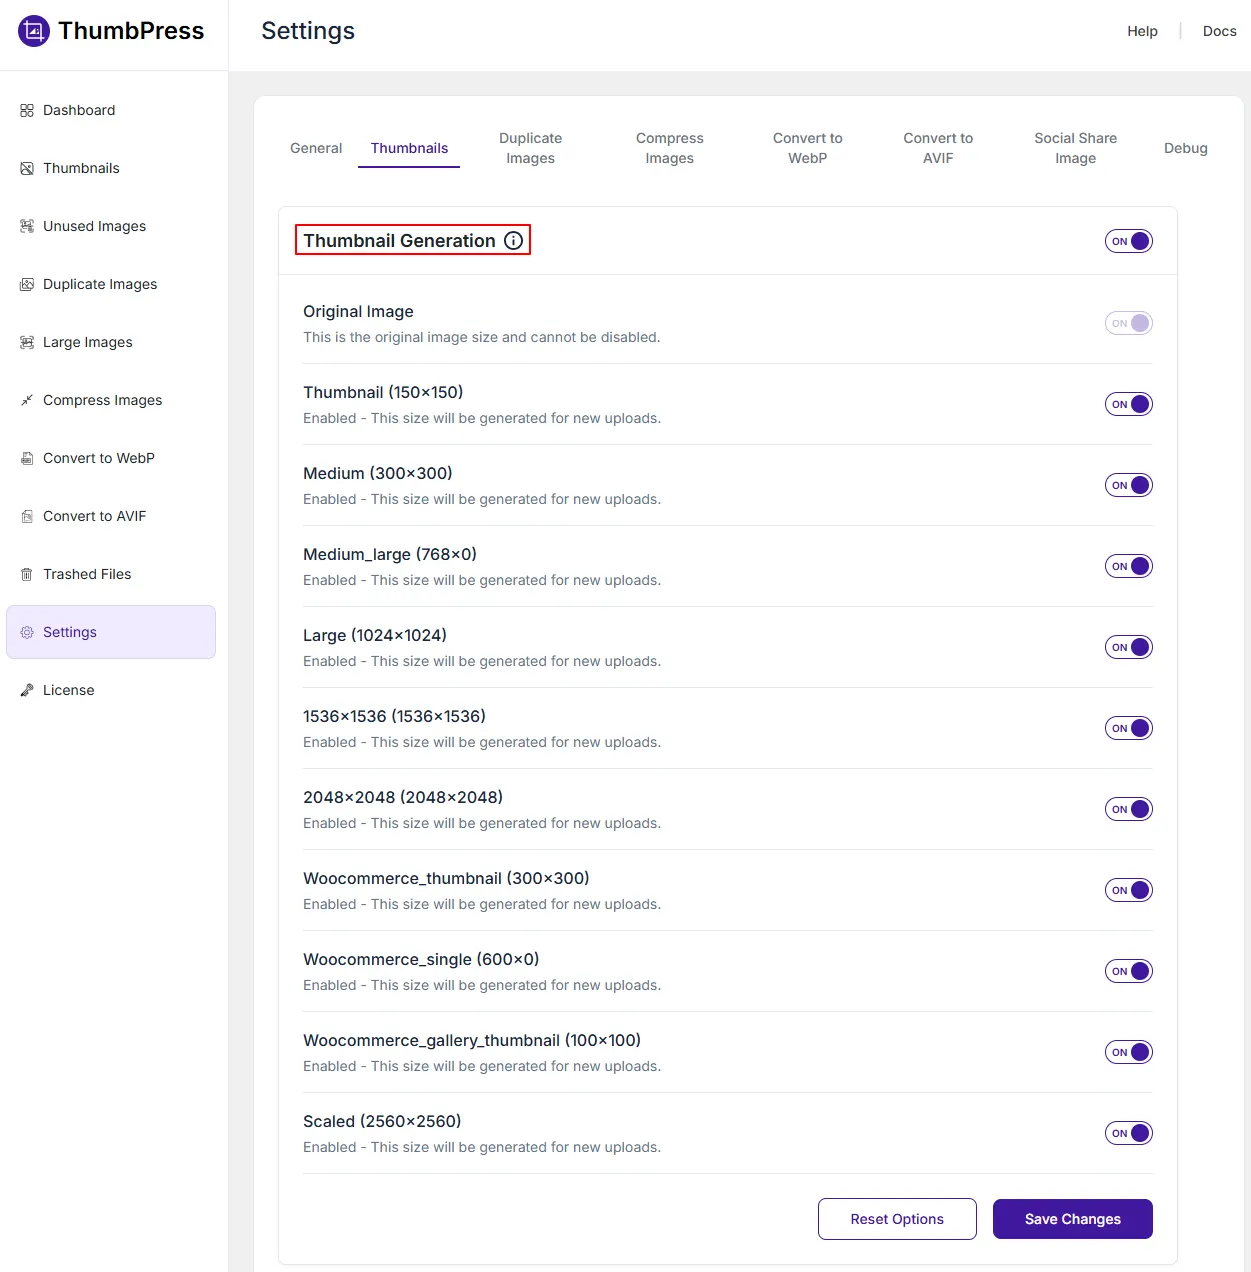
Since all the features are already enabled, head over to ThumbPress >> Settings, and you’ll see a tab called Thumbnails.
Inside this tab, you’ll find a simple interface that lets you choose which thumbnail sizes you want to keep and which ones you’d like to disable. Just drag the sizes into the appropriate sections, and once you’re done, click the Save Settings button to apply the changes.
2. Convert Images into WebP
Many websites struggle with unoptimized images, which can quickly eat up server space and slow down performance. One simple way to fix this is by using the Convert Images to WebP feature in ThumbPress.
To get started, go to ThumbPress >> Settings >> Convert Image to WebP. You’ll see three options for converting your WordPress images to the WebP format:
1. Convert images automatically as they’re uploaded: This setting will work automatically whenever you upload any images to your WordPress site.
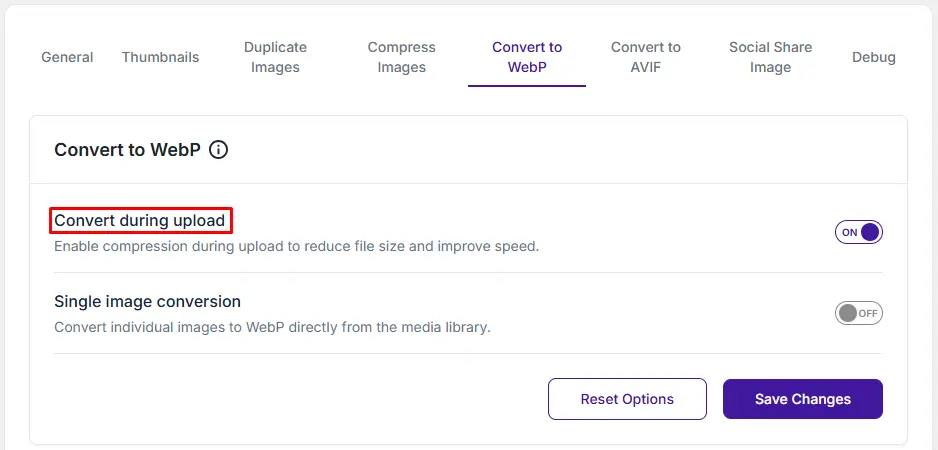
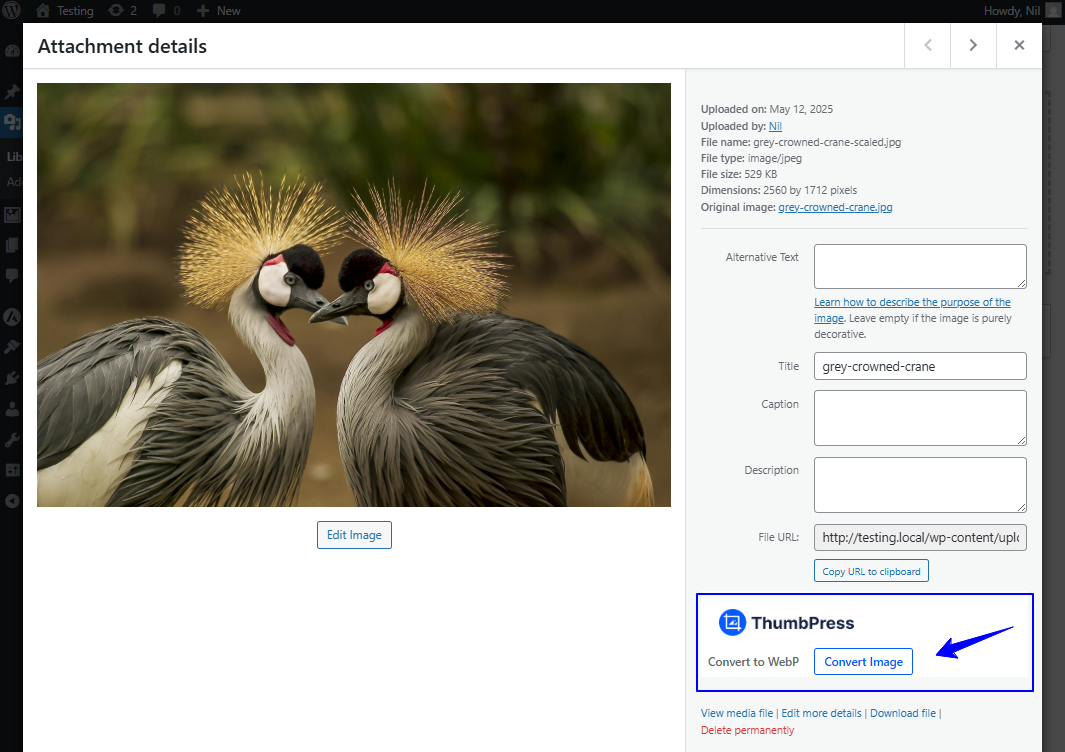
2. Convert them manually: You will need to convert the images manually one by one from the media settings on your website.
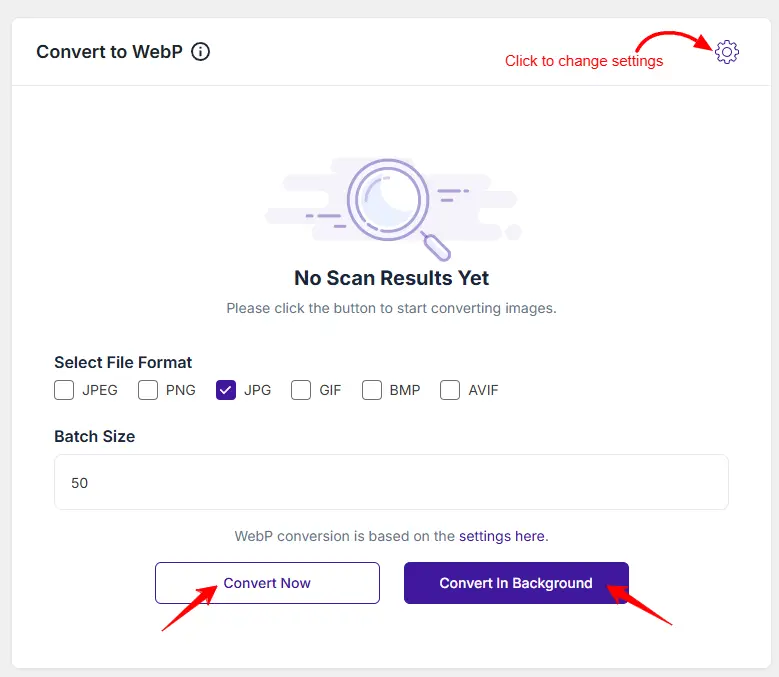
3. Convert your existing WordPress images in bulk: If you want to convert existing images on your WordPress site in bulk, you can easily do that using this feature. Go to ThumbPress >> Convert to WebP from your site dashboard.
3. Detect and Delete Large Images
Suppose you have thousands of images and you want to find out the large images from them. You can easily do this job with ThumbPress Detect large image feature.
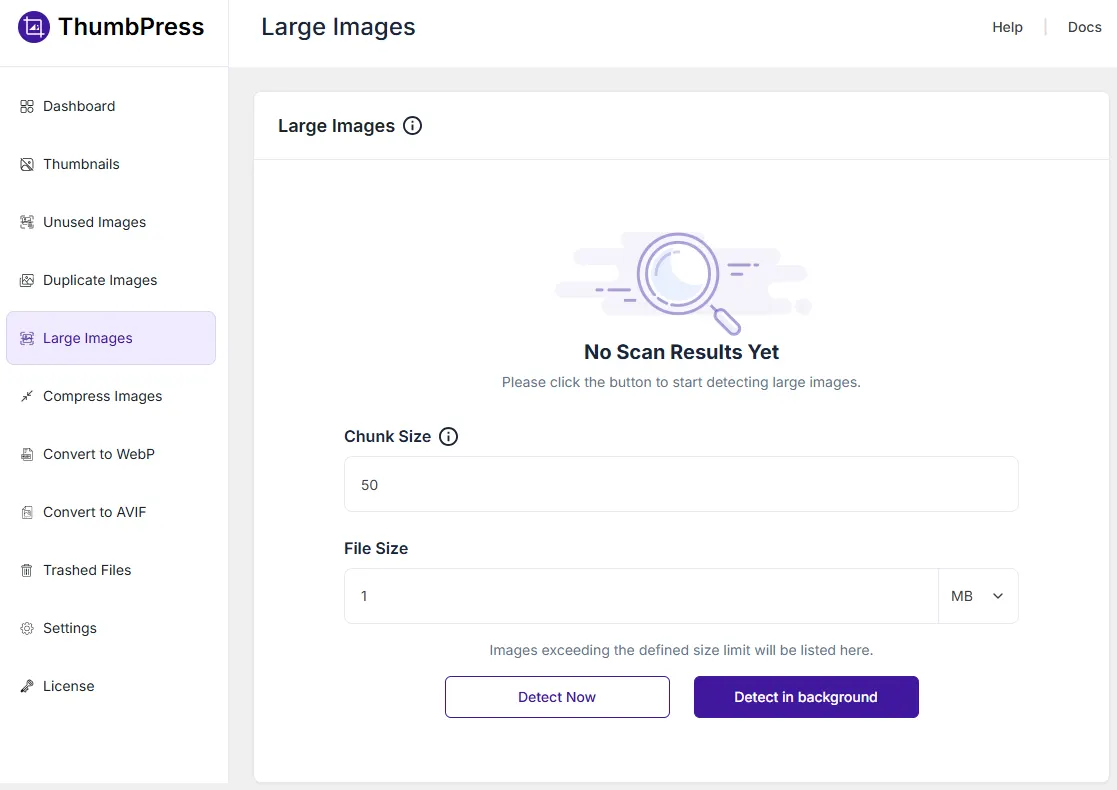
Make sure you have enabled the feature from ThumbPress >> Large Images. If it is active, then go to the Detect Large Image tab. You need to provide the Number of Images you want to detect per request and the Max Image Size in the input field, and click on the Detect Now button.
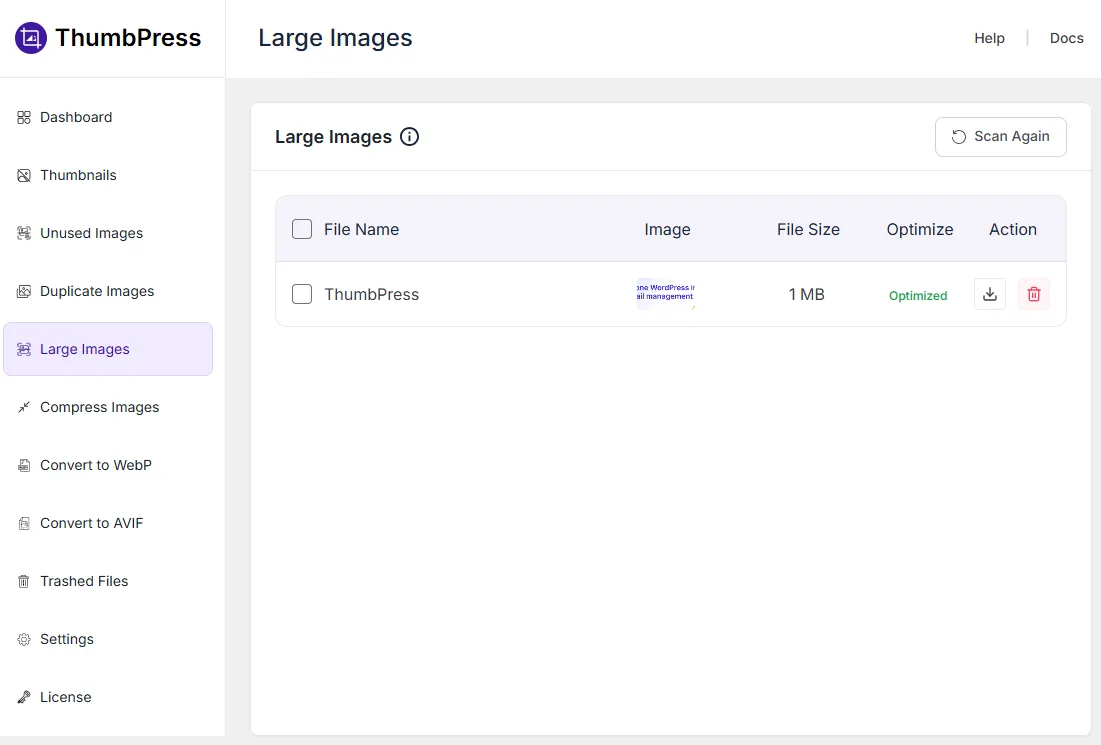
If you wish to remove the detected image, you have to head over to View Large Image.
On that page, you will find the options to remove the large images individually or in bulk options.
4. Detect and Remove Unused Images
There’s even more you can do. This plugin also lets you detect unused images on your website. To use this feature, simply enable Detect Unused Image and click Save Settings.
If the feature is already enabled, go to ThumbPress >> Detect Unused Image. Then, enter the number of images you want to scan per request and click the Detect Now button.
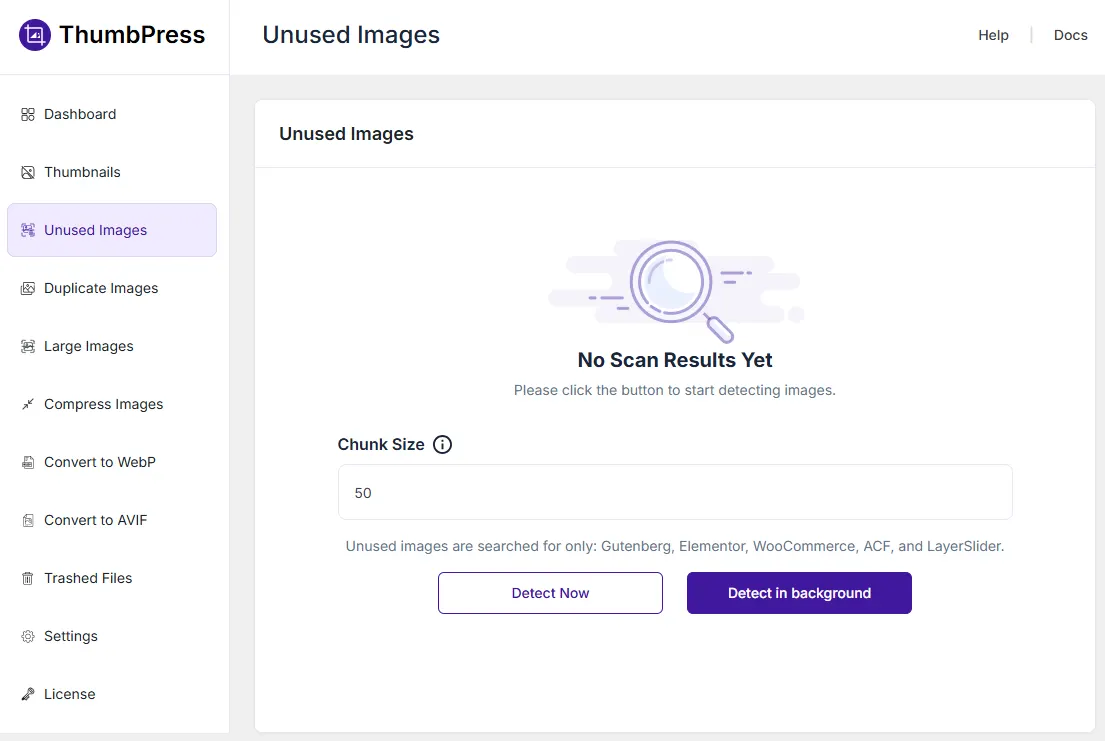
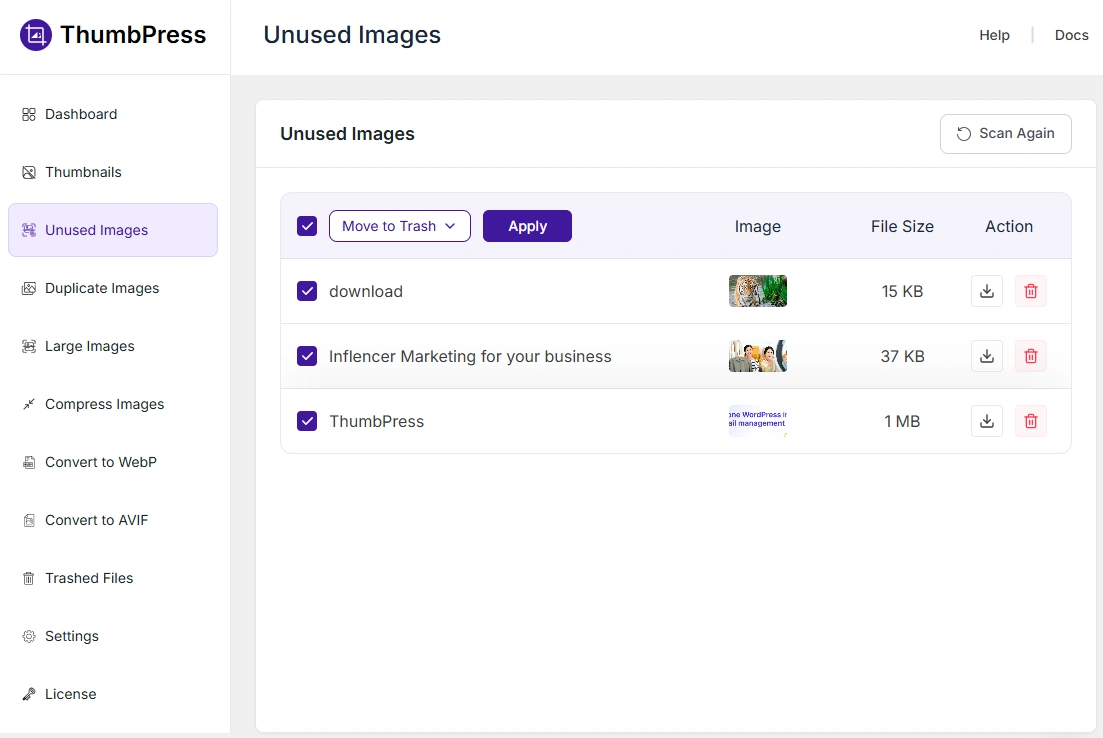
Once the detection is complete, you’ll see a success message along with a View Unused Image button. Click that to proceed.
You’ll be taken to the Detect Unused Image page, where you can either delete all unused images at once or remove them manually, one by one.
5. Compress Images for WordPress
If you’re looking for a more advanced way to optimize images on your WordPress site, the Compress Images for WordPress feature is the one to use.
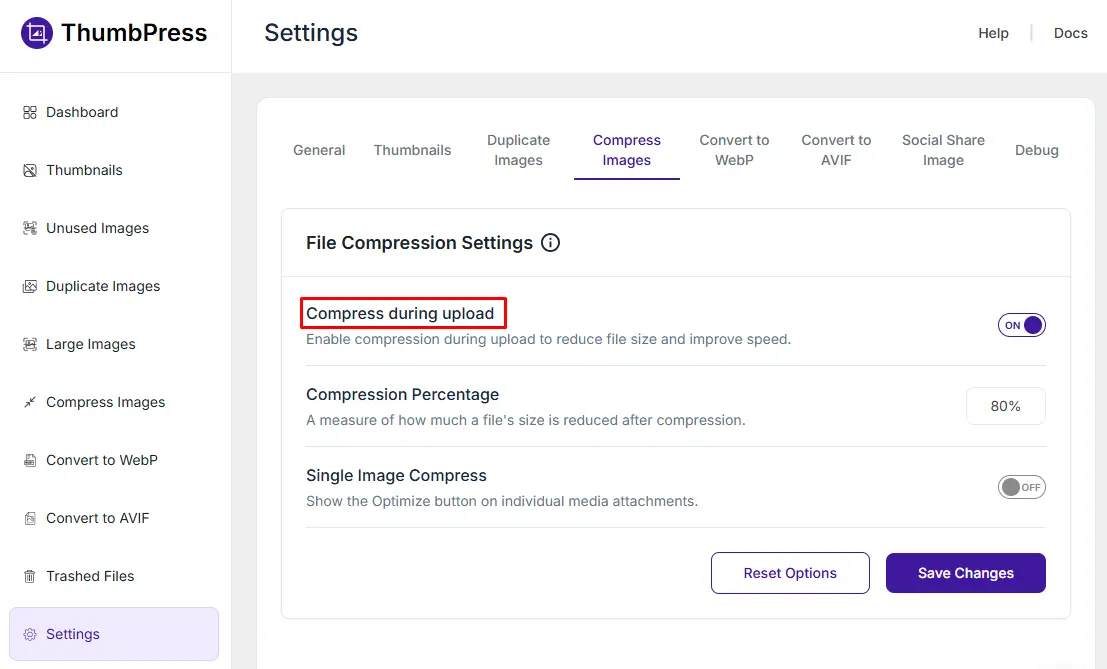
To get started, make sure the feature is enabled on your site. To do that, go to ThumbPress >> Compress Image. Go to that page, and enter how many images you want to compress at a time.
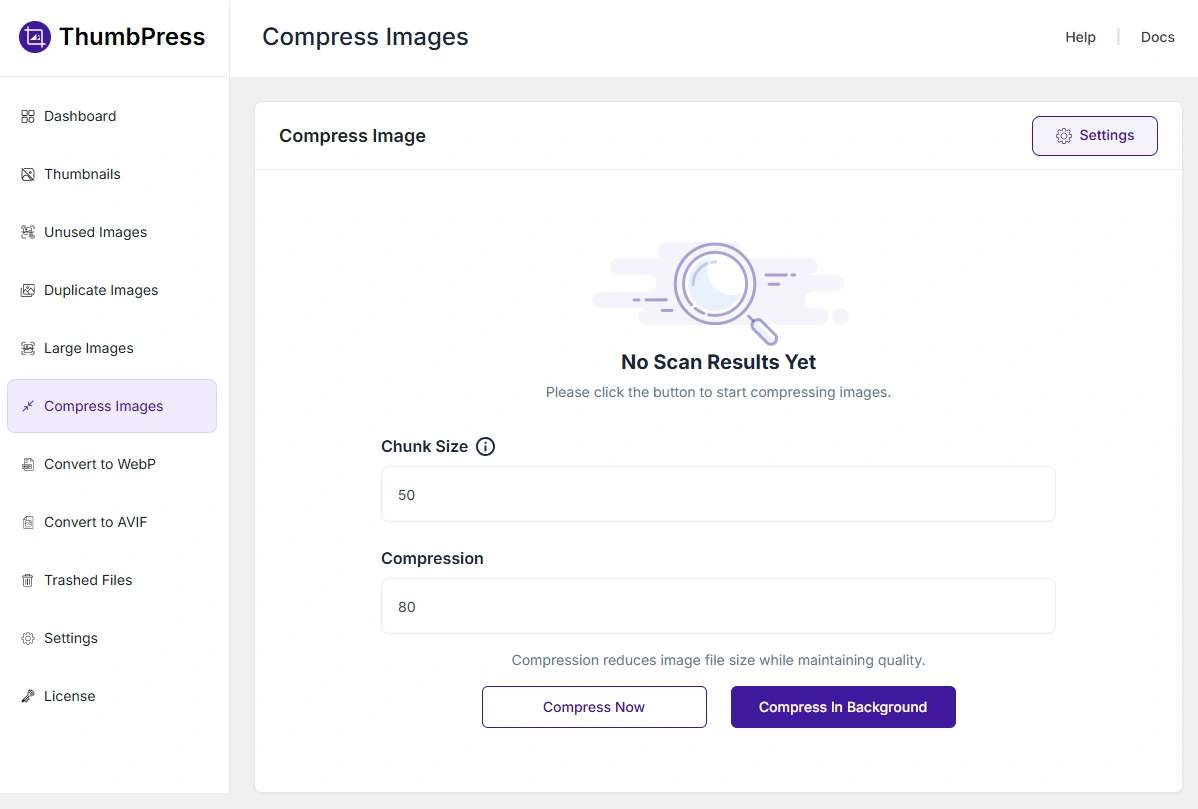
You can also automate this process to compress images as you upload them. To do that, go to ThumbPress >> Settings >> Compress Image. There, enable the automatic compression option and set your default compression percentage.
6. Replace Older Images with New Ones
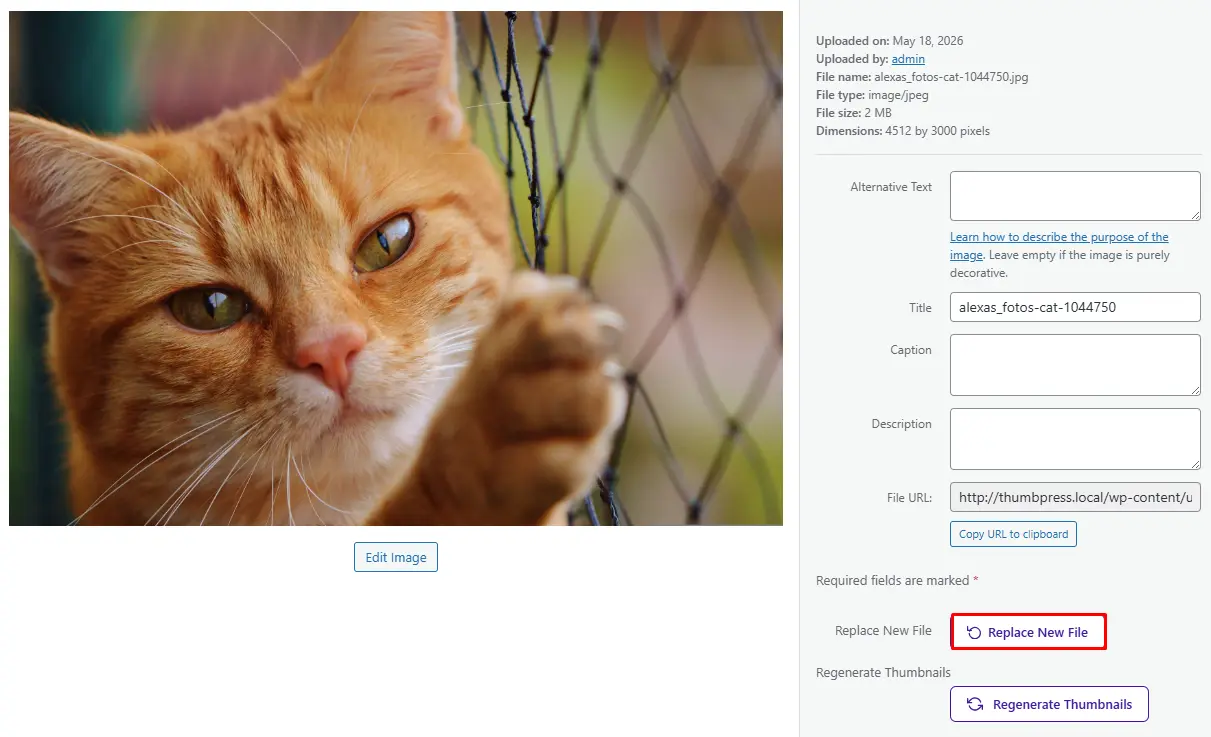
Suppose you have a lot of older images, and now you want to replace them quickly. With ThumbPress Replace Older Images, you can easily update those images in just a few steps.
First, enable the feature and go to your site’s media library. Open the image you want to replace, you’ll see a Replace button there. Just click that button to swap out the existing image with a new one.
7. Edit Image with Image Editor
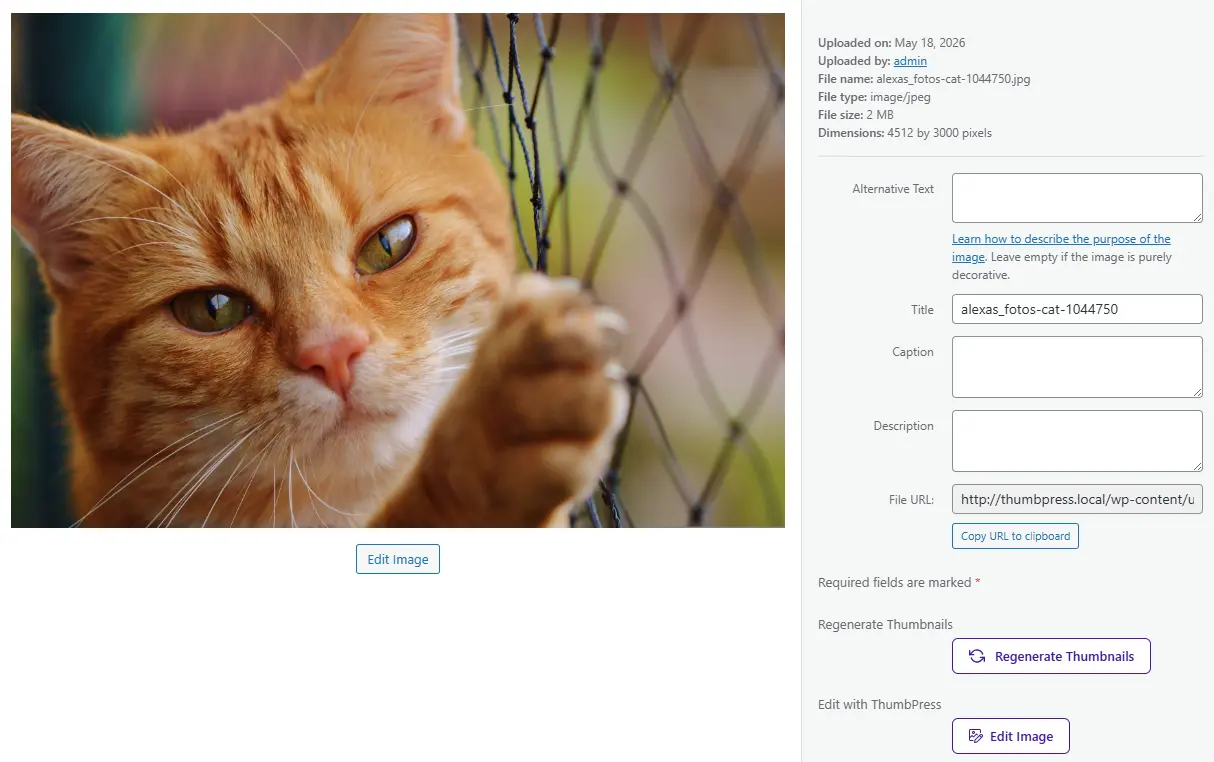
We’re almost at the end of our article, and now it’s time to talk about the WordPress Image Editor feature.
To edit any existing image, start by enabling the ThumbPress Image Editor. Once it’s active, go to Media >> Library, open an image, and click on the Edit Image button to start making changes.
Final Words
A slow website can turn visitors away before they even get a chance to look at your content. In many cases, heavy or unoptimized images are the main cause.
ThumbPress gives you everything you need to fix that. You can easily compress images, remove unused ones, and keep your media library organized, all in just a few clicks. These simple steps can make your site load faster and run more smoothly.
Now’s a great time to clean up your images and start seeing the difference in your site’s speed and performance.
Frequently Asked Questions(FAQs)
Q. What is the best image optimizer for WordPress?
The most popular and reliable image optimizer plugin for WordPress is ThumbPress. This tool automatically compresses images as you upload them, detects and removes unused, large images, and much more. The best one for you depends on your needs, but ThumbPress is a great choice for most users.
Q. How do I optimize images in WordPress without plugins?
You can manually optimize images before uploading them by using free tools like TinyPNG, ImageOptim, or Squoosh. These tools let you compress image file sizes without losing quality.
Q. How do I optimize my WordPress site?
To optimize your WordPress site,
- Use a lightweight theme.
- Compress and resize your images.
- Install a caching plugin (like WP Rocket or W3 Total Cache).
- Minify CSS, JavaScript, and HTML.
- Use a CDN (Content Delivery Network) to speed up global access.
- Limit heavy plugins and remove unused images using ThumPress.
Q. How to make WordPress images load faster?
To make images load faster on your WordPress site:
- Compress them using tools or plugins
- Use the WebP format for better performance
- Enable lazy loading so images only load when users scroll to them
- Resize images to fit the exact dimensions needed
- Use a CDN to serve images more quickly across different regions
Subscribe to Our Newsletter
Get the latest WordPress tutorials, trends, and resources right in your inbox. No Spamming, Unsubscribe Anytime.

Thank you for subscribing to our newsletter!


Table of Content
- Benefits of Optimizing Your Website Images
- Speed Up Your Website
- Save Server Space
- Improve Website SEO
- Better Performance on Different Devices
- Quicker Backups and Easier Site Management
- Top 7 Strategies to Optimize WordPress Images
- 1. Disable Unnecessary Thumbnails
- 2. Convert Images into WebP
- 3. Detect and Delete Large Images
- 4. Detect and Remove Unused Images
- 5. Compress Images for WordPress
- 6. Replace Older Images with New Ones
- 7. Edit Image with Image Editor
- Final Words
- Frequently Asked Questions(FAQs)
- Q. What is the best image optimizer for WordPress?
- Q. How do I optimize images in WordPress without plugins?
- Q. How do I optimize my WordPress site?
- Q. How to make WordPress images load faster?