How to Compress Images
with ThumbPress
Let’s have a look at how you can compress images using ThumbPress and
improve overall website performance.
Install and Activate ThumbPress & ThumbPress Pro
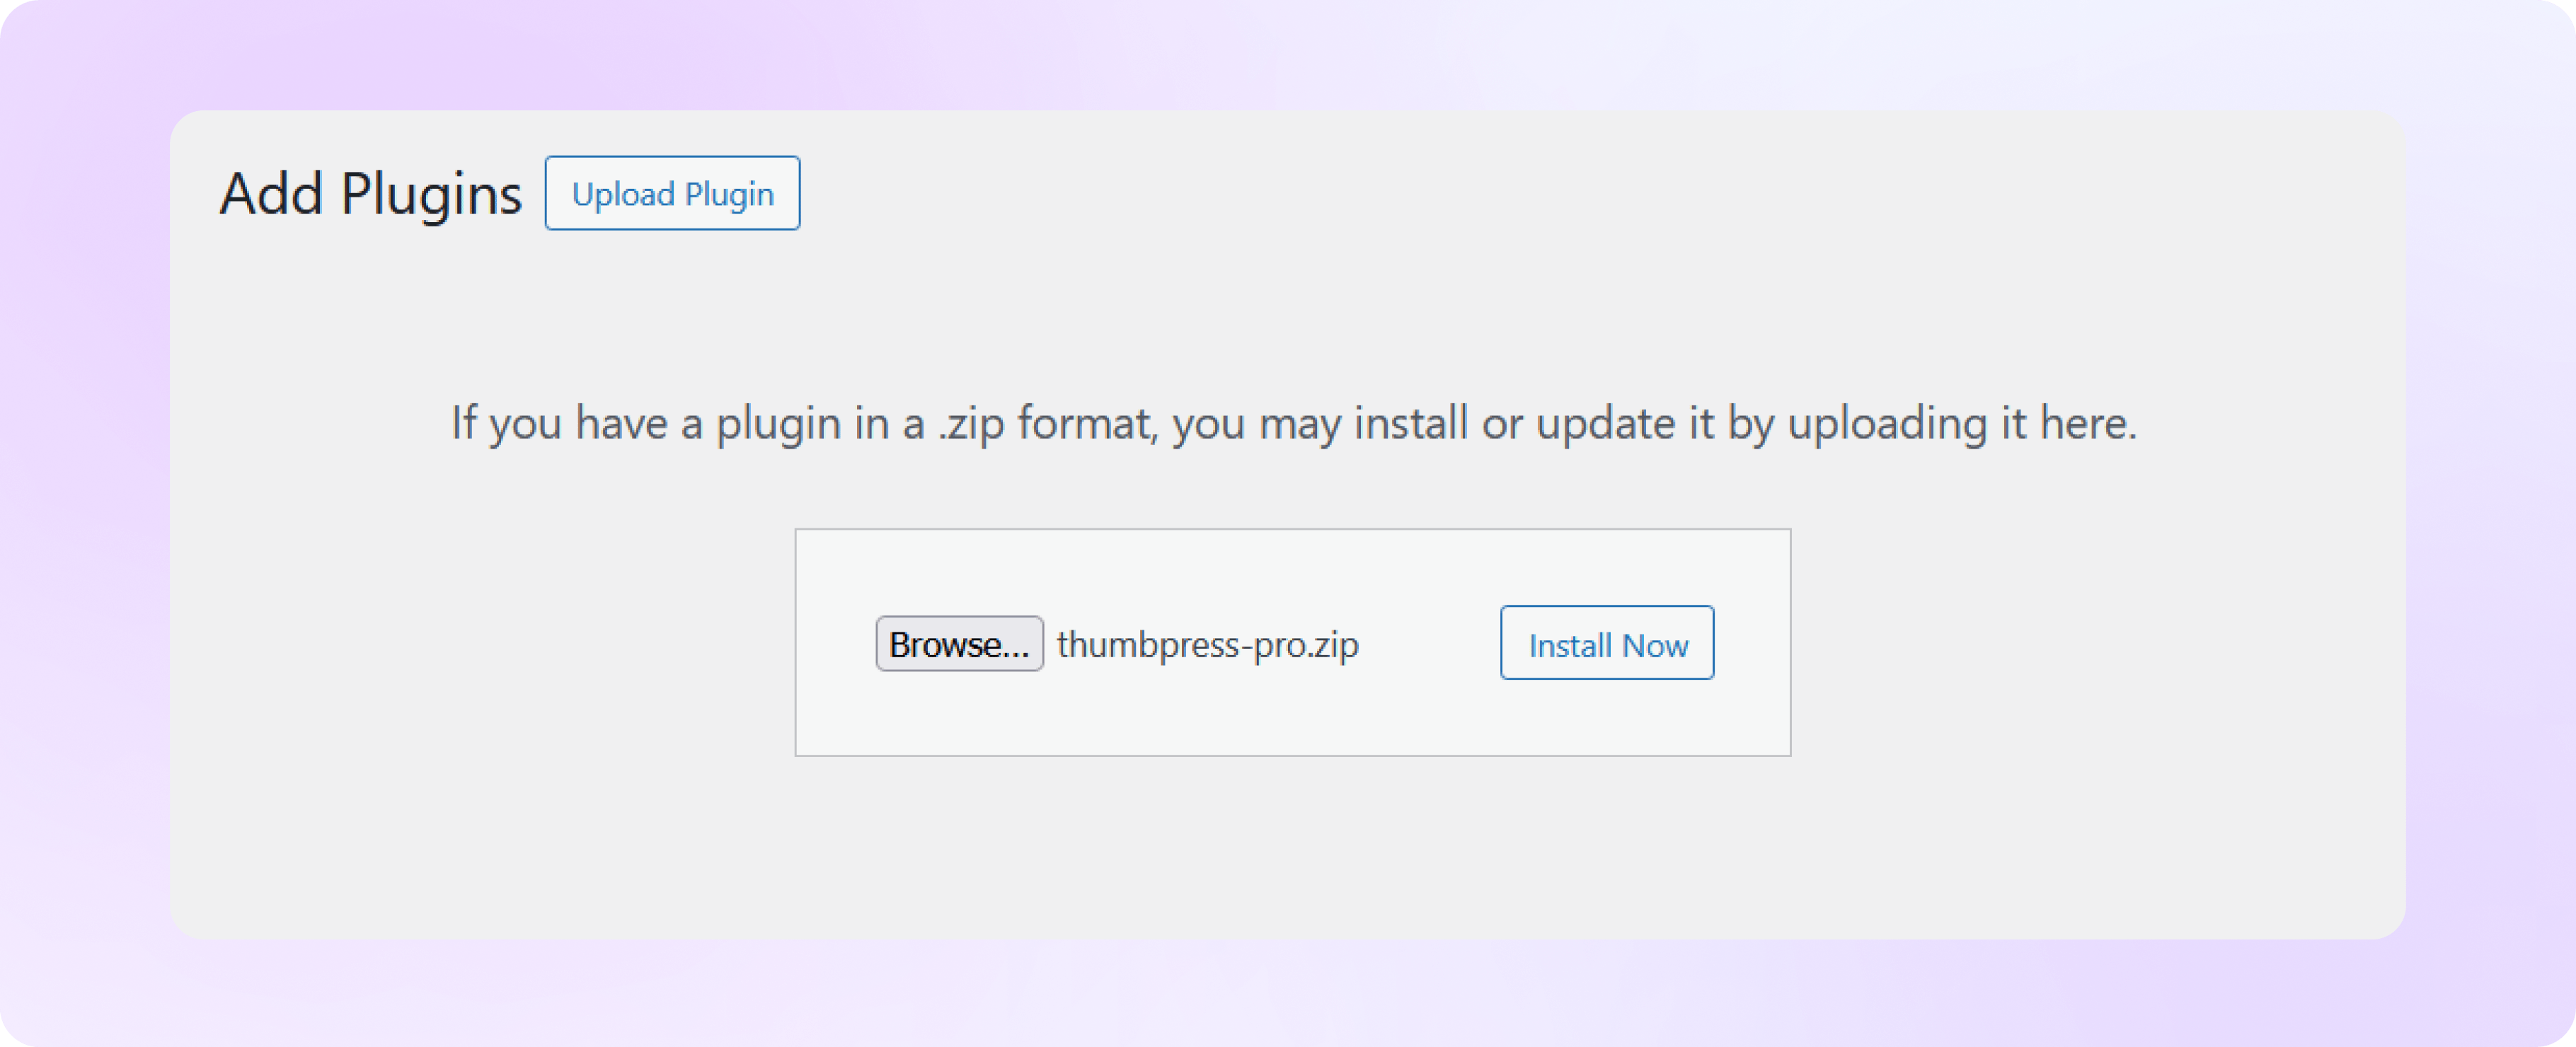
First, you need to install ThumbPress on your dashboard. To install and activate ThumbPress
Go to Dashboard > Plugins > Add New Plugin and search for ThumbPress in the search bar on the top right of the screen.
Click Install Now and then Activate ThumbPress.
Note: Detect Large Images is a premium ThumbPress feature. Get ThumbPress Pro to unlock this feature. After that, upload it to your site and activate the license.
Start Image Compression
Head over to the ThumbPress Compress Images page, set your preferred chunk size and compression level.
Then click the Compress Now or Compress in Background button to begin the image optimization process.
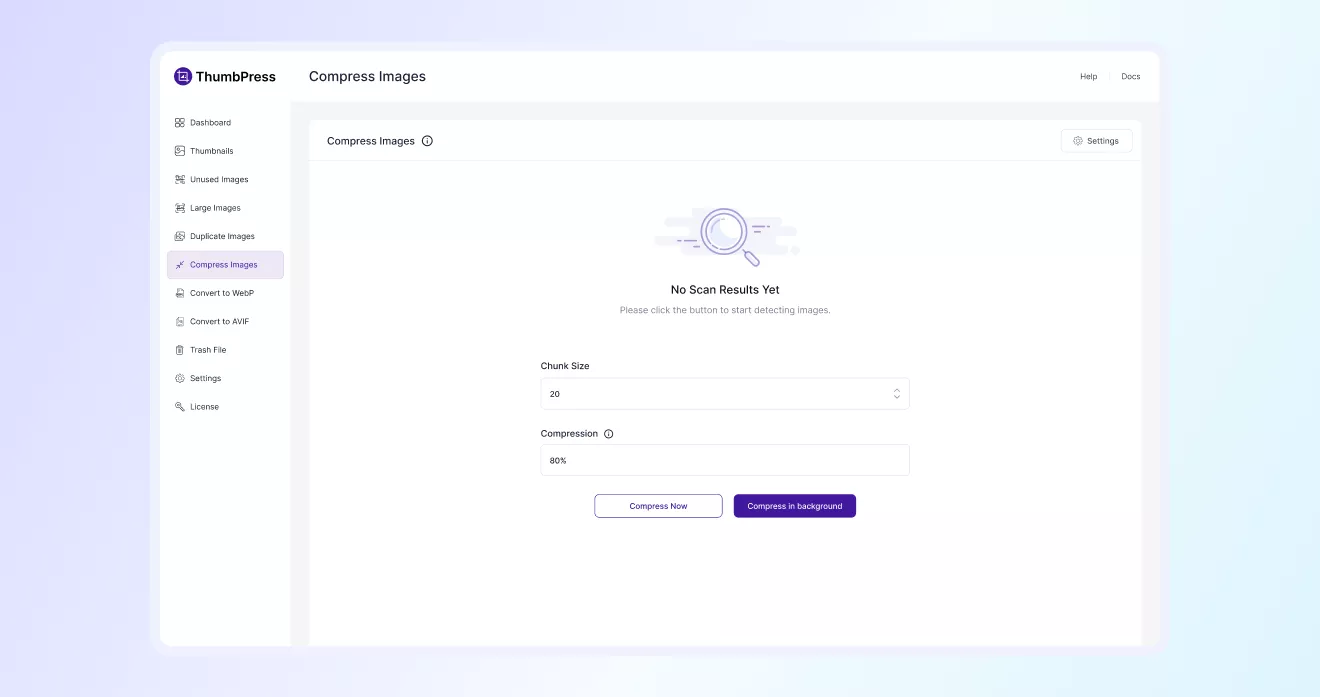
Image Compression Completed
Once the compression process is complete, you’ll see a summary showing the
total processed images, compressed files, and saved space from the optimization process.
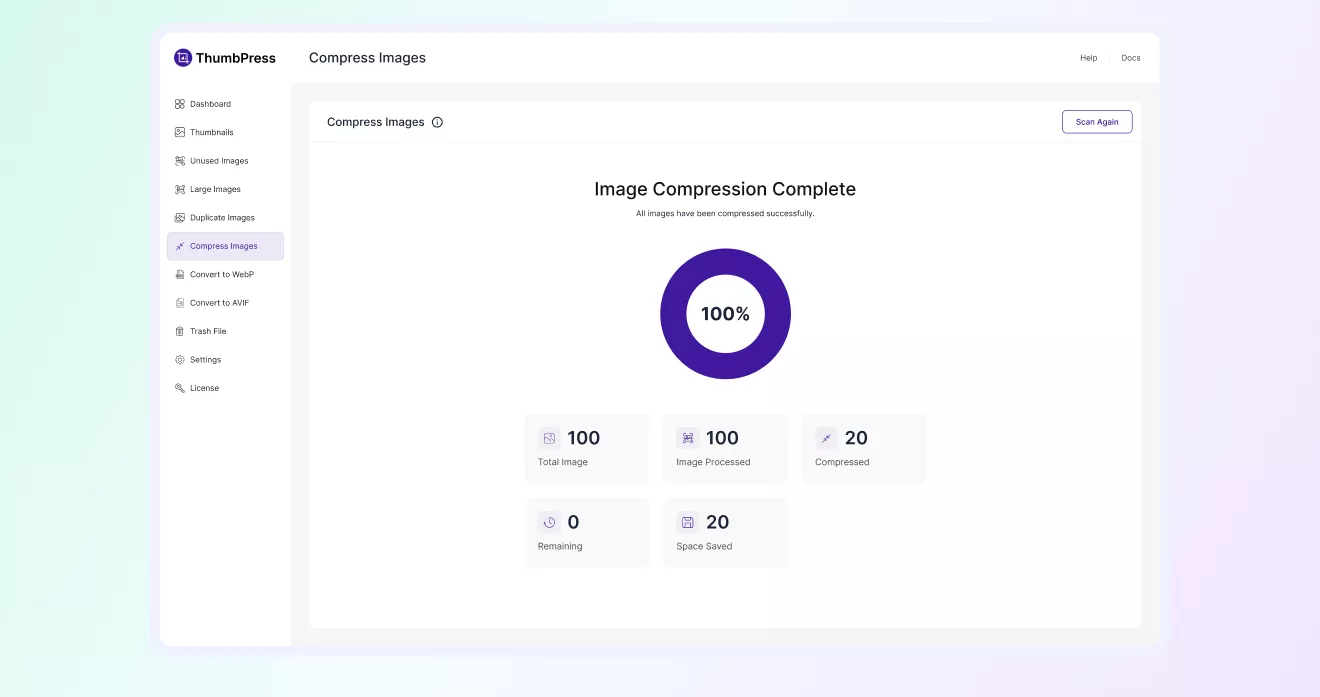
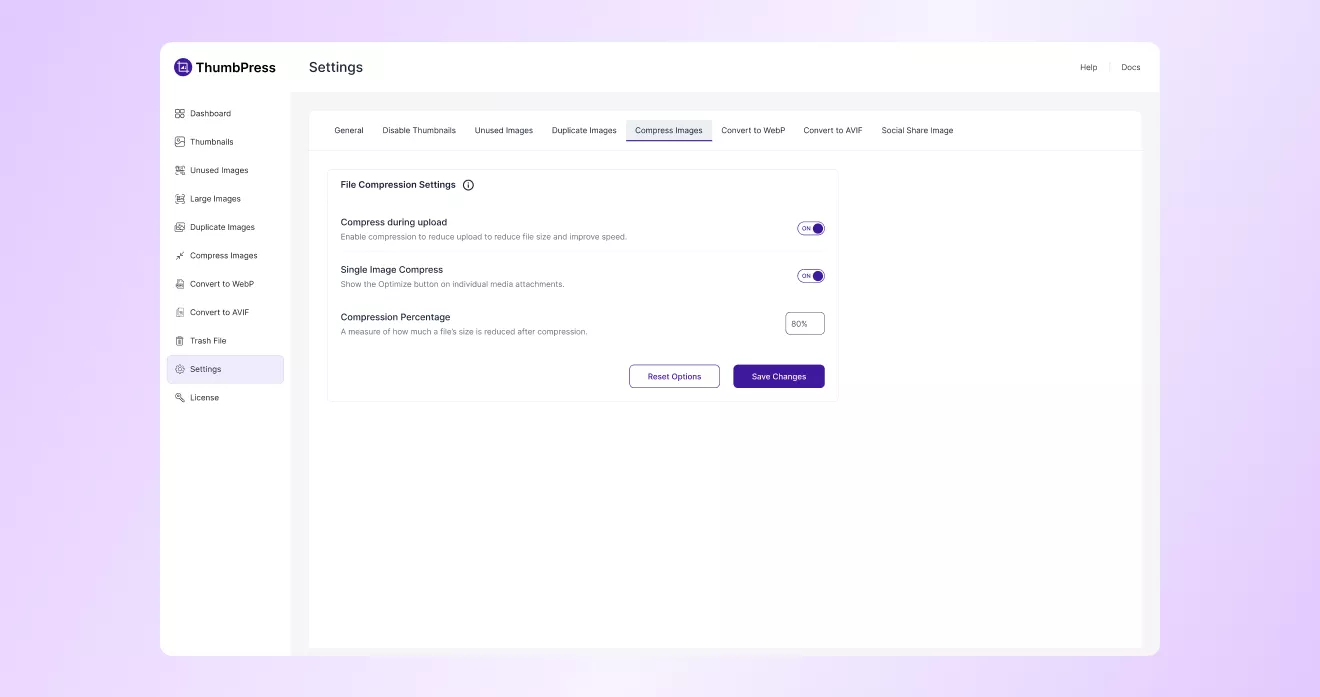
Image Compression Settings
You can configure how image compression works on your site. Enable automatic optimization during uploads, compressing
individual images manually, and adjusting the compression percentage to balance image quality and file size reduction.