The Hidden Revenue Cost of Unoptimized WordPress Images


Your website looks great. Traffic is coming in, the design feels solid, and nothing seems obviously wrong.
But something’s off.
People aren’t staying as long as you expected. Pages take just a bit too long to load. Conversions aren’t where they should be. It’s not a big, visible problem-more like a slow leak you can’t quite spot.
In many cases, the issue isn’t your content, SEO, or design. It’s your image.
In this guide, you’ll see exactly how this happens, and more importantly, how to fix it with simple, practical steps you can apply right away.
Why Images Quietly Slow Down Your Website the Most
If you analyze most WordPress sites today, you’ll notice a common pattern: images take up the majority of the page size. On average, they account for nearly half of the total weight, and on image-heavy pages like product listings, that number can go even higher.
Here’s where things go wrong:
- Oversized images: Many users upload full-resolution images straight from a camera or design tool. These files are far larger than what’s actually needed on a website.
- Wrong formats: Using JPEG or PNG for everything is still common, but these formats are heavier compared to modern alternatives.
- No compression: Without compression, images carry extra data that doesn’t improve visual quality but does increase load time.
- Media library habits: WordPress makes uploading easy, but it doesn’t enforce optimization. Over time, your media library fills up with heavy, unoptimized files.
What seems like a small habit at first slowly turns into a real performance issue.
Common scenario
A site with 500 uploaded images could easily end up with 10,000+ thumbnail files on the server, many of which are never even used.
How Slow Websites Turn Into Lost Revenue
Speed is often treated as a technical metric, but in reality, it directly affects how users behave on your site. Research shows that 1s delay can hurt revenue by about 7%.
When a page takes too long:
- Users leave before it loads
- They trust your site less
- They don’t complete actions
This affects key business areas:
- Ecommerce: Slow product pages reduce purchases. Users don’t wait to see your product.
- Lead generation: Forms get fewer submissions when pages lag.
- Ad performance: You pay for clicks, but slow pages waste that traffic.
Even a small delay can reduce engagement. Faster sites always win.
The silent part nobody talks about
You won’t see “slow images” in your analytics. You’ll just see bounce rates going up and conversion rates going down. Most site owners never connect the dots.
The Hidden Costs Most Site Owners Ignore
The impact of unoptimized images goes beyond just slow loading times.
For eCommerce sites, slow product images can directly reduce sales. Customers rely on visuals to make decisions, and if those visuals don’t load quickly, they move on.
Lost Sales from Slow Product Pages
WooCommerce stores with 300+ products often run twice as slow as a basic site if images aren’t handled properly. Every product page load is a micro-moment. If it’s slow, the sale doesn’t happen.
Higher Ad Spend with Lower ROI
A slow page after an ad click raises your effective cost per acquisition. You’re not spending more – you’re just converting less with the same budget.
Poor Core Web Vitals Scores
Images without defined dimensions cause layout shifts. Images without lazy loading trigger unnecessary requests on page load. Both hurt your CLS and LCP scores. Both hurt your Google rankings.
Lower Search Visibility
Google indexes fast pages more efficiently. A slow site gets crawled less often. Your new content takes longer to rank or never ranks at all.
Key insight: Most SEO guides focus on content and backlinks. But a bulky page with unoptimized images will struggle to rank – no matter how good the writing is.
Image Formats Matter More Than You Think
Not all image formats are equal. The format you choose has a direct impact on file size – and therefore load speed.
| Format | Best For | File Size | Status |
| JPEG | Photos | Large | Legacy format – still works, but outdated |
| PNG | Logos, transparency | Very large | Use only when transparency is needed |
| WebP | All web images | 25–35% smaller than JPEG | Current standard – use as your primary format |
| AVIF | All web images | 50% smaller than WebP | Next-gen – best compression available in 2026 |
The smart approach in 2026: serve AVIF to browsers that support it, keep WebP as the fallback, and JPEG/PNG only as a last resort. A good WordPress plugin handles this automatically.
Real-world result: On a photography portfolio site, switching from JPEG to AVIF reduced overall image weight by nearly 70% – with no visible loss in quality.
The Right Tool for WordPress Image Optimization
You need a plugin that handles the full picture – not just compression. Most popular plugins only do one or two things. They compress. Maybe they convert to WebP. But they don’t help you manage the real clutter.
ThumbPress – WordPress Image Management Suite
ThumbPress handles the whole image workflow from a single dashboard. It’s built for site owners who want speed, clean media libraries, and less manual work.
- Disable unused thumbnails
- Disable & Regenerate thumbnails
- Compress images
- Convert to WebP/AVIF
- Detect large images
- Find unused images
- Set upload size limits
- Social Share Image
- WooCommerce compatible
What makes ThumbPress different from a basic compression plugin is the thumbnail management layer. You can see every thumbnail size being generated, disable the ones you don’t need, and run a full bulk cleanup. That’s the feature most optimization plugins simply don’t have.
The free version covers thumbnail control and WebP conversion. The Pro version unlocks AVIF, image compression, large image detection, and unused image cleanup.
How to Optimize Images in WordPress (Step by Step)
Now that you’ve seen what unoptimized images can do and what needs to be fixed, it’s time to take action. Just follow these simple, step-by-step optimizations using ThumbPress to start improving your image performance right away.
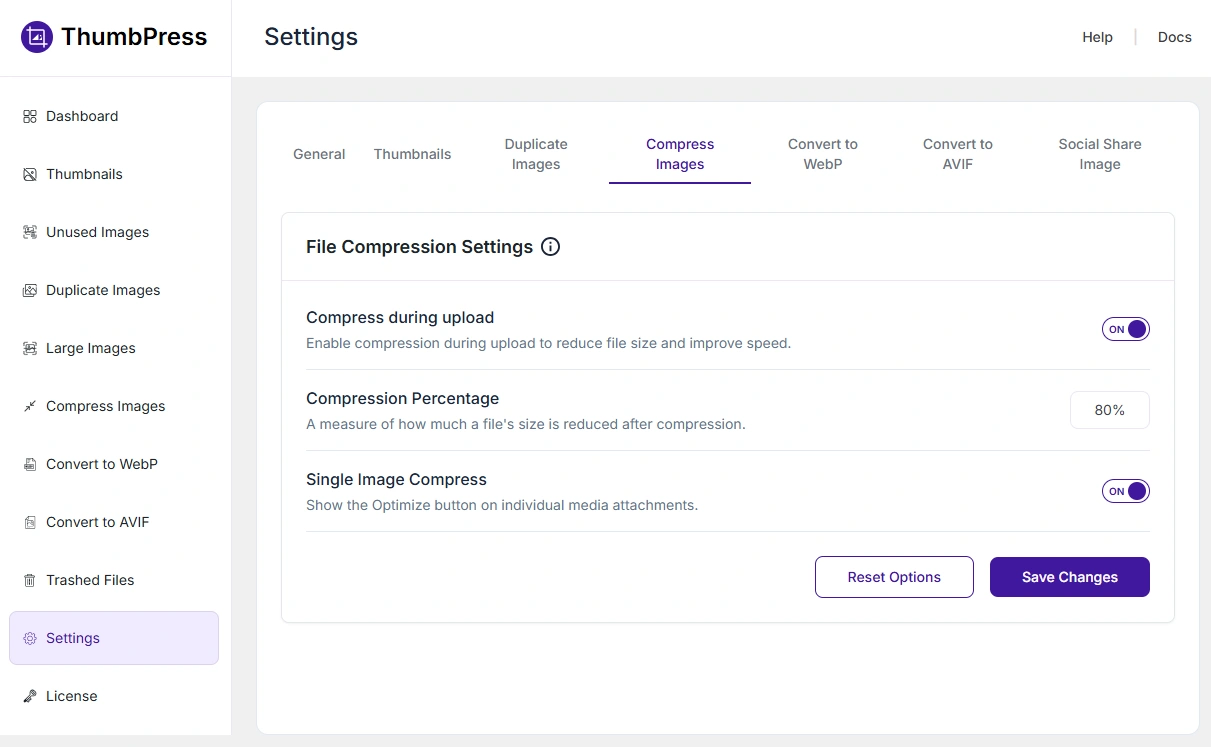
Step 1: Compress images before upload
Never upload a raw camera file. A DSLR photo can be 8-20MB in size. That’s a page killer. Compress before uploading – aim for under 200KB for most images, under 100KB for thumbnails.
Go to ThumbPress → Settings → Compress Images. Then Enable Compress During Upload. It will auto-converts images on upload. Set Compression Percentage in the process upon with the future compression will take place.
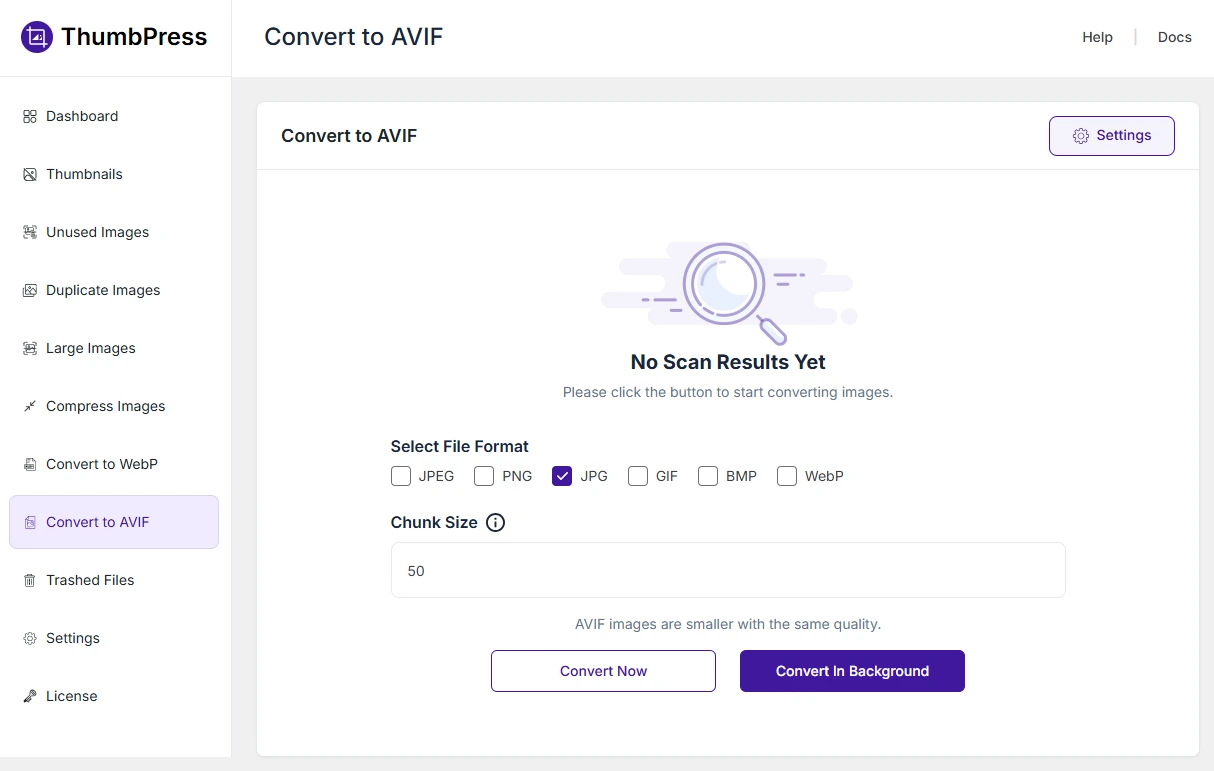
Step 2: Convert to WebP or AVIF
Convert your JPEGs and PNGs to WebP at a minimum. If your plugin supports AVIF, use it. This single step can reduce image weight by 30-70%.
Go to ThumbPress → Convert to AVIF Tab → Select File Format & set Chunk Size → Click Compress Now or Compress in background.
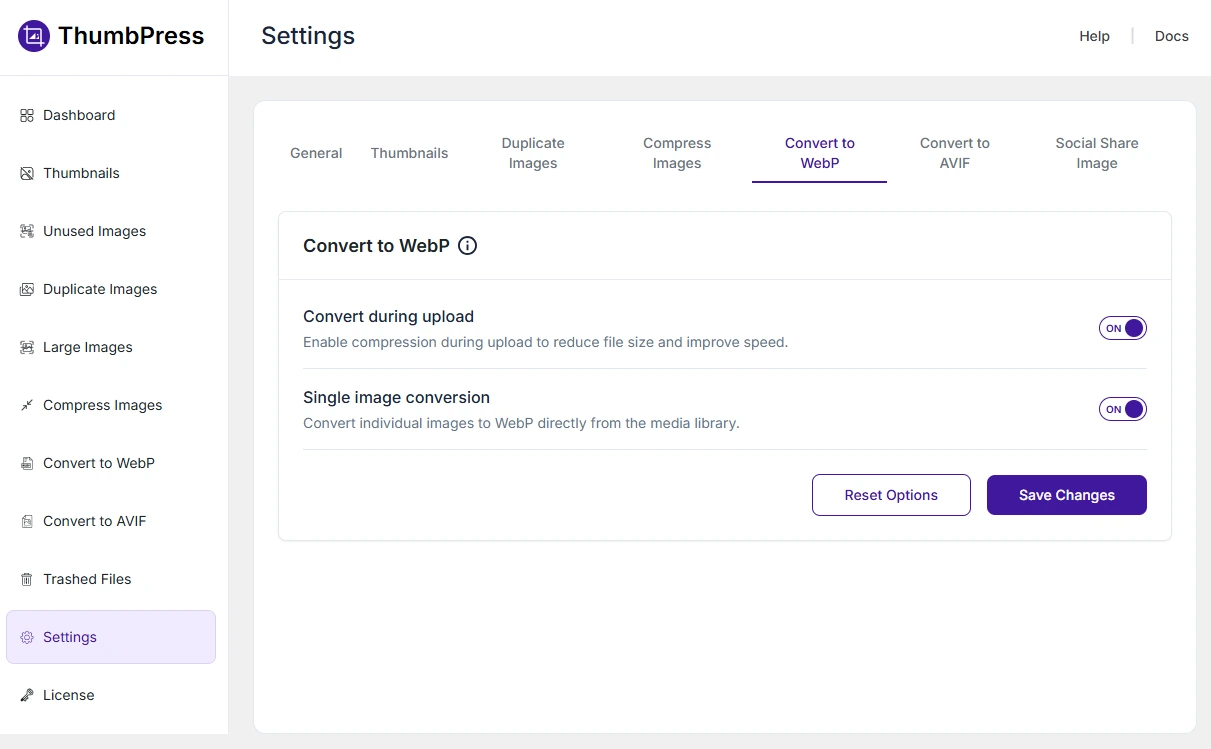
For converting future uploads to AVIF:
Access ThumbPress Settings → Convert to AVIF and enable Convert during upload from there. It will auto-converts images during the upload process. Don’t forget to click on Save Changes button.
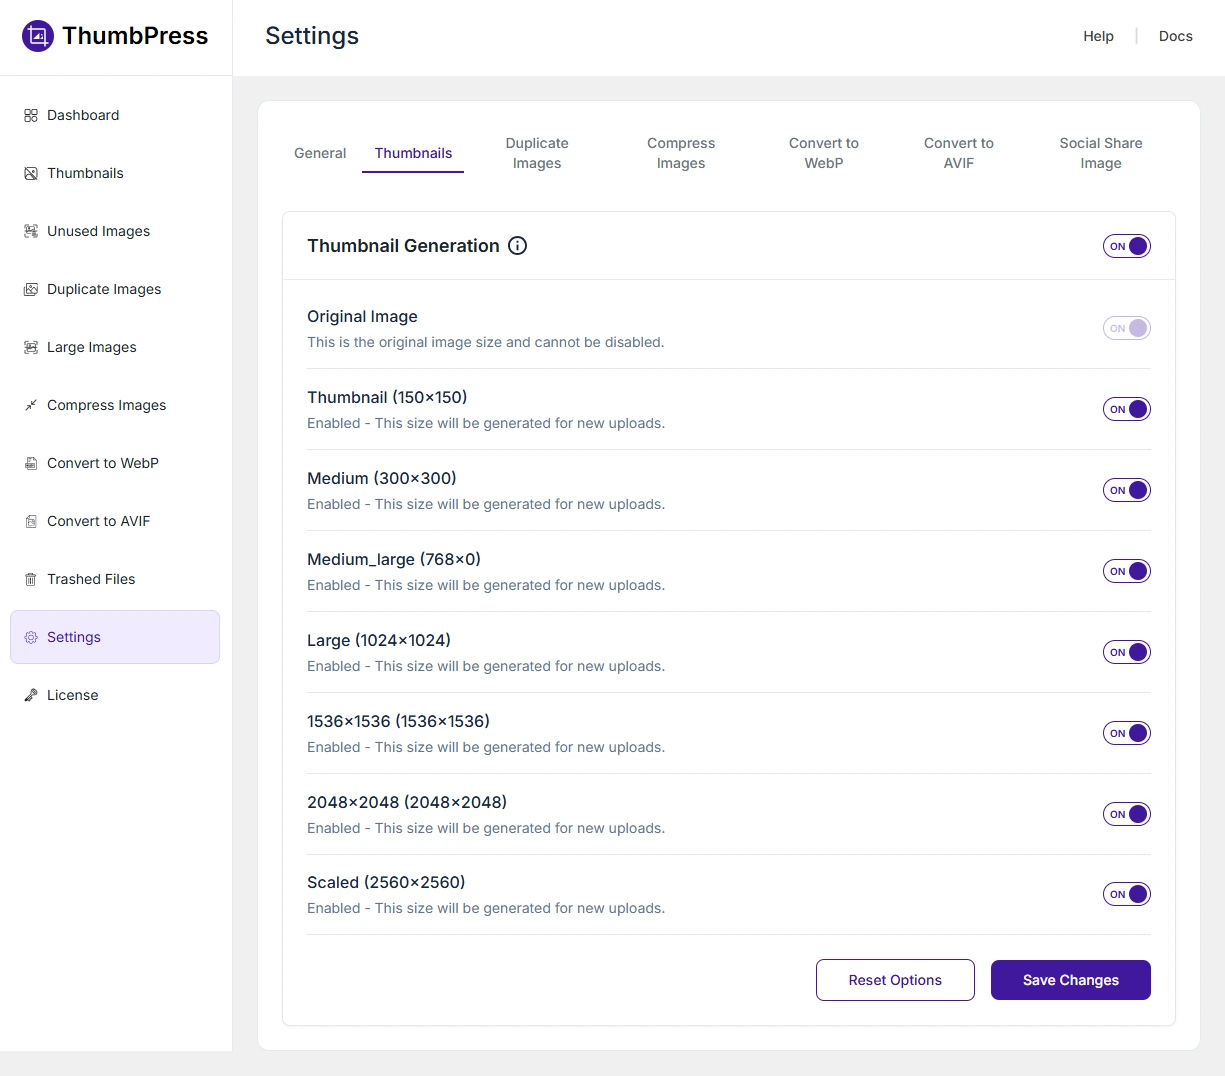
Step 3: Disable unused thumbnail sizes
This step is often skipped – but it’s critical. Go through your active thumbnail sizes. Disable every size that isn’t actually being used on your site. This frees up server space and speeds up image generation on upload.
Go to ThumbPress → Settings → Thumbnails Tab → enable the sizes you want thumbnails to be created and then click Save Changes. The disabled sized thumbnails won’t be generated anymore.
Step 4: Enable lazy loading
Lazy loading delays off-screen images until the user scrolls toward them. WordPress has had native lazy loading since version 5.5. Make sure it’s active.
One important exception: Never lazy-load your above-the-fold hero image – that will hurt your LCP score.
Go to ThumbPress → General Settings Tab → Enable Lazy load → Save Changes
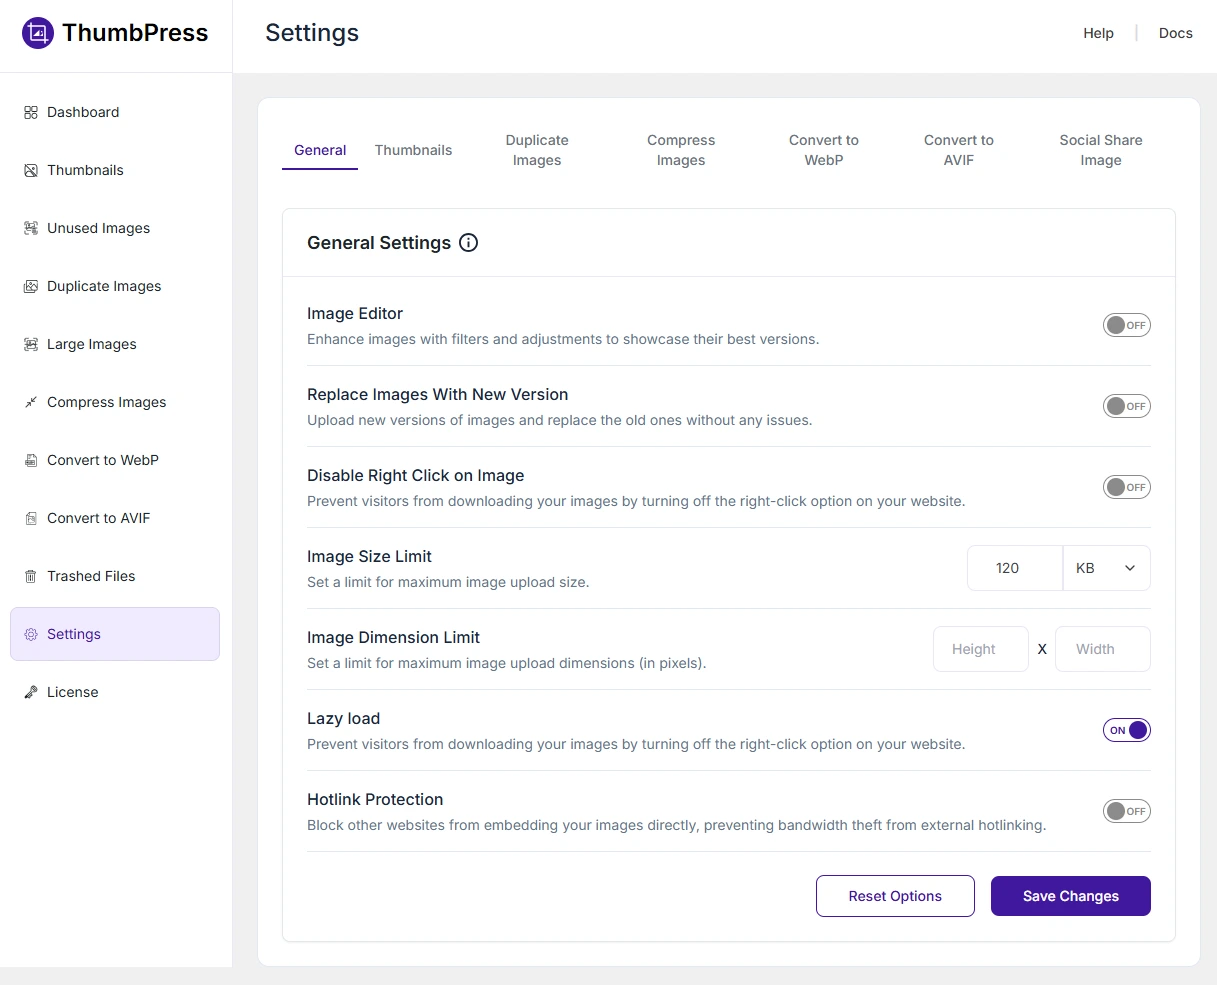
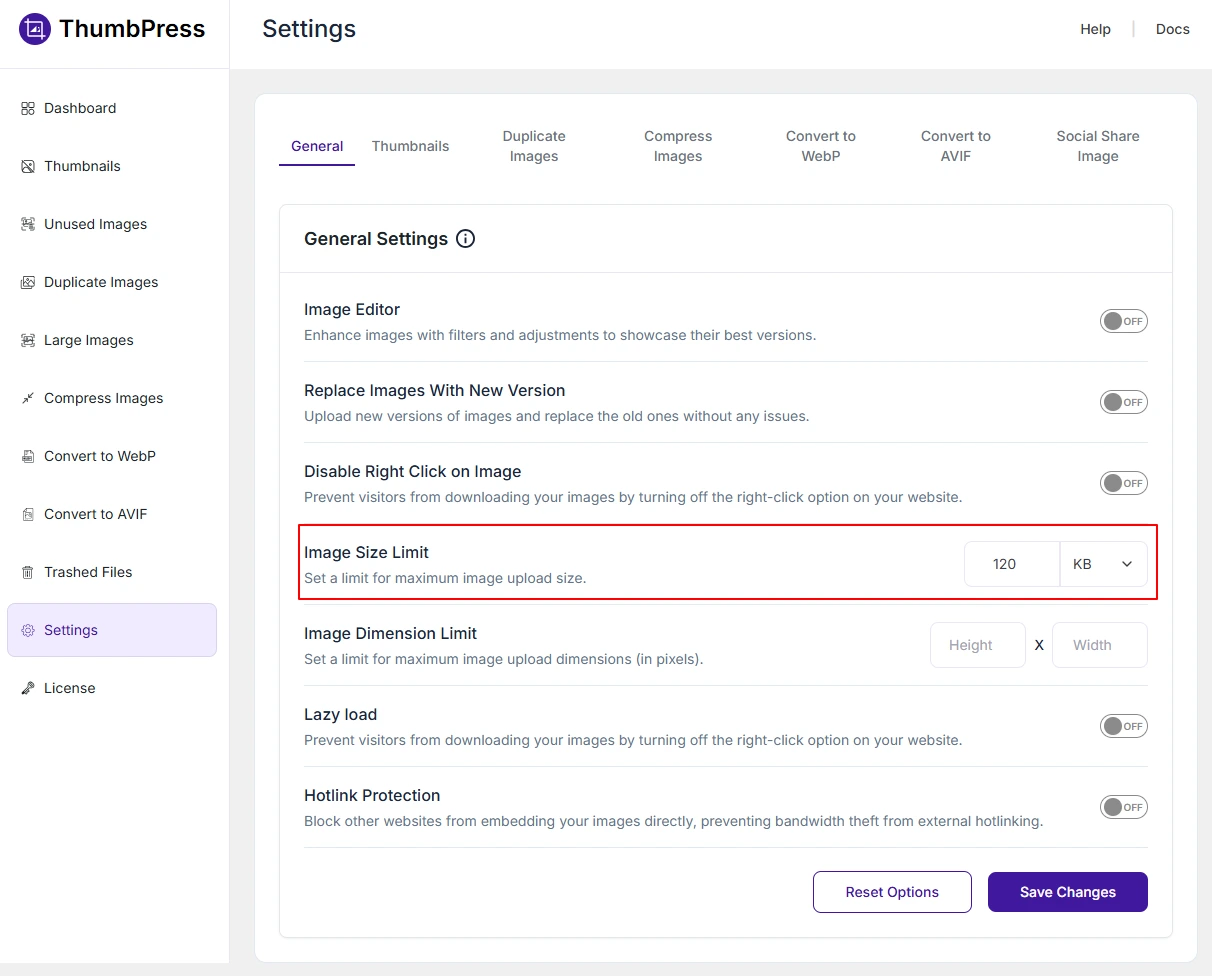
Step 5: Set an image upload limit
If multiple people manage your site, set a maximum upload size. This prevents oversized files from getting into your media library in the first place. A 2MB upload limit is a sensible default for most sites.
Go to ThumbPress → General Settings Tab → Enable Image Size Limit → Save Changes
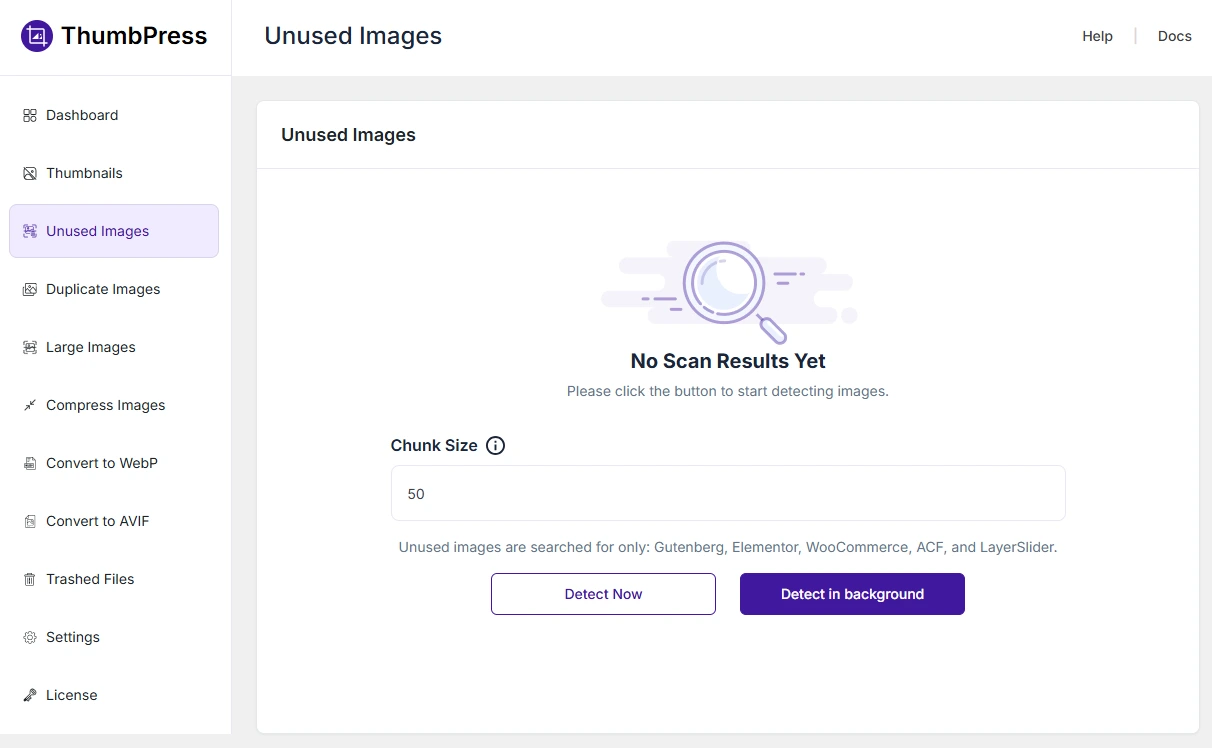
Step 6: Find and remove unused images
Your media library probably has hundreds of images that aren’t used anywhere on your site. They take up storage, slow down backups, and bloat your database. Running a regular cleanup saves space and keeps things tidy.
Go to ThumbPress → Unused Images Tab → Set Chunk Size → Click Detect Now or Detect in background.
Step 7: Use a CDN for image delivery
A CDN (Content Delivery Network) serves your images from a server close to your visitor. Someone in London doesn’t have to load images from a server in the US. Cloudflare’s free tier is a solid starting point for most WordPress sites.
Real Impact: Before vs After Image Optimization
Here’s what a typical mid-size WordPress site looks like before and after a proper image optimization pass – using compression, format conversion, and thumbnail cleanup together.
| Before | After |
| Page Size-4.2 MB | Page Size-1.1 MB |
| Load Time-4.8s | Load Time-1.7s |
| LCP Score-Poor | LCP Score-Good |
| Thumbnail Files~12,000 | Thumbnail Files~3,000 |
| Unused Images~400 | Unused Images Cleaned |
The biggest gains came from three things: converting to WebP, disabling 14 unused thumbnail sizes, and deleting unused media files. No hosting change. No theme redesign.
6 Common Image Optimization Mistakes to Avoid
1. Never upload raw camera images directly
A photo straight off a DSLR or smartphone is 5–20MB. WordPress will scale it down visually – but it still loads the full file. Always compress before uploading.
2. Don’t over compress images
Chasing the highest PageSpeed score is tempting. But blurry product photos kill trust. For photos, a quality setting of 70–85% is the sweet spot. Don’t go lower without checking visually.
3. Don’t lazy load your hero section images
Lazy loading is great for below-the-fold content. But if you apply it to your main hero or banner image, it will delay LCP – and hurt your Google score. The first visible image should always load immediately.
4. Running multiple image optimization plugins
Two plugins doing the same job create conflicts. Images can get double-processed, distorted, or broken. Pick one plugin and stick with it.
5. Ignoring thumbnail bloat
Most WordPress optimization guides don’t mention this at all. But those 15,000 unused thumbnail files are a real weight on your server. Clean them up.
6. Never removing unused media
Media libraries grow fast. Old images from deleted posts, test uploads, replaced banners – they pile up. A regular cleanup keeps your library lean and your backups small.
Final Thoughts
Unoptimized images are one of the most overlooked performance issues in WordPress. They increase page size, slow down load times, and negatively affect user experience. More importantly, they reduce conversions and lead to measurable revenue loss.
While many guides explain how to optimize images, few explain why it matters beyond speed. Understanding this connection is what allows you to prioritize the right improvements.
If your site is already getting traffic but not converting as expected, images may be part of the problem. Fixing them is not just a technical upgrade. It is a direct way to improve performance, user experience, and revenue at the same time.
Frequently Asked Questions
Do unoptimized images affect SEO?
Yes – images affect LCP, CLS, and INP, all three Core Web Vitals that Google uses as ranking signals.
What is lazy loading, and should I use it on WordPress?
Lazy loading delays off-screen images from loading until needed. Use it on all images except your hero/LCP image – never lazy-load the largest above-the-fold element.
Does image optimization affect WooCommerce sales?
Directly. Slow product images cause CLS on mobile, pushing the add-to-cart button out of position. Mobile cart abandonment on WooCommerce averages 85%.
Can I optimize images in WordPress without coding?
Absolutely. With ThumbPress, you can compress, convert, disable unused thumbnails, and clean unused images entirely from the WordPress dashboard.
Subscribe to Our Newsletter
Get the latest WordPress tutorials, trends, and resources right in your inbox. No Spamming, Unsubscribe Anytime.

Thank you for subscribing to our newsletter!


Table of Content
- Why Images Quietly Slow Down Your Website the Most
- How Slow Websites Turn Into Lost Revenue
- When a page takes too long:
- This affects key business areas:
- The Hidden Costs Most Site Owners Ignore
- Lost Sales from Slow Product Pages
- Higher Ad Spend with Lower ROI
- Poor Core Web Vitals Scores
- Lower Search Visibility
- Image Formats Matter More Than You Think
- The Right Tool for WordPress Image Optimization
- ThumbPress - WordPress Image Management Suite
- How to Optimize Images in WordPress (Step by Step)
- Step 1: Compress images before upload
- Step 2: Convert to WebP or AVIF
- Step 3: Disable unused thumbnail sizes
- Step 4: Enable lazy loading
- Step 5: Set an image upload limit
- Step 6: Find and remove unused images
- Step 7: Use a CDN for image delivery
- Real Impact: Before vs After Image Optimization
- 6 Common Image Optimization Mistakes to Avoid
- 1. Never upload raw camera images directly
- 2. Don't over compress images
- 3. Don't lazy load your hero section images
- 4. Running multiple image optimization plugins
- 5. Ignoring thumbnail bloat
- 6. Never removing unused media
- Final Thoughts
- Frequently Asked Questions
- Do unoptimized images affect SEO?
- What is lazy loading, and should I use it on WordPress?
- Does image optimization affect WooCommerce sales?
- Can I optimize images in WordPress without coding?