How to Edit an Image in WordPress: From Basic to Advance
Struggling with blurry product photos or lackluster website visuals?
WordPress makes managing your site’s images a breeze, but what if you crave more than just basic edits? This blog will equip you with the ultimate image editing toolkit to transform your visuals, leaving your website looking sharp and your brand sparkling.
Get ready to transform your website from ordinary to visually stunning!
How to Do Basic Image Editing in WordPress
The built-in WordPress Image Editor is an excellent tool for quickly editing images on your site. With this feature, you can easily crop, rotate, scale, and flip your images.
To start, navigate to your WordPress dashboard and go to Media > Library. Select the image you want to edit and then follow the steps below –
Step 1: Crop an image
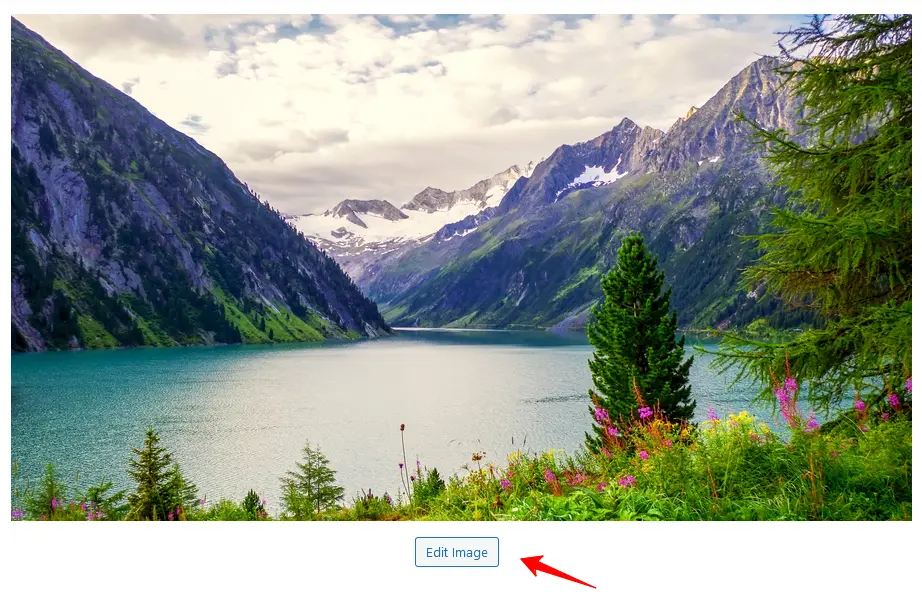
Click on the Edit Image button below the image you selected.
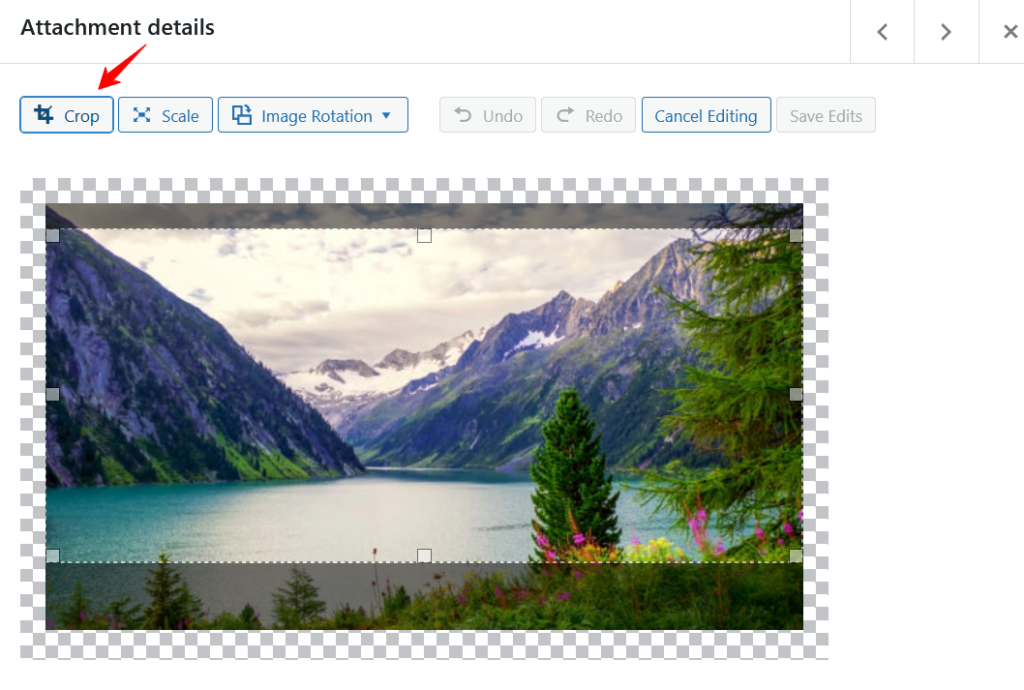
After that, you’ll find the Crop option above the image to help you remove the unnecessary background.
Step 2: Image Rotation and Flip
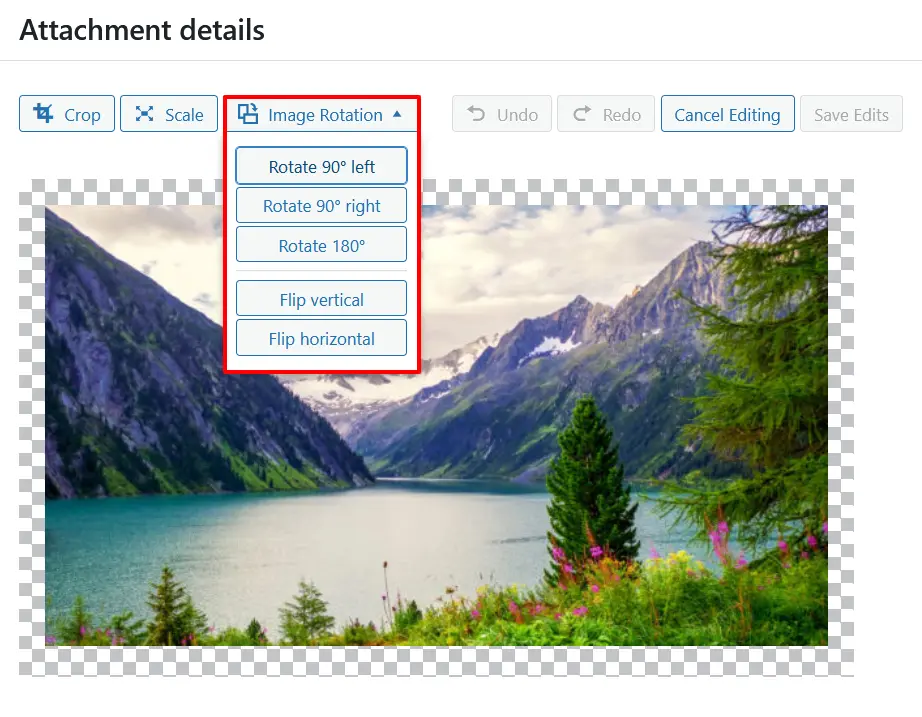
To rotate the image (left/right), use the rotation options available in Basic WordPress Editor. You can flip your image horizontally and vertically in WordPress Editor using the flip options.
Step 4: Scale for Preferred Dimension
To scale any image in your WordPress site, enter the specific dimension for your image.
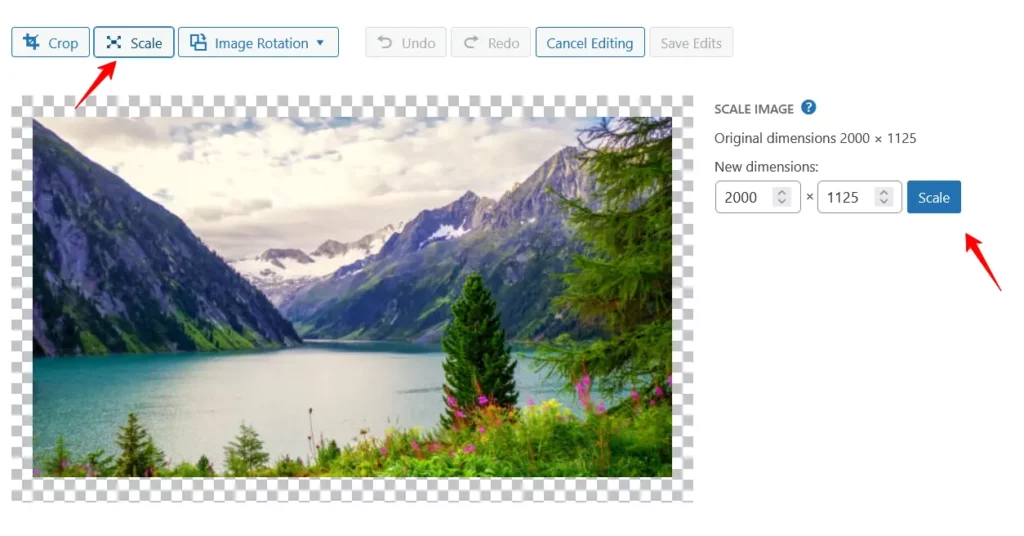
Note: WordPress only allows you to scale down your image.
Finally, save your changes to create a new copy of the image on your server and your customized WordPress image is ready.
Limitations of the WordPress Image Editor
When considering advanced image editing features, you may encounter the following limitations with the basic WordPress image editor –
- No option to resize images to achieve a perfectly balanced shape.
- No ability to draw custom designs on images uploaded to WordPress.
- No feature to apply individual shapes for better visual representation.
- No capability to add unique icons for symbolic purposes.
- No function to incorporate text to enhance the user experience on your site.
But wait! You can achieve these advanced editing capabilities with the premium plugin ThumbPress. ThumbPress is an all-in-one solution for WordPress image optimization, and its Image Editor feature offers far more than basic editing.
Advanced Image Editing in WordPress Using a Plugin
Step 1: Install and Setup ThumbPress
Before starting advanced edits to your WordPress images, make sure to install the free version of ThumbPress on your site.
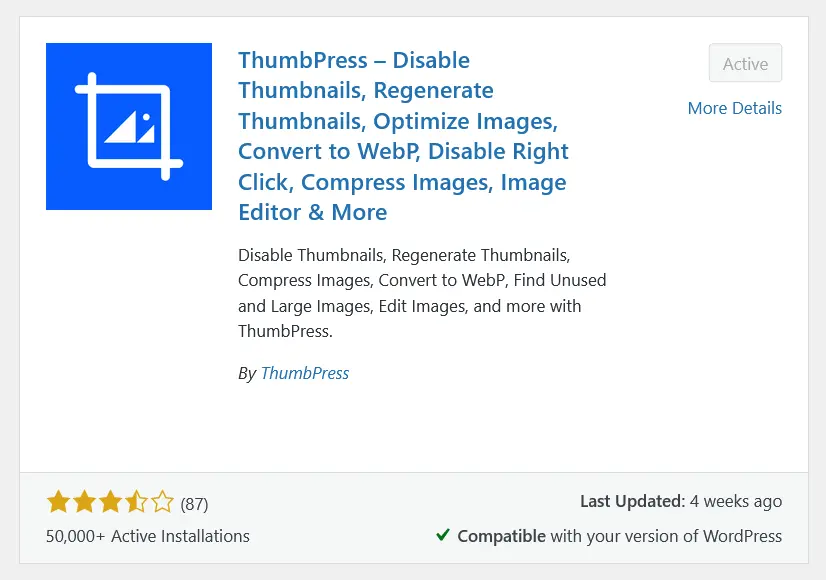
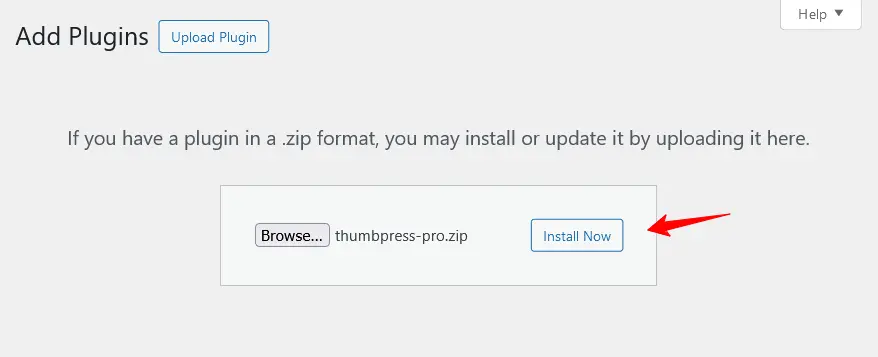
As Image Editor is a premium feature of ThumbPress, you must upgrade to ThumbPress Pro.
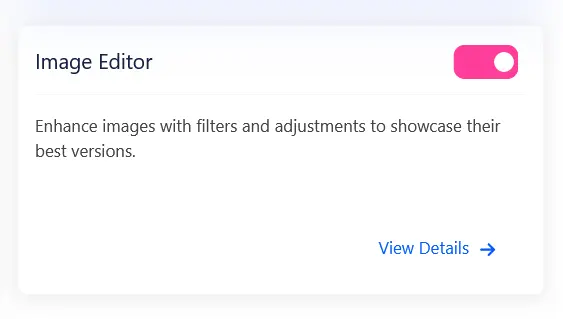
Enable the Image Editor modules by going to ThumbPress > Modules from your dashboard.
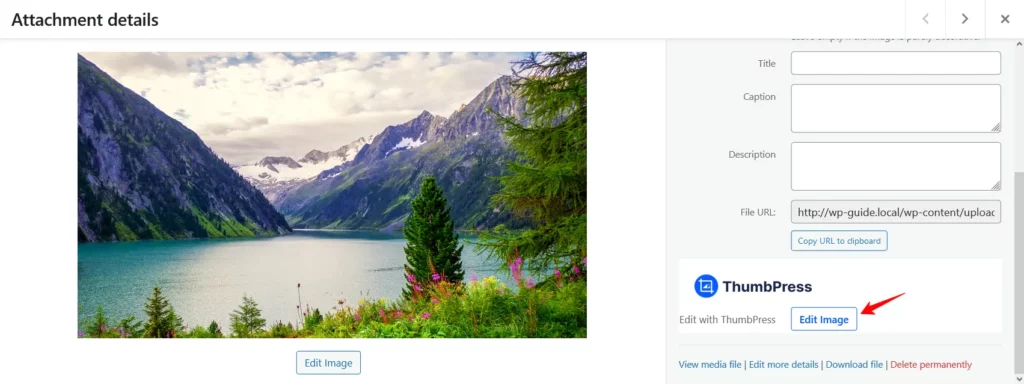
When the setup is complete, navigate to Media > Library and select an image. Then click the Edit with ThumbPress button.
Step 2: Draw Custom Designs
Use the Draw feature in ThumbPress to create custom designs on your preferred image.

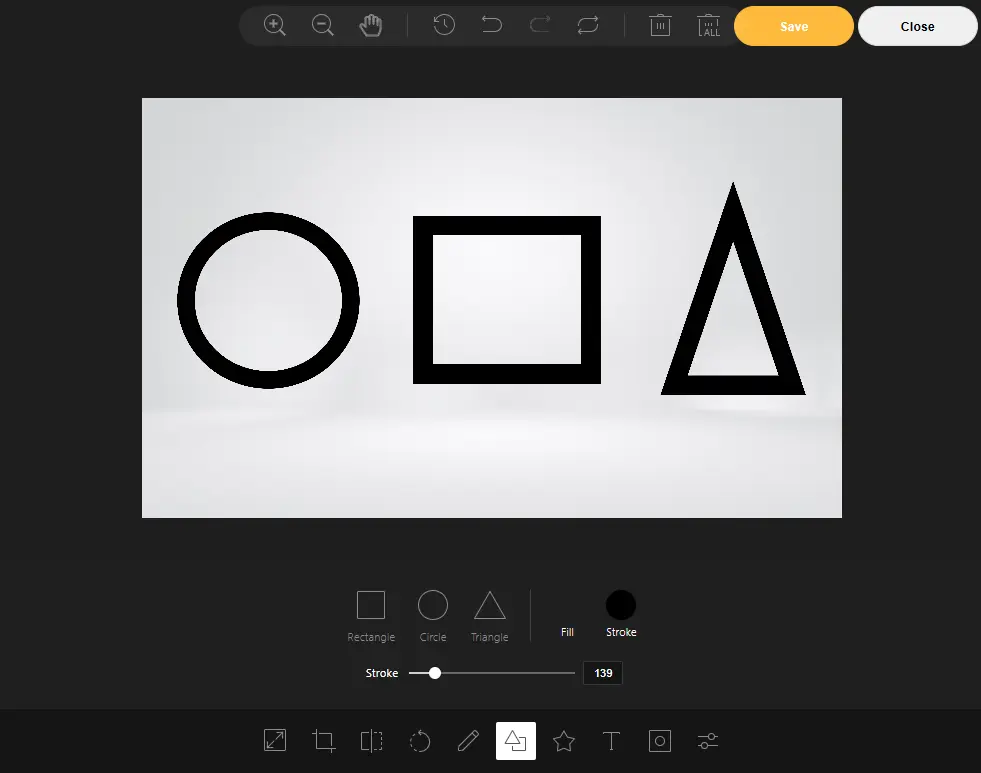
Step 3: Add Individual Shapes
Click the Shapes icon in the editor and choose the shape you want to add to your image.
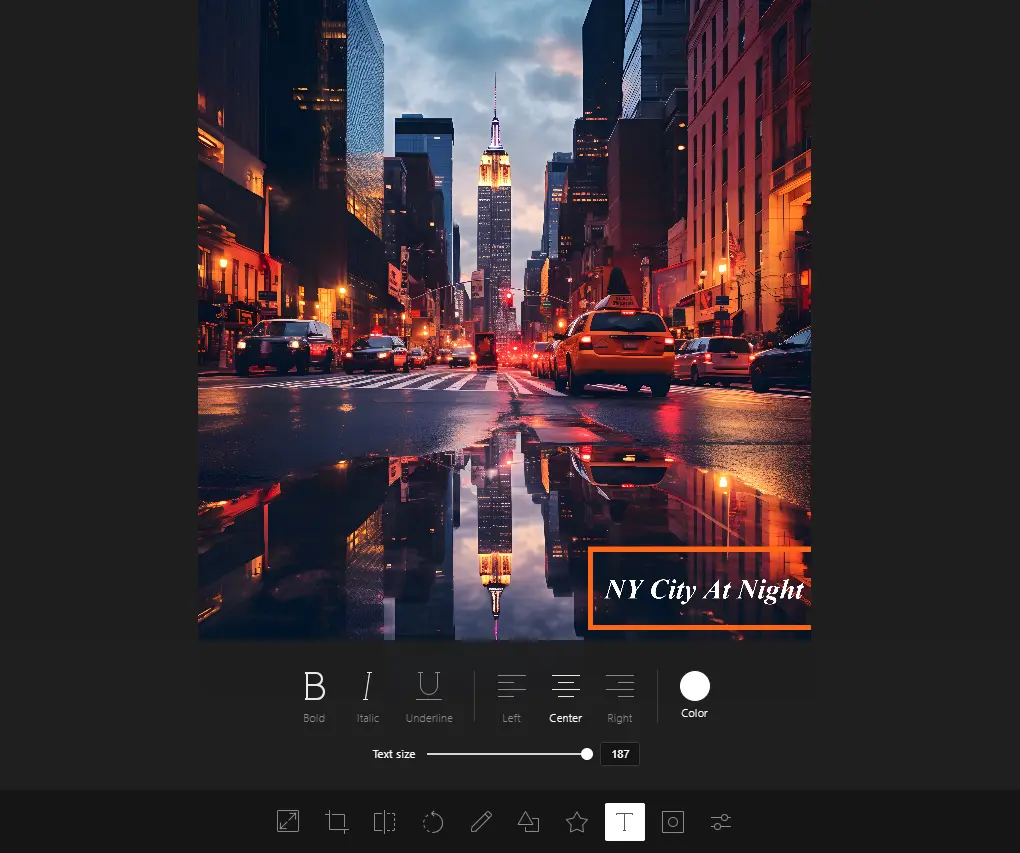
Step 4: Add Texts
Texts can help indicate or identify items on your website images. Select the Text option from the editor and apply it to your image.
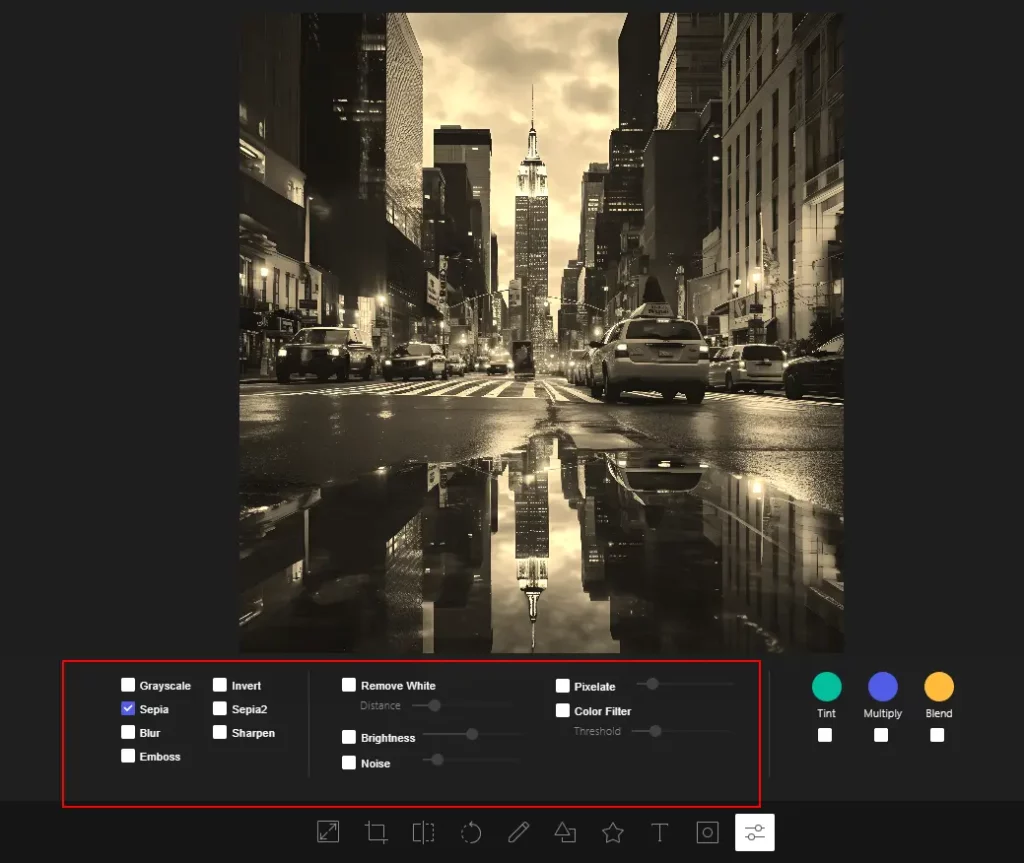
Step 5: Apply Filters to WordPress Image
With ThumbPress, you can apply a variety of filters to your images, including grayscale, sepia, blur, tint, brightness, and more. Simply select the desired filters from the image editor to adjust your images.
Guide to Fixing Common Image Issues in WordPress
Problem 1: File Permission Issue While Uploading Images
When working on your website, you may encounter this image upload issue in WordPress. This can happen due to incorrect file permissions, insufficient server space, file size, and more.
Solutions
- Set the permission for WordPress directories and folders to 755. Check the settings for your /wp-content/uploads directory using FTP or your hosting cPanel.
- Increase PHP limits on your server. To do this, update upload_max_filesize and post_max_size in your server php.ini file. Change the default limit to 32M > 256M or 512M depending on your needs.
- You can easily increase the maximum upload file size plugin to resolve the issue of uploading larger image files.
Problem 2: Images Taking Time to Load
Unoptimized images can take time to load on your website, which can lead to higher bounce rates and negatively affect SEO.
Solutions
- Use the ThumbPress plugin to optimize large image files and convert them to WebP format.
- Try to use CDN services like Cloudflare. This solution helps serve images from closer locations and reduces load times.
- Use ThumbPress to Detect and Delete Unused Images and free up precious server space.
Problem 3: Images Not Showing
Sometimes, images may upload successfully but fail to display on your website. This issue could be due to missing URLs, non-existent images, or caching problems.
Solutions
- Check if the missing image is on your site. Copy the URL from your media library and search for it. If the original image loads then you need to regenerate thumbnails for it.
- Incorrect URLs can cause images to not display properly. They might be broken, missing, or incorrectly formatted. To identify broken image links, use the Broken Link Checker on your website.
- Cache can often cause outdated or broken images on your website. Use a caching plugin to clear your site’s cache, and if you’re using a CDN, clear both the server and CDN cache as well.
Problem 4: Duplicate Images in the Media Library
Duplicate images are a common issue that can bog down your website. They consume significant server storage space and can negatively impact site performance.
Solution
- Inform site contributors to use existing images from the media library instead of uploading the same image multiple times.
- Use a media cleaner plugin on your WordPress site to scan your site and delete those duplicate files.
Final Words
Unique images add undeniable personality to your WordPress site, but wrestling with image optimization can quickly steal your creative spark. To truly shine, your illustrations need to be web-ready and plugins like ThumbPress can make advanced image editing a breeze within WordPress.
The methods outlined in this blog can help keep your images lightweight, and contribute to your website’s SEO ranking. Remember, a visually stunning and SEO-friendly site is a winning combination!
Frequently Asked Questions (FAQs)
- How do I edit an Image size in WordPress?
- Go to your site Media Library and select an Image.
- Click on the Edit Image button.
- Provide your preferred size for that image.
- Finally, click on the Scale button
- How do I apply filters in WordPress Images?
- Install and set up ThumbPress and ThumbPress Pro plugins on your site.
- Open an image from the Media Library.
- Click on the Edit with ThumbPress button.
- Select Filter from the Design box and choose your desired filter.
- Finally, click on the Save button.
- WordPress Edit Image is not working?
This could be a compatibility issue. Take a backup of your site and try changing the theme to default like Twenty-twenty-four, Hello Elementor, etc.
Subscribe to Our Newsletter
Get the latest WordPress tutorials, trends, and resources right in your inbox. No Spamming, Unsubscribe Anytime.

Thank you for subscribing to our newsletter!

Table of Content
- How to Do Basic Image Editing in WordPress
- Step 1: Crop an image
- Step 2: Image Rotation and Flip
- Step 4: Scale for Preferred Dimension
- Limitations of the WordPress Image Editor
- Advanced Image Editing in WordPress Using a Plugin
- Step 1: Install and Setup ThumbPress
- Step 2: Draw Custom Designs
- Step 3: Add Individual Shapes
- Step 4: Add Texts
- Step 5: Apply Filters to WordPress Image
- Guide to Fixing Common Image Issues in WordPress
- Problem 1: File Permission Issue While Uploading Images
- Problem 2: Images Taking Time to Load
- Problem 3: Images Not Showing
- Problem 4: Duplicate Images in the Media Library
- Final Words
- Frequently Asked Questions (FAQs)


