To optimize images for a content-heavy WordPress blog, resize images before uploading, compress them, use modern formats like WebP or AVIF, lazy-load below-the-fold images, and regularly clean up oversized, duplicate, or unused media files. An image optimization plugin like ThumbPress can help automate much of this work for both existing images and new uploads.
You should also review the thumbnail sizes generated by WordPress, themes, and plugins. Keep the sizes your layouts actually use, remove unnecessary variants, and regenerate thumbnails when your theme, image dimensions, or layouts change.
For the general workflow, see our complete guide to optimizing WordPress images. This post focuses on what changes once your blog has hundreds of posts and your Media Library keeps growing.
Why Image Optimization Becomes More Important as Your Blog Grows
Images are usually among the heaviest resources on a web page. A single unoptimized photograph can be larger than the page’s HTML, CSS, and JavaScript combined.
As traffic grows, those heavy files add up into a real hidden revenue cost of unoptimized images, since slower pages tend to convert worse.
As your blog grows, each page may need to load more images, such as:
- Featured images
- Screenshots
- Charts or diagrams
- Related-post thumbnails
- Promotional graphics
WordPress, themes, and plugins can also create several resized versions of every uploaded image. Over time, this means more image files to store, manage, and serve, making image optimization increasingly important as your blog expands.
A Practical Approach to Optimize Images for a Content-Heavy WordPress Blog
For a growing WordPress blog, image optimization needs to address both sides of your image library:
- New images before and during upload
- Existing images already stored in the Media Library
For new image uploads, resize them to the dimensions your site actually needs, choose an appropriate format, compress them, and avoid uploading unnecessarily large files.
Existing images require a different approach. You may need to compress or convert older files, remove unused images, manage automatically generated thumbnails, and make sure WordPress serves images at appropriate dimensions.
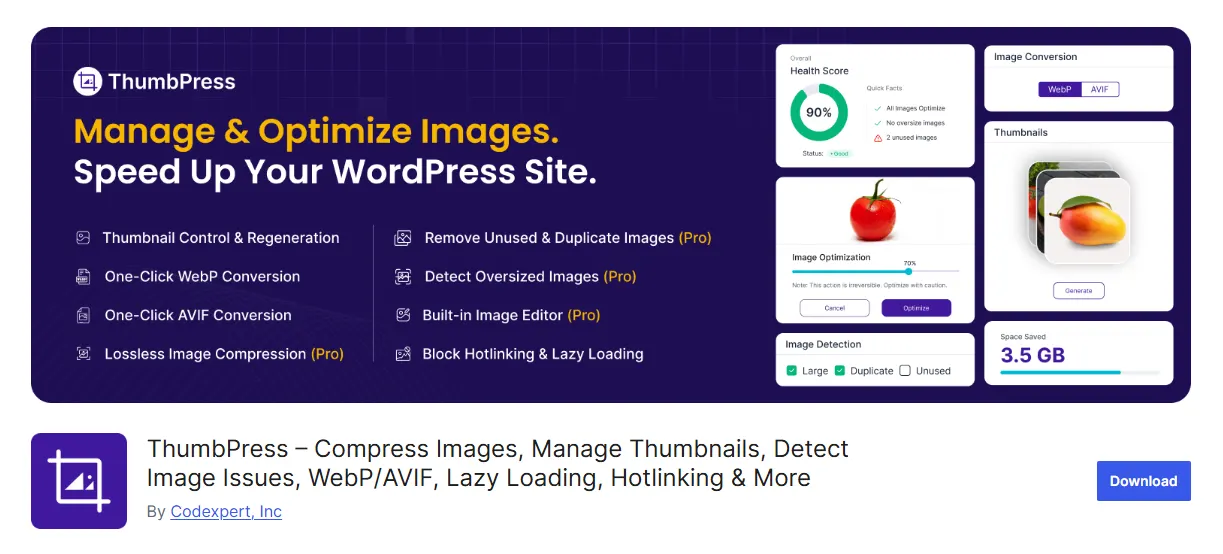
Managing all of this manually becomes difficult as your Media Library grows. A dedicated plugin like ThumbPress can simplify the process with image compression, WebP and AVIF conversion, thumbnail management, unused-image detection, and automation for future uploads.
Now, let’s go through the nine key areas to focus on when optimizing images for a content-heavy WordPress blog.
01 – Audit Existing Images Before Optimizing
Before optimizing anything, first check what is already stored in your WordPress Media Library. Look for common issues such as:
- Large images uploaded at full resolution
- Heavy PNG files
- Duplicate uploads
- Old or unused images
- Excessive generated thumbnails
- Images that have not been compressed or converted to modern formats
Checking these manually can be difficult on a content-heavy site. ThumbPress provides a centralized overview of your Media Library, including total images, thumbnails, unoptimized and oversized images, unused files, duplicates, and images available for WebP or AVIF conversion.
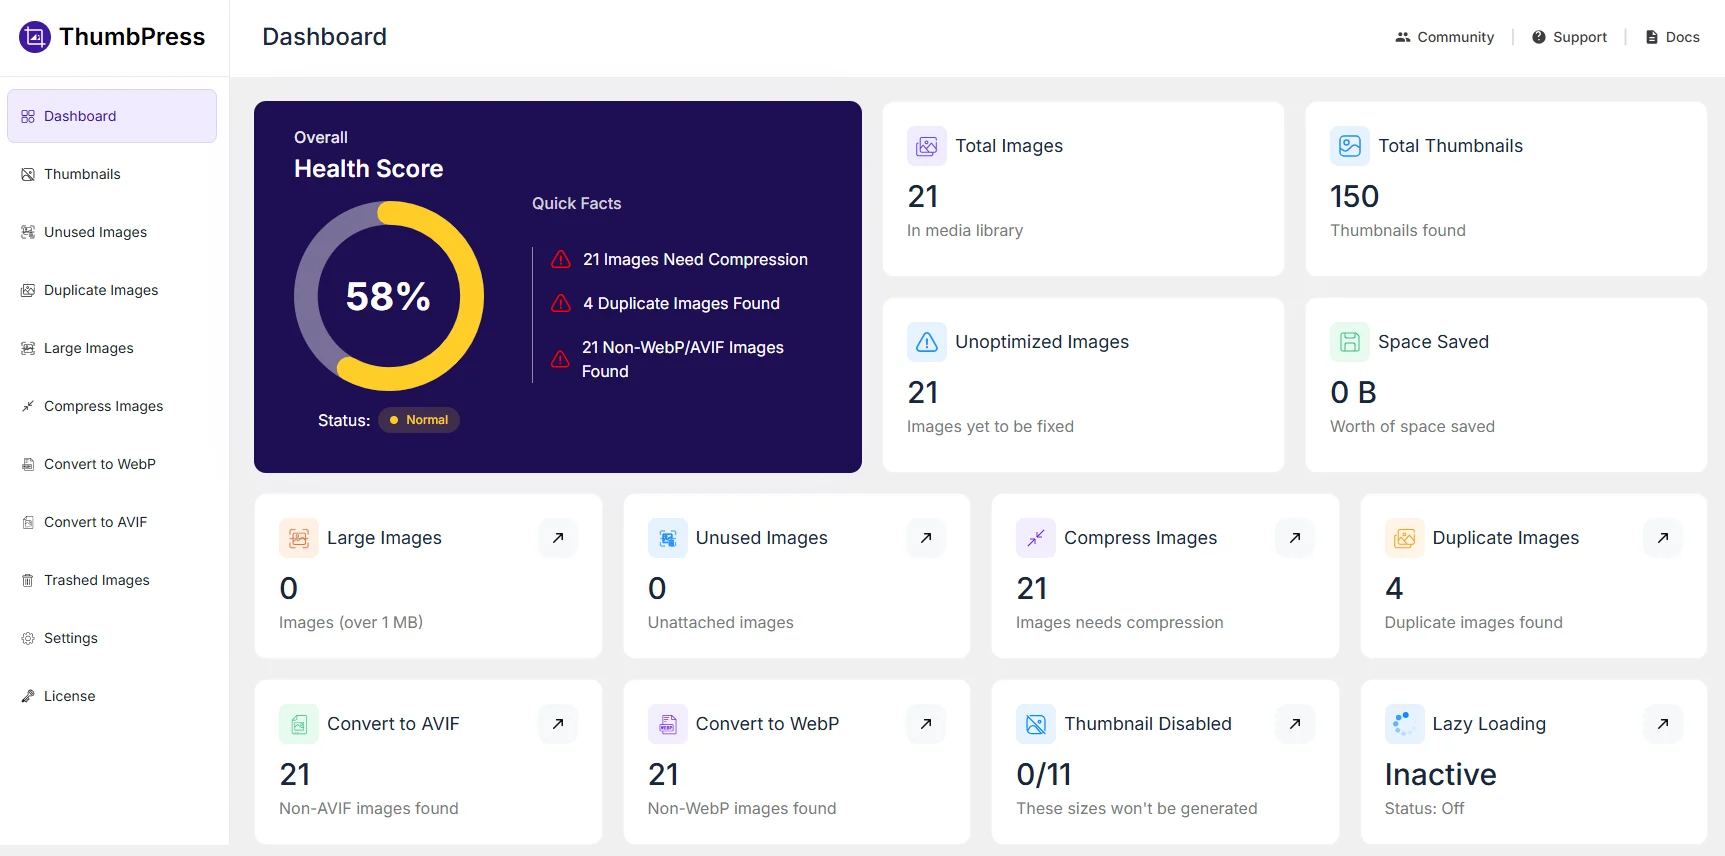
Start from ThumbPress → Dashboard to identify where unnecessary files and optimization opportunities exist before making broader changes.
02- Resize Images and Prevent Oversized Uploads
Before uploading an image, resize it close to the largest size your website will actually display.
For example, if your blog content area is about 900px wide, uploading a 4000px-wide image usually adds unnecessary file size and storage without improving how it looks on the page. A simple sizing guideline can look like this:
| Image Type | Recommended Approach |
| Featured image | Use a consistent size and aspect ratio that fits your theme |
| In-content photo | Resize close to the maximum width of your content area |
| Screenshot | Crop unnecessary browser, desktop, or empty areas |
| Chart or diagram | Keep text readable without making the image unnecessarily large |
| Transparent graphic | Keep the dimensions only as large as the layout requires |
| Logo or icon | Avoid uploading files much larger than their display size |
There is no single ideal dimension for every image. The important thing is to avoid uploading images that are much larger than where they will actually appear.
Set Limits for Oversized Image Uploads
Even with clear image guidelines, oversized files can still be uploaded, especially when several people publish content on the same site.
ThumbPress lets you set maximum limits for image file size, width, and height. This helps prevent unnecessarily large photos and screenshots from building up in your Media Library.
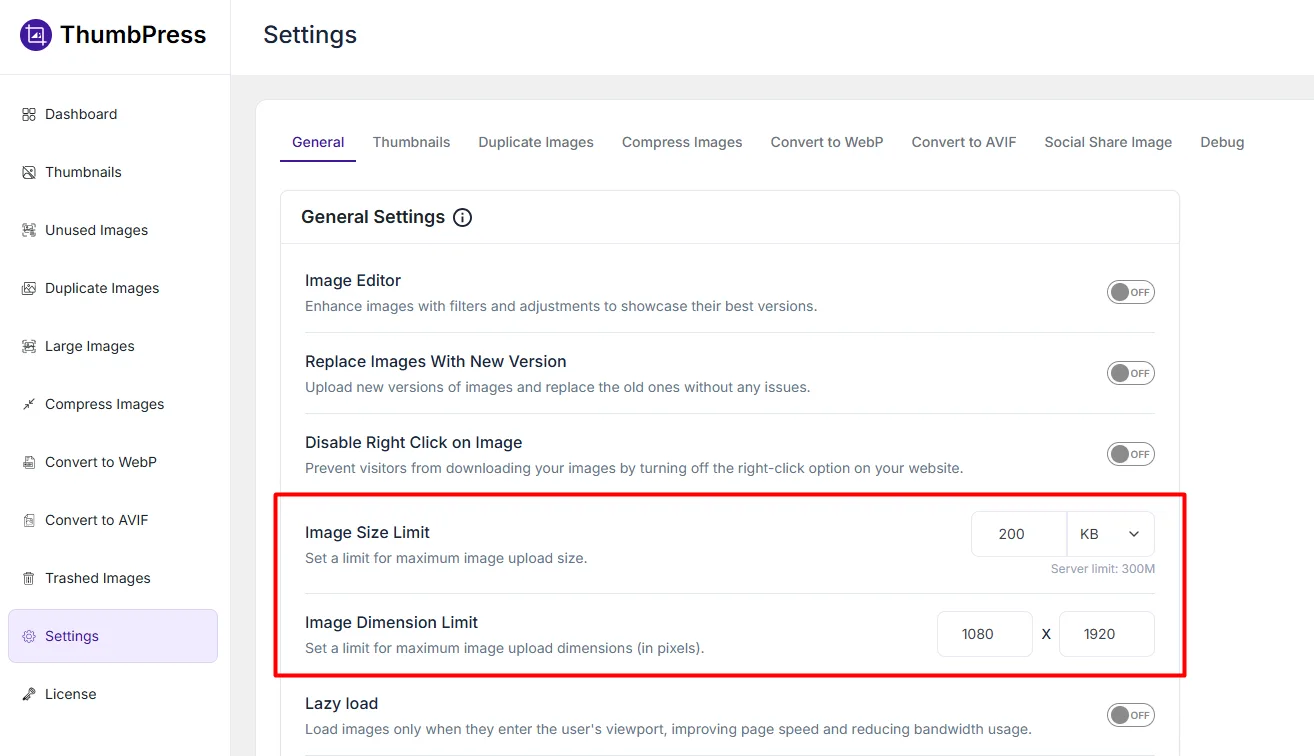
Do not set the limits too aggressively. Base them on the largest legitimate image your current design requires.
03 – Pick the Right Image Format for Your Content
Different image formats work better for different types of content, so choose based on what the image contains.
When to Use JPEG
Use JPEG for photographs, featured images, and other visuals with many colors or gradients. It offers good quality at relatively small file sizes.
When to Use PNG
PNG works best for images that need transparency or very sharp details, such as screenshots, diagrams, and graphics with text. For regular photos, it usually creates larger files than necessary.
When to Use WebP
WebP is a good option for most website images and often produces smaller files than JPEG or PNG at similar quality.
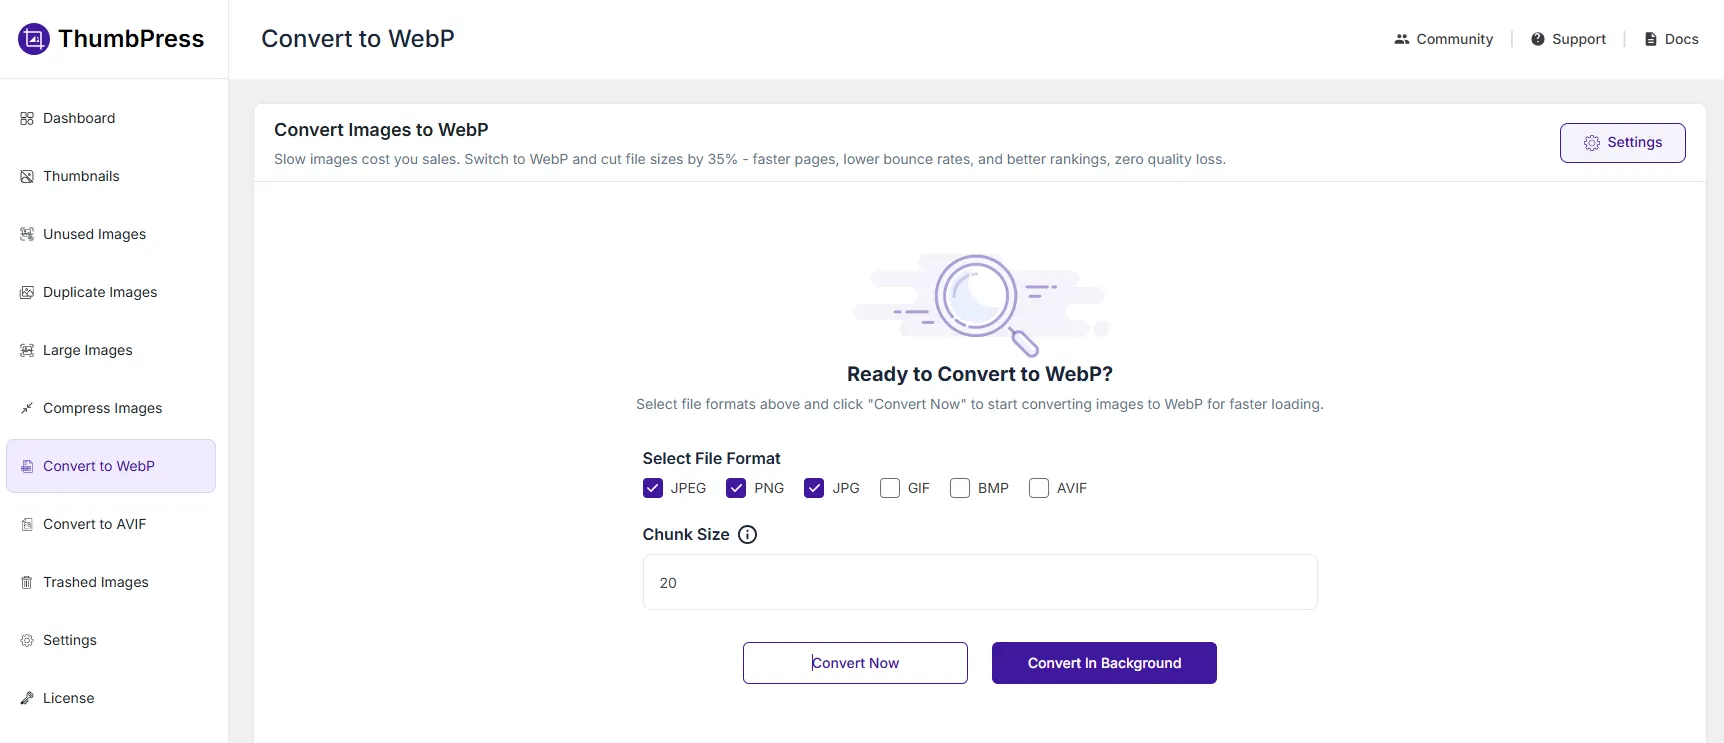
ThumbPress lets you convert existing images to WebP and automatically create WebP versions for new uploads.
When to Use AVIF
AVIF can provide even smaller files while maintaining good visual quality, especially for photographs and detailed images.
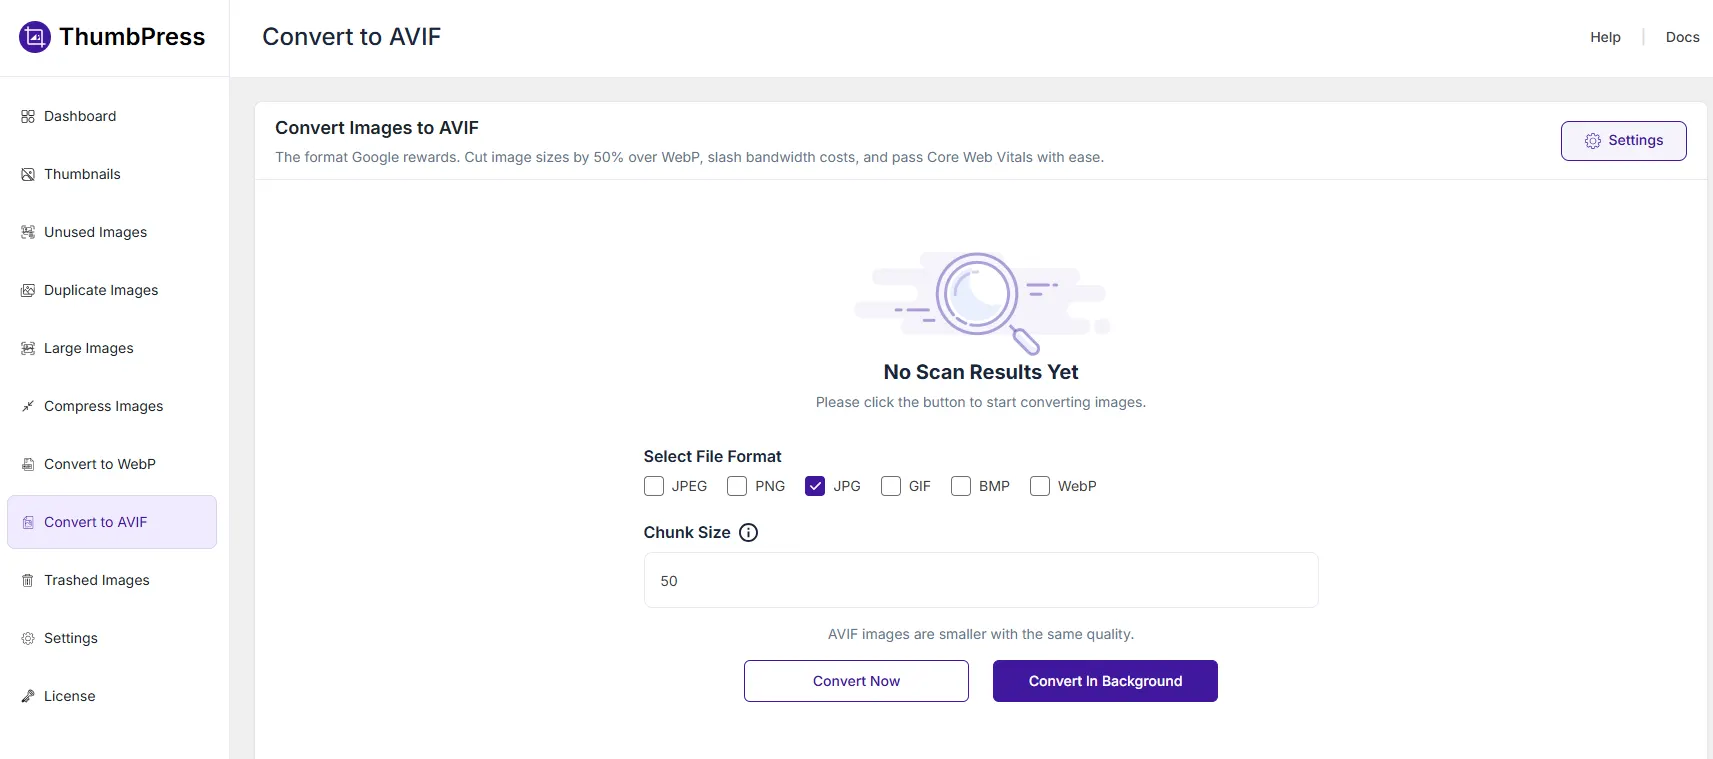
ThumbPress can convert existing images to AVIF and automatically generate AVIF versions for future uploads.
04 – Compress WordPress Images Without Losing Quality
Even a properly sized image can still be too heavy. Compression reduces file size without changing its dimensions.
Photos can usually handle more compression, while screenshots, charts, and diagrams may need higher quality to keep text and details sharp.
ThumbPress can compress existing Media Library images individually or in bulk, and automatically compress new uploads.
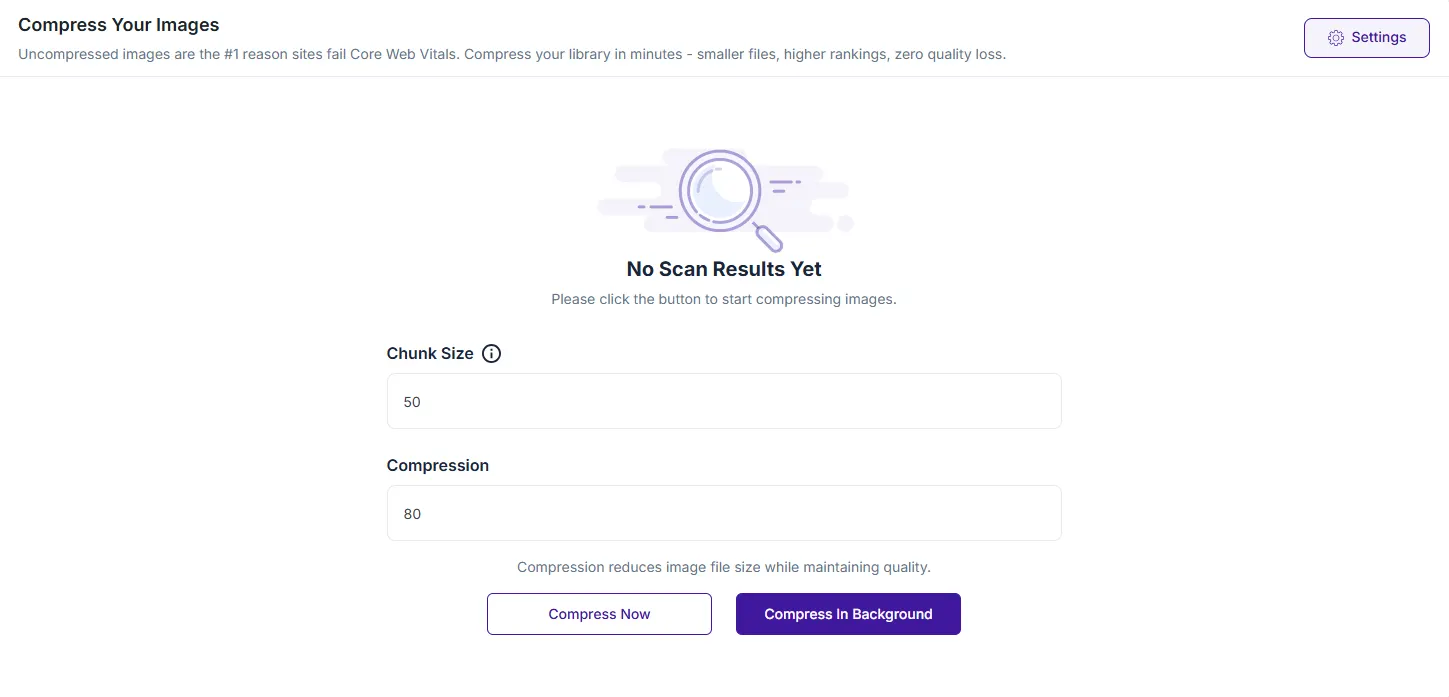
For a large library, test a few photos and screenshots first. If the quality still looks good, apply the same settings to larger batches.
Before bulk compression, keep a backup of the originals, since ThumbPress replaces the original file during compression.
Optimizing a large library by hand doesn’t scale. ThumbPress handles compression, WebP/AVIF conversion, thumbnail management, and Media Library cleanup from one dashboard, for both existing images and every new upload. Get ThumbPress →
05 – Manage WordPress Thumbnail Sizes
WordPress creates multiple image sizes for each upload, and your theme or plugins may add more. These are useful when your layouts need them, but unnecessary sizes only add extra files to the Media Library.
Check which sizes are actually used for featured images, post cards, archives, related posts, grids, sliders, and mobile layouts.
If you use a blog plugin to create post grids, lists, archive pages, or other blog layouts, also check which image sizes those layouts use before disabling any thumbnails.
ThumbPress shows all registered thumbnail sizes and lets you disable the ones you do not need from ThumbPress → Settings → Thumbnails.
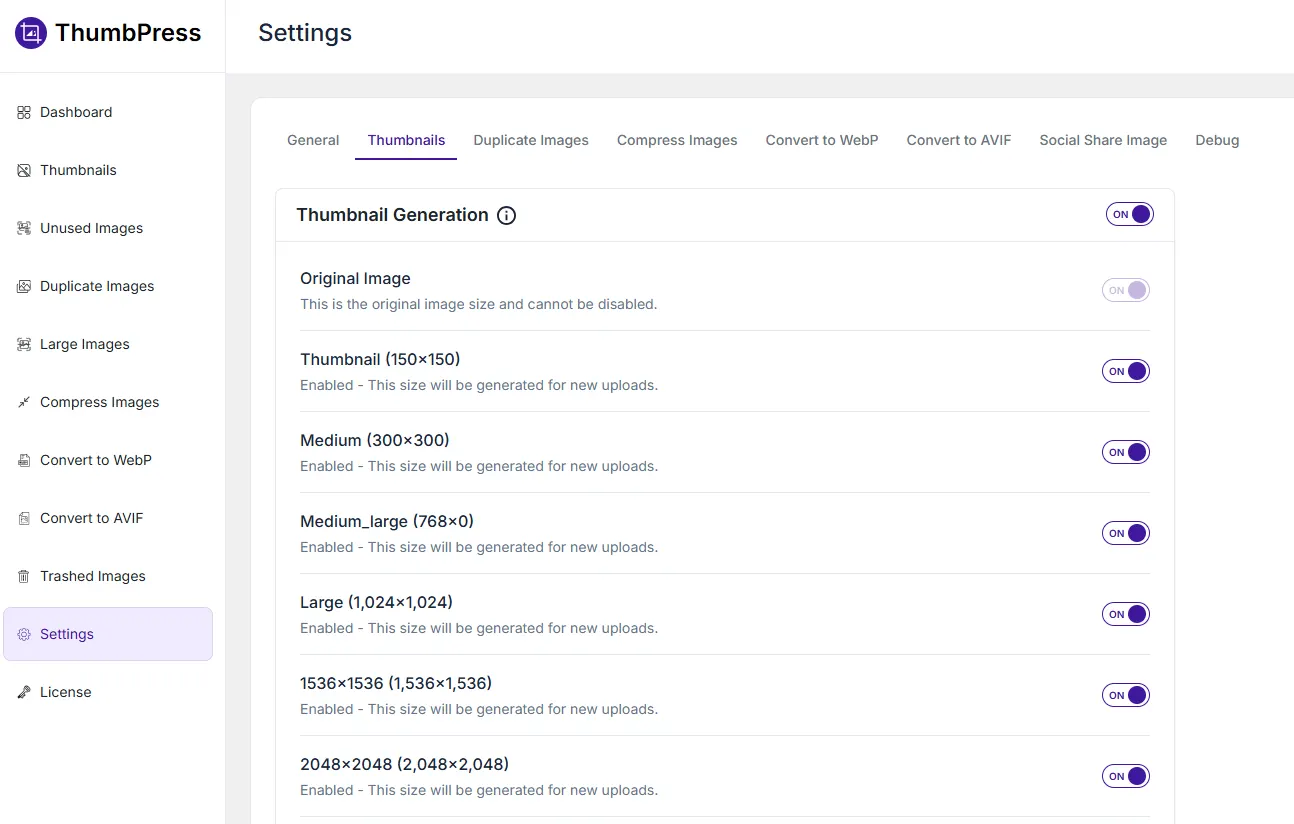
Before disabling a size, make sure your theme or plugins are not using it. Keep the sizes your layouts need and stop generating the rest.
06 – Regenerate Thumbnails After Changing Image Sizes
Thumbnail changes usually affect only new uploads. Older images may still have outdated sizes or may be missing the sizes required by a new theme or layout.
You may need to regenerate thumbnails after changing themes, featured-image dimensions, archive layouts, or thumbnail settings.
ThumbPress can regenerate the required sizes for existing images from ThumbPress → Regenerate Thumbnails.
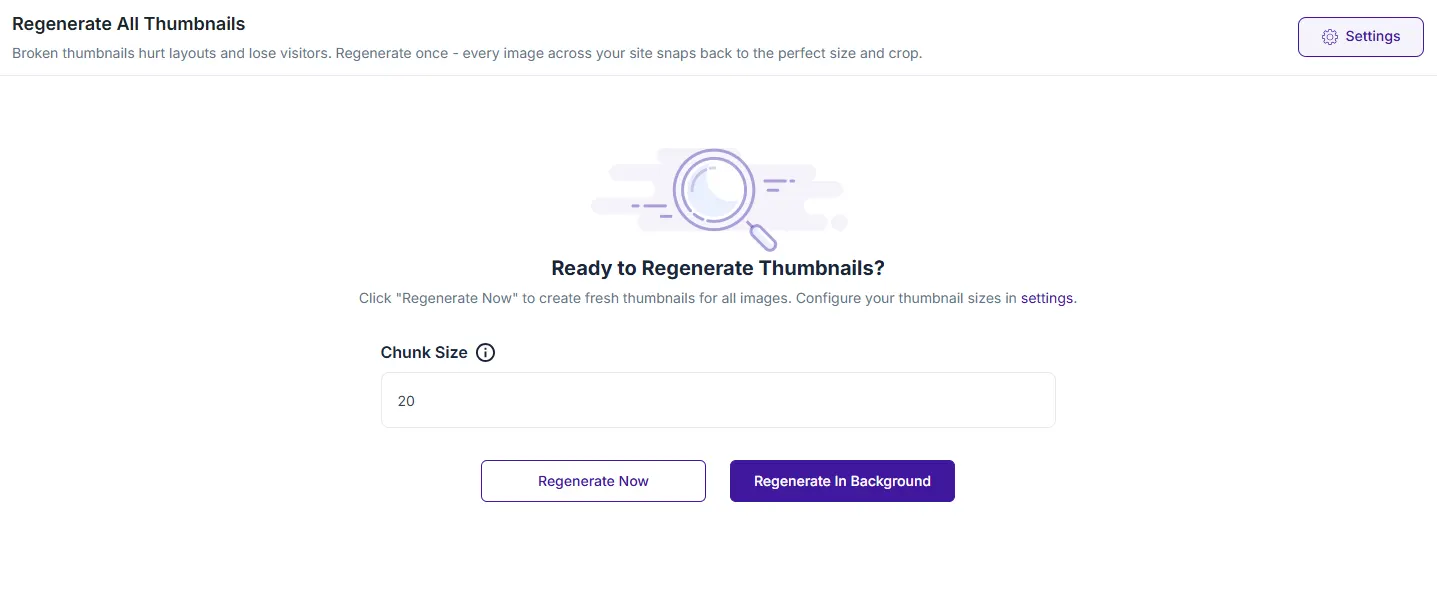
Afterward, check a few key pages to make sure automatic cropping has not cut off important parts of the image.
07 – Use Lazy Loading Without Hurting Page Speed
Lazy loading delays images that are further down the page until visitors scroll closer to them. This reduces the number of images that need to load immediately and is especially useful for long blog posts with lots of visual content.
ThumbPress lets you enable lazy loading from its general settings. However, images at the top of the page, such as the main featured or hero image, should usually load normally so they appear as quickly as possible.
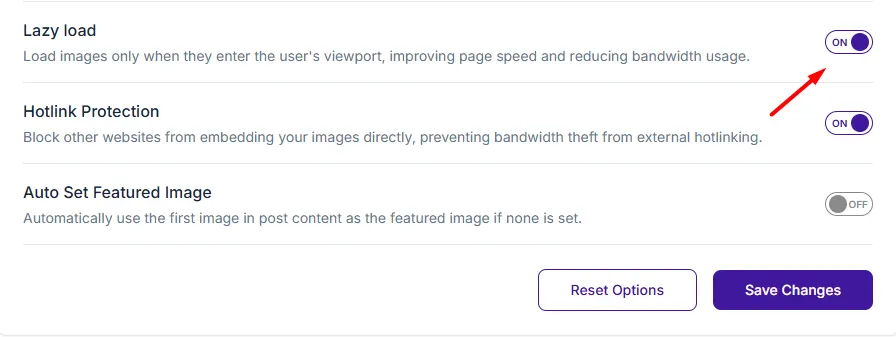
A simple rule is to load top-of-page images normally and use lazy loading for images further down the page. For better overall performance, combine lazy loading with properly sized and compressed images.
08 – Clean Up Your WordPress Media Library
Over time, your Media Library can collect oversized, duplicate, unused, and outdated images. Cleaning them up helps reduce storage and keeps the library easier to manage.
Optimize Oversized Images
ThumbPress highlights oversized images from its dashboard, so you can quickly find large photos, screenshots, and other files that need attention.
Remove Duplicate Images
ThumbPress can detect duplicate images, show how much space they use, and help merge them while moving redundant files to trash. Review the results before removing anything.
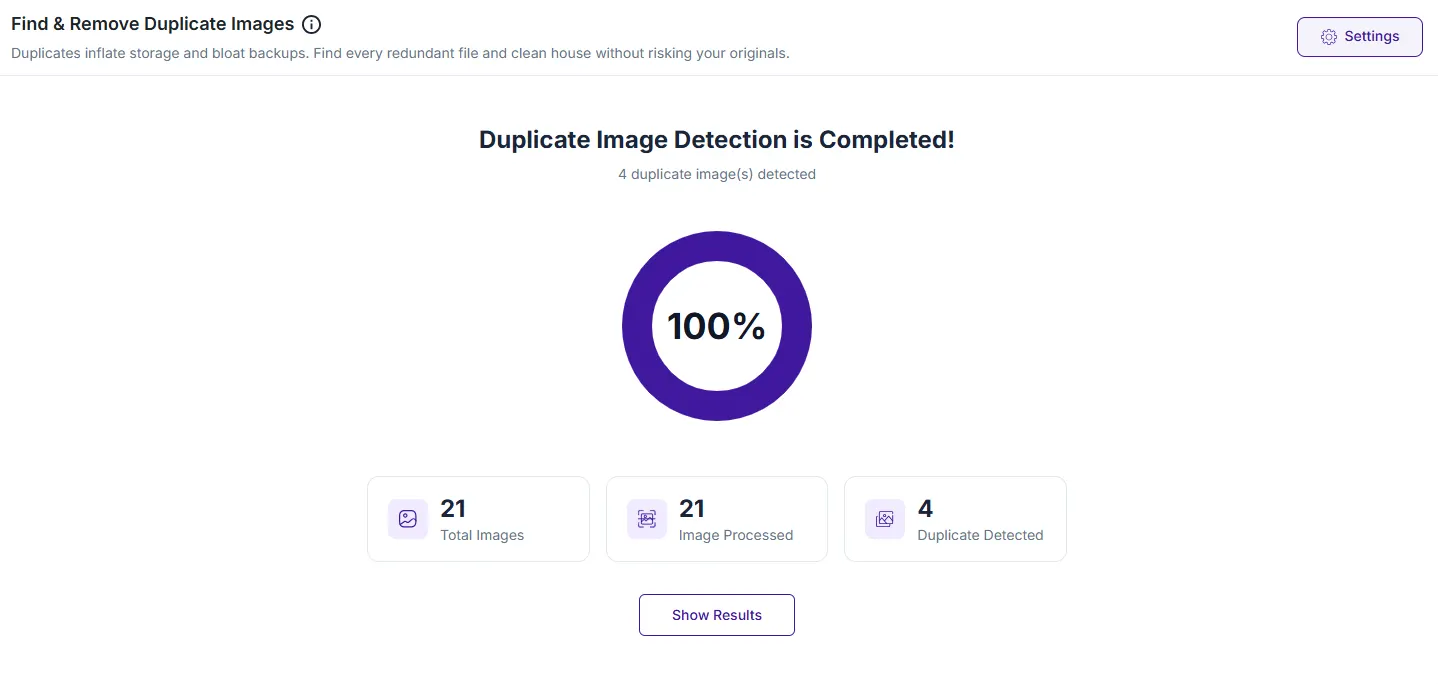
Find and Delete Unused Images Safely
ThumbPress can scan for potentially unused images and move selected files to trash before permanent deletion.
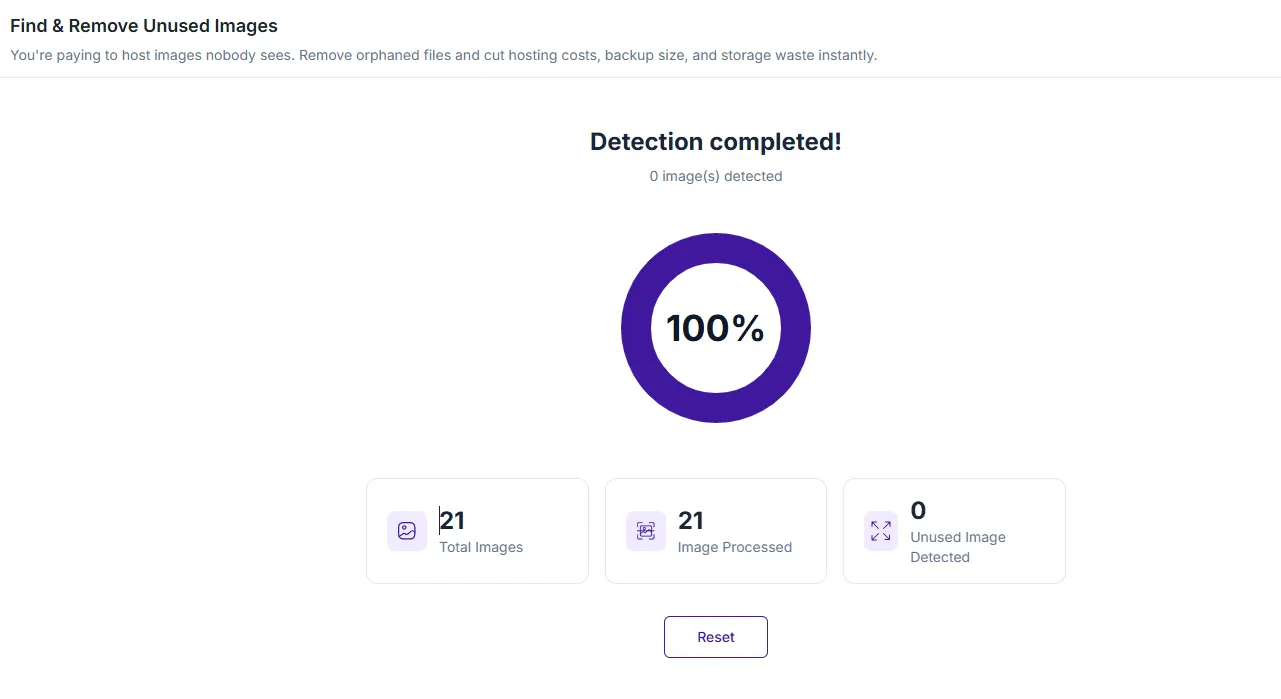
Check the results carefully, since themes, plugins, templates, or custom fields may still use some images.
Replace Outdated Images Without Changing Their URLs
For screenshots, charts, or branded visuals that need updating, ThumbPress lets you replace the existing image while keeping its filename and links intact.
09 – Keep Featured Image Sizes Consistent
Featured images are often reused across your homepage, category pages, related posts, and blog cards. If these areas use the same image shape, prepare your featured images in that same ratio. For example, a 16:9 layout could use images around 1200 × 675 px.
Without a standard size, you may upload one image at 4000 × 3000 px, another at 1600 × 900 px, and another at 1200 × 1200 px. Some images may be much larger than your site needs, while others may have to be cropped differently to fit the same blog-card size.
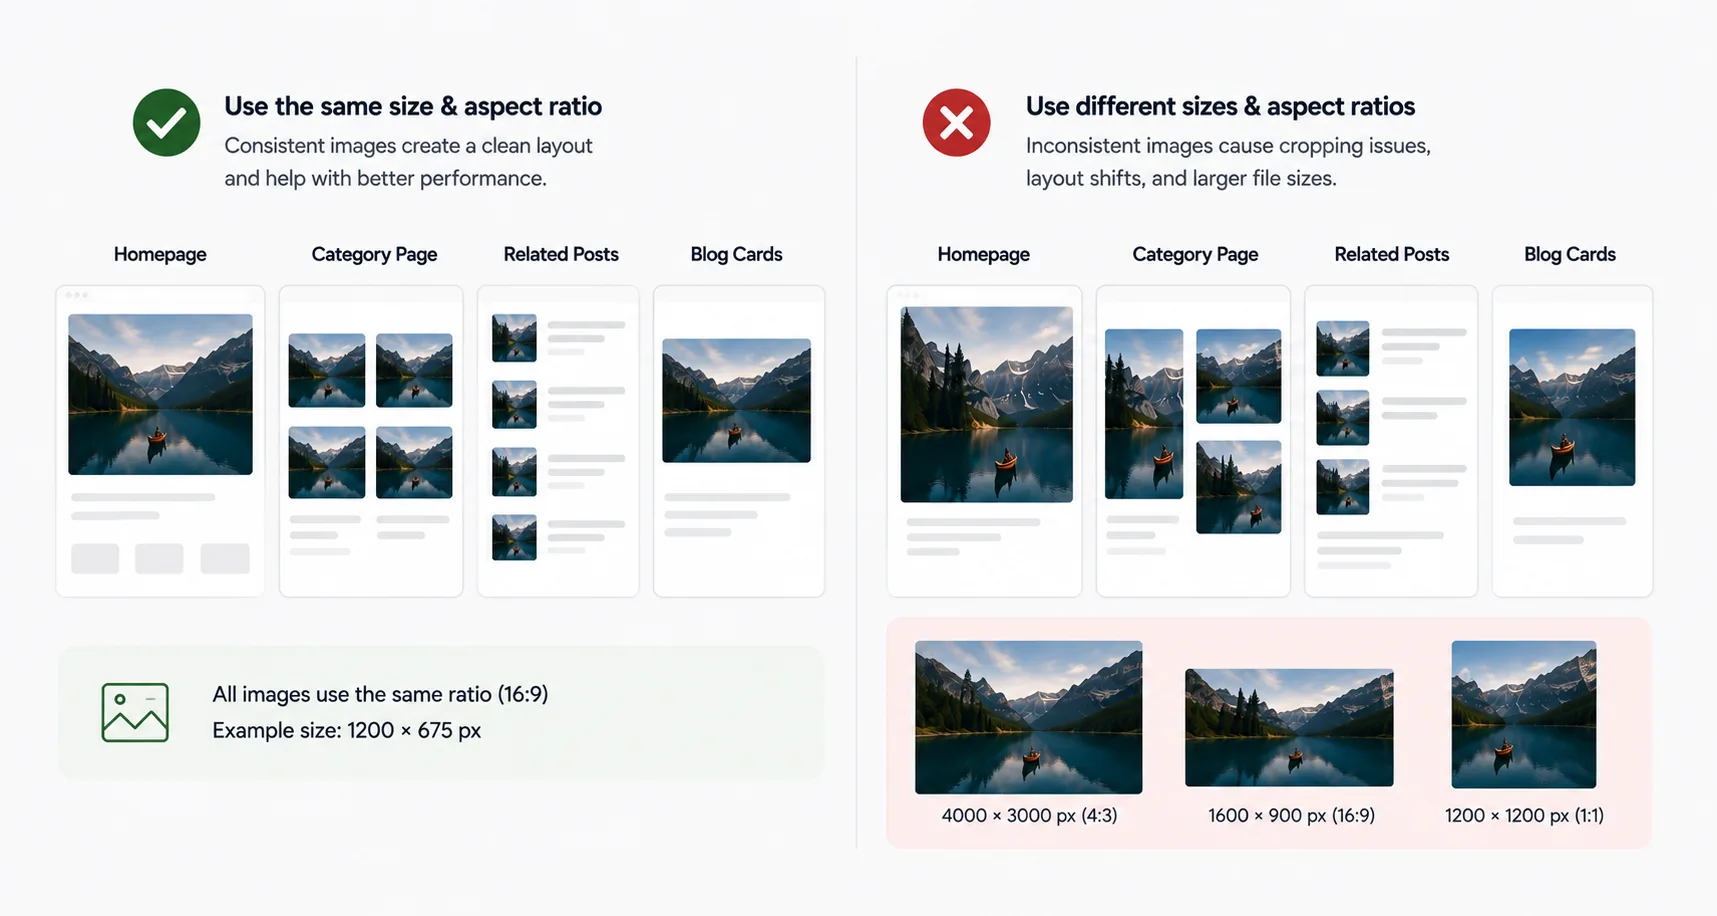
For better image optimization, choose a practical featured-image size based on your theme and use it consistently. This keeps file sizes under control and makes it easier for WordPress to serve suitable image versions in different layouts.
Make Image Optimization Part of Your WordPress Maintenance Routine
Image optimization works best when it becomes part of your publishing and maintenance workflow rather than a one-time cleanup.
Check Images Before Uploading: Before uploading an image, check that its dimensions match where it will be used, choose a suitable format, and keep the file size as small as possible without noticeably reducing quality.
Review Image Performance Monthly: Once a month, check recent uploads and a few important pages, such as your homepage, archive pages, and popular blog posts. Look for images that are much larger than their displayed size, slow-loading images near the top of the page, or new thumbnail sizes created by themes and plugins.
Clean the Media Library Quarterly: Review your Media Library for oversized images, unused files, duplicates, and thumbnail sizes your site no longer needs.
ThumbPress can help you identify and remove unnecessary image files. Review what will be deleted first and keep a backup before permanently removing anything.
Recheck Image Sizes After Design Changes: Changing your theme, templates, or blog layouts can also change the image sizes your site needs. After a major design change, remove thumbnail sizes that are no longer required and regenerate any new sizes your layouts need.
Then clear your cache and check important pages on both desktop and mobile to make sure images are displaying and loading properly.
Common Image Optimization Problems and How to Fix Them
Here are some common image optimization problems you may run into and how to fix them. For a deeper walkthrough, see our guide to fixing common image issues in WordPress.
| Problem | How to Fix |
| Images look blurry | Reduce compression or use a larger image size |
| Small cards load large images | Check which image size the layout uses and serve a smaller thumbnail |
| Featured images load slowly | Avoid lazy-loading important above-the-fold images |
| Images have awkward crops | Use the right aspect ratio or adjust the source image before regenerating thumbnails |
Be careful when removing images marked as unused. Some may still be used by your theme, page builder, custom fields, or CSS even if the scanner cannot detect them.
Keep Your WordPress Images Optimized as Your Blog Grows
Image optimization is not a one-time task. As your blog grows, keep an eye on what gets uploaded, which image sizes WordPress creates, and what visitors actually download.
As you have seen, ThumbPress can automate much of the ongoing work, including compression, WebP and AVIF conversion, upload limits, thumbnail management, regeneration, and Media Library cleanup.
The goal is simple: keep images visually sharp, lightweight, and properly sized for where they appear.
Ready to stop babysitting your Media Library? Try ThumbPress and automate image optimization as your blog grows.
Frequently Asked Questions
WordPress provides some useful image handling automatically. It creates resized versions and generates responsive-image markup so browsers can select a suitable file.
No. Some generated sizes support responsive delivery, featured images, archive cards, galleries, and other layouts. Disable only sizes you have confirmed are not used by your active theme, plugins, or custom templates
Regenerate them after changing themes, image dimensions, thumbnail settings, or layouts so older images get the sizes your current design needs.
Both can reduce file size. WebP is widely practical, while AVIF may produce smaller files in some cases. Test both with photographs, screenshots, and transparent graphics before making a site-wide decision. Our AVIF vs WebP vs JPEG comparison breaks down when to use each.