What Is Image Compression? A Simple Guide to How It Works


Have you ever visited an online store, clicked a product page, and waited… and waited… for the images to load? That delay might only be a few seconds, but for shoppers, it feels much longer.
For WordPress stores, product images are often the biggest files on the page.
According to HTTP Archive data, images account for over 1 MB of the median desktop webpage’s transferred data, making them one of the largest contributors to page weight.
When product photos, banners, and thumbnails are not optimized, they can significantly slow page load times and affect the overall shopping experience.
In this guide, we’ll explain image compression in plain language, show why it matters for WordPress stores, compare lossy and lossless compression, and walk through the compression process step by step.
What is Image Compression?
Image compression is the process of reducing the file size of an image. The goal is to make the image take up less storage space and load faster on websites, apps, and other digital platforms.
Think of it like packing a suitcase. You want to fit everything you need into the smallest possible space without making the contents unusable. Compression does the same thing with image data.
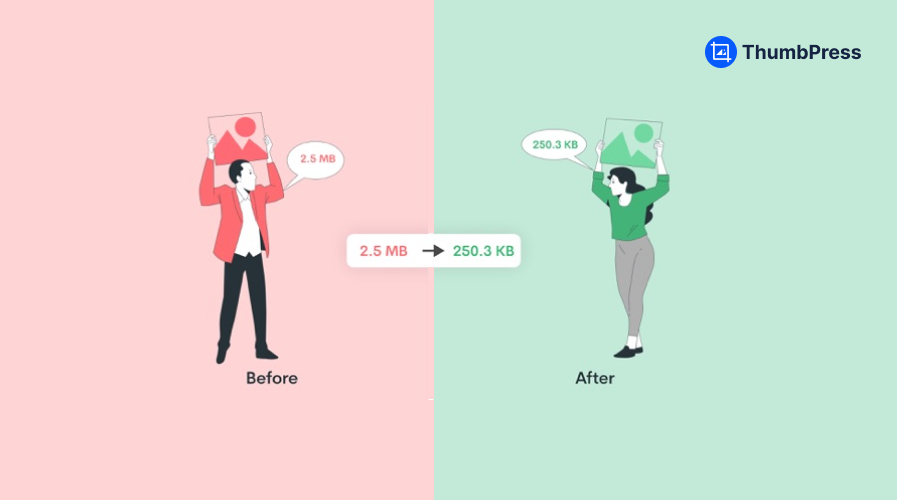
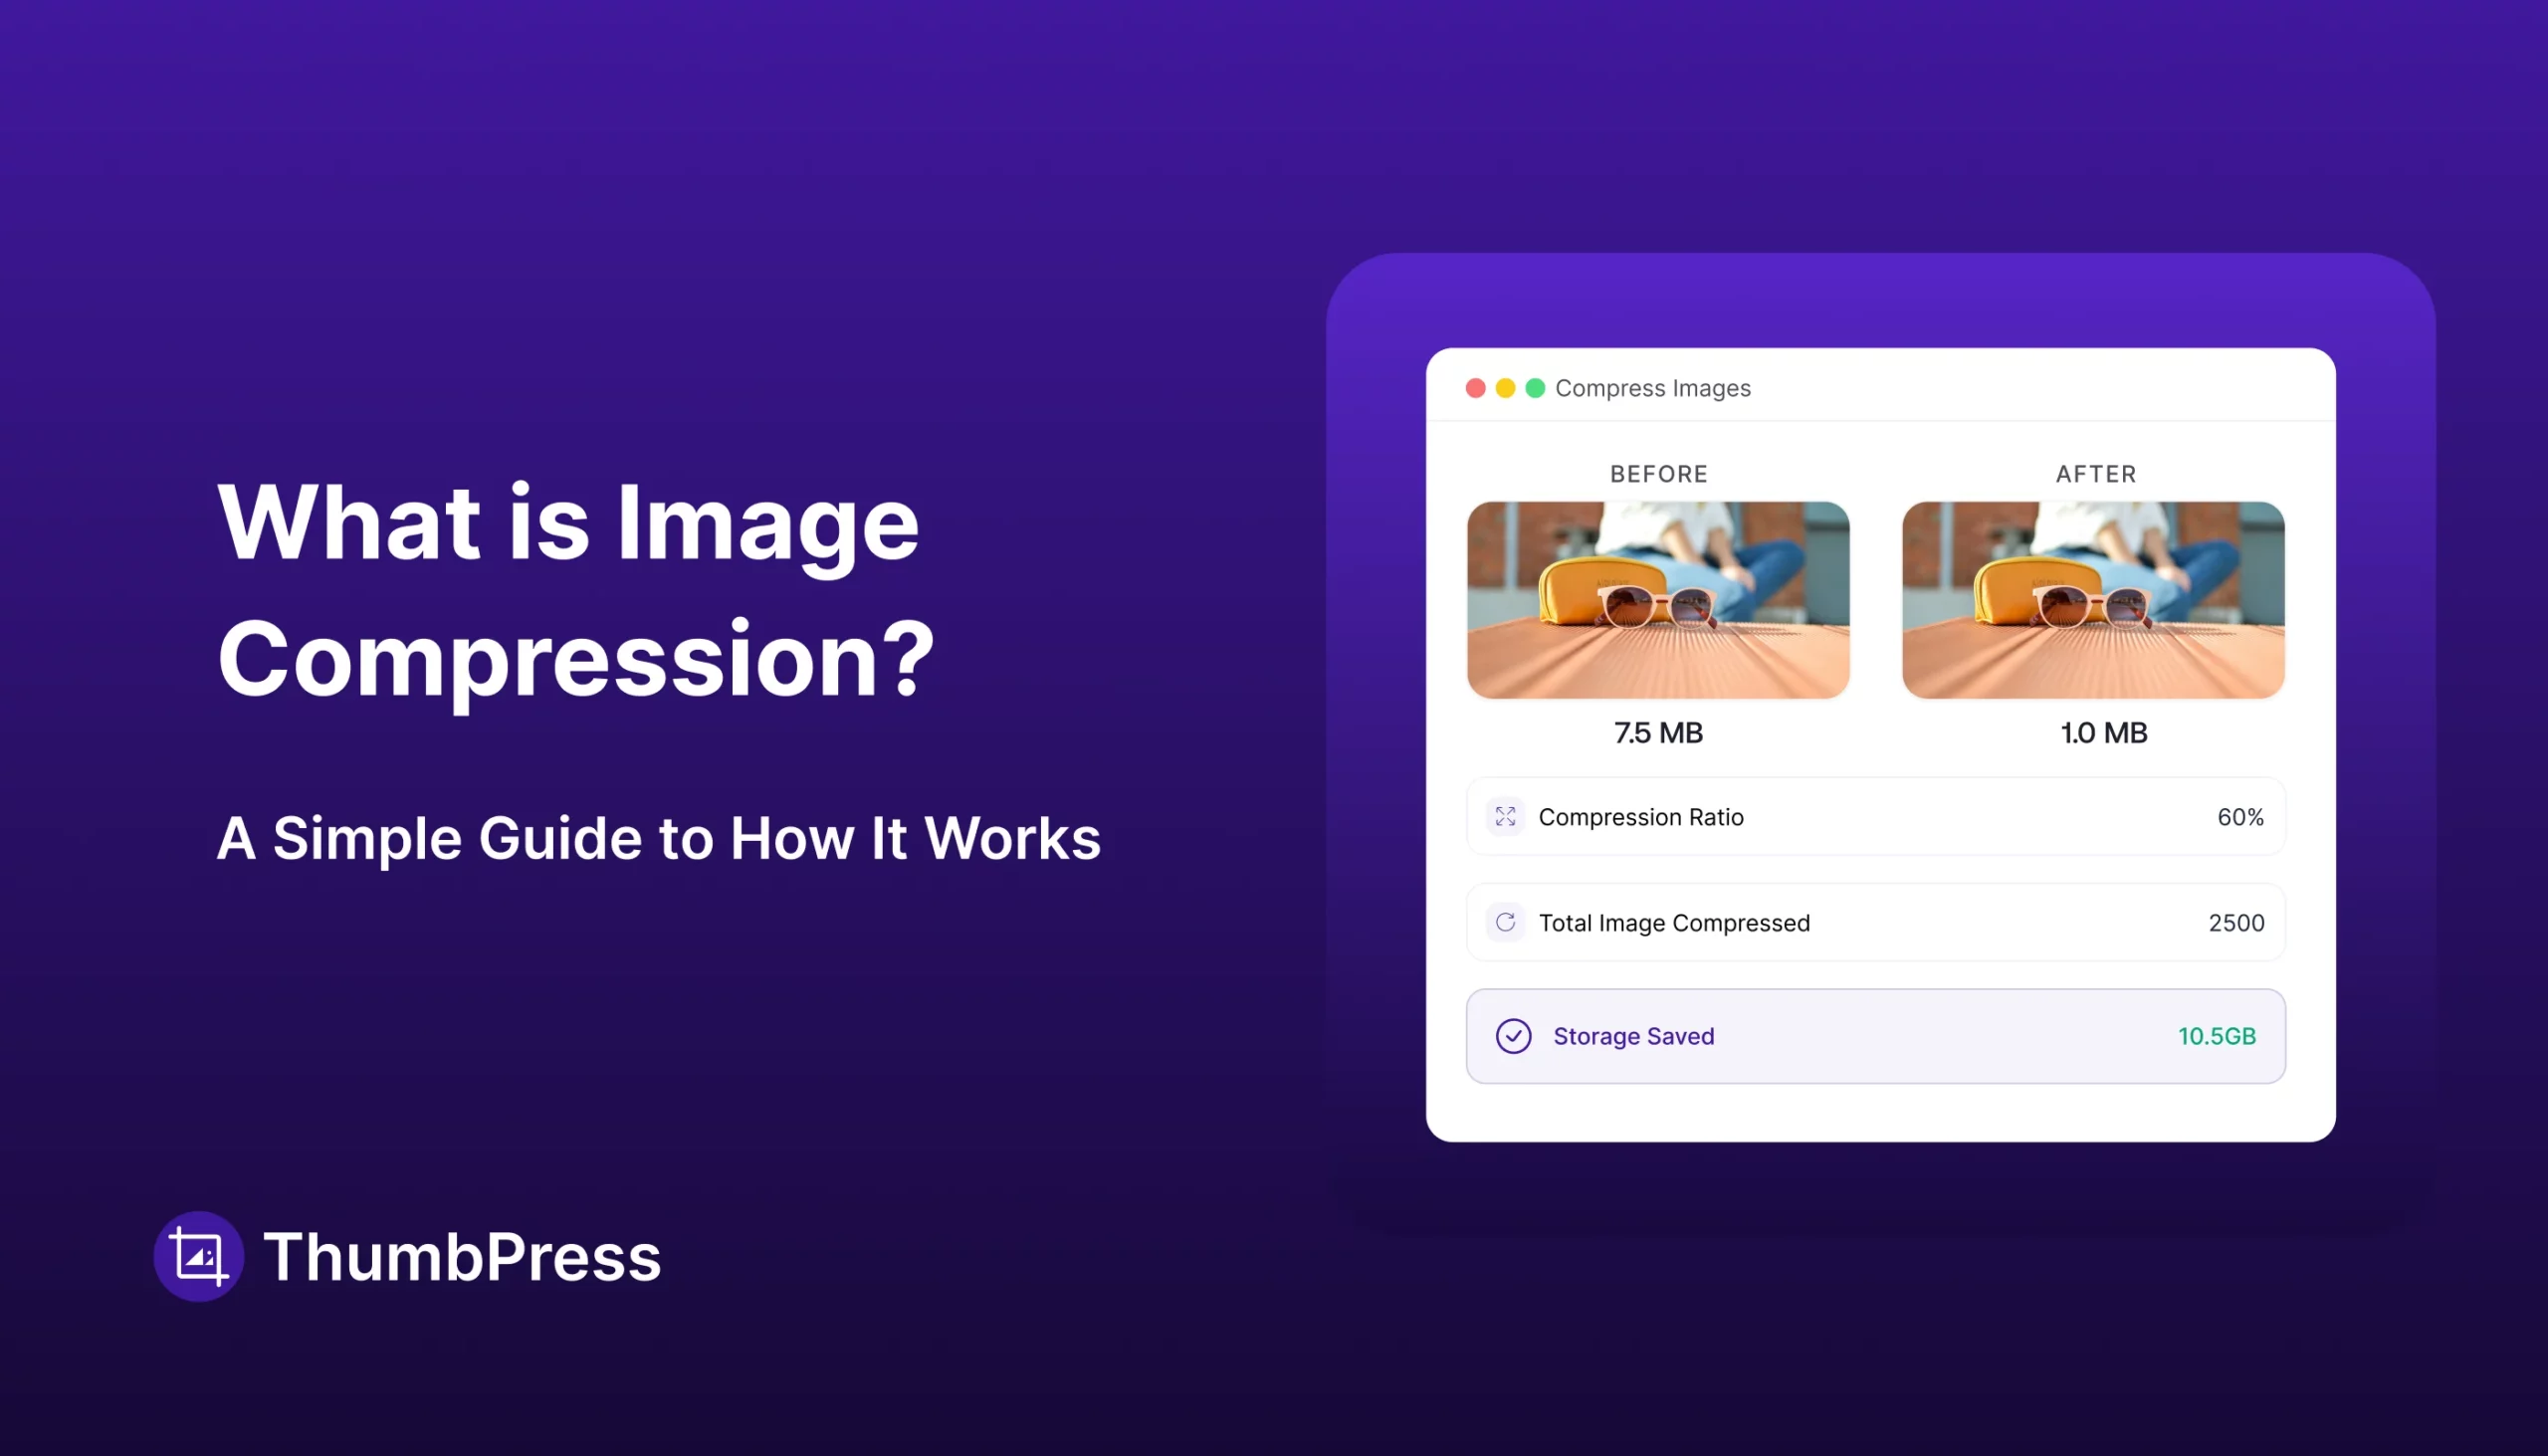
For example, a product photo from a camera might be 6 MB. After compression, it could become 250 KB while still looking almost identical to most visitors.
Why Image Compression Matters for WordPress Stores
Website speed has a measurable impact on user behavior. Google’s mobile performance research found that the probability of a visitor bouncing increases by 32% when page load time grows from 1 second to 3 seconds.
As loading times continue to rise, the likelihood of users leaving a website increases dramatically. That means image-heavy pages are unavoidable. Without compression, those pages become expensive to load.
1. Faster Page Load Times
Every image adds weight to a page. Ten images that are 2 MB each create 20 MB of data. On mobile networks, it can take a long time to download.
Compressed images reduce the amount of data transferred, helping pages appear faster.
2. Better User Experience
People rarely wait patiently for slow pages. Studies consistently show that visitors leave websites when the loading feels sluggish.
For ecommerce, speed affects:
- Product browsing
- Search results
- Category pages
- Checkout flow
A smoother experience usually means more completed purchases.
3. Improved Mobile Performance
Many shoppers browse on phones. Mobile connections can vary from excellent to poor depending on location.
Smaller image files help mobile users load pages faster and consume less data.
4. Lower Bandwidth Costs
Hosting providers and CDNs often charge based on bandwidth usage. Serving smaller images means less data transfer and potentially lower costs.
5. Better SEO Signals
Search engines consider page speed as one of many ranking factors. Faster pages can contribute to better visibility, especially when competing against similar stores.
If you’re working on overall WordPress performance, image optimization should be part of the process.
Lossy vs. Lossless Compression: The Real Difference
This is where most people get confused. Let’s clear it up simply.
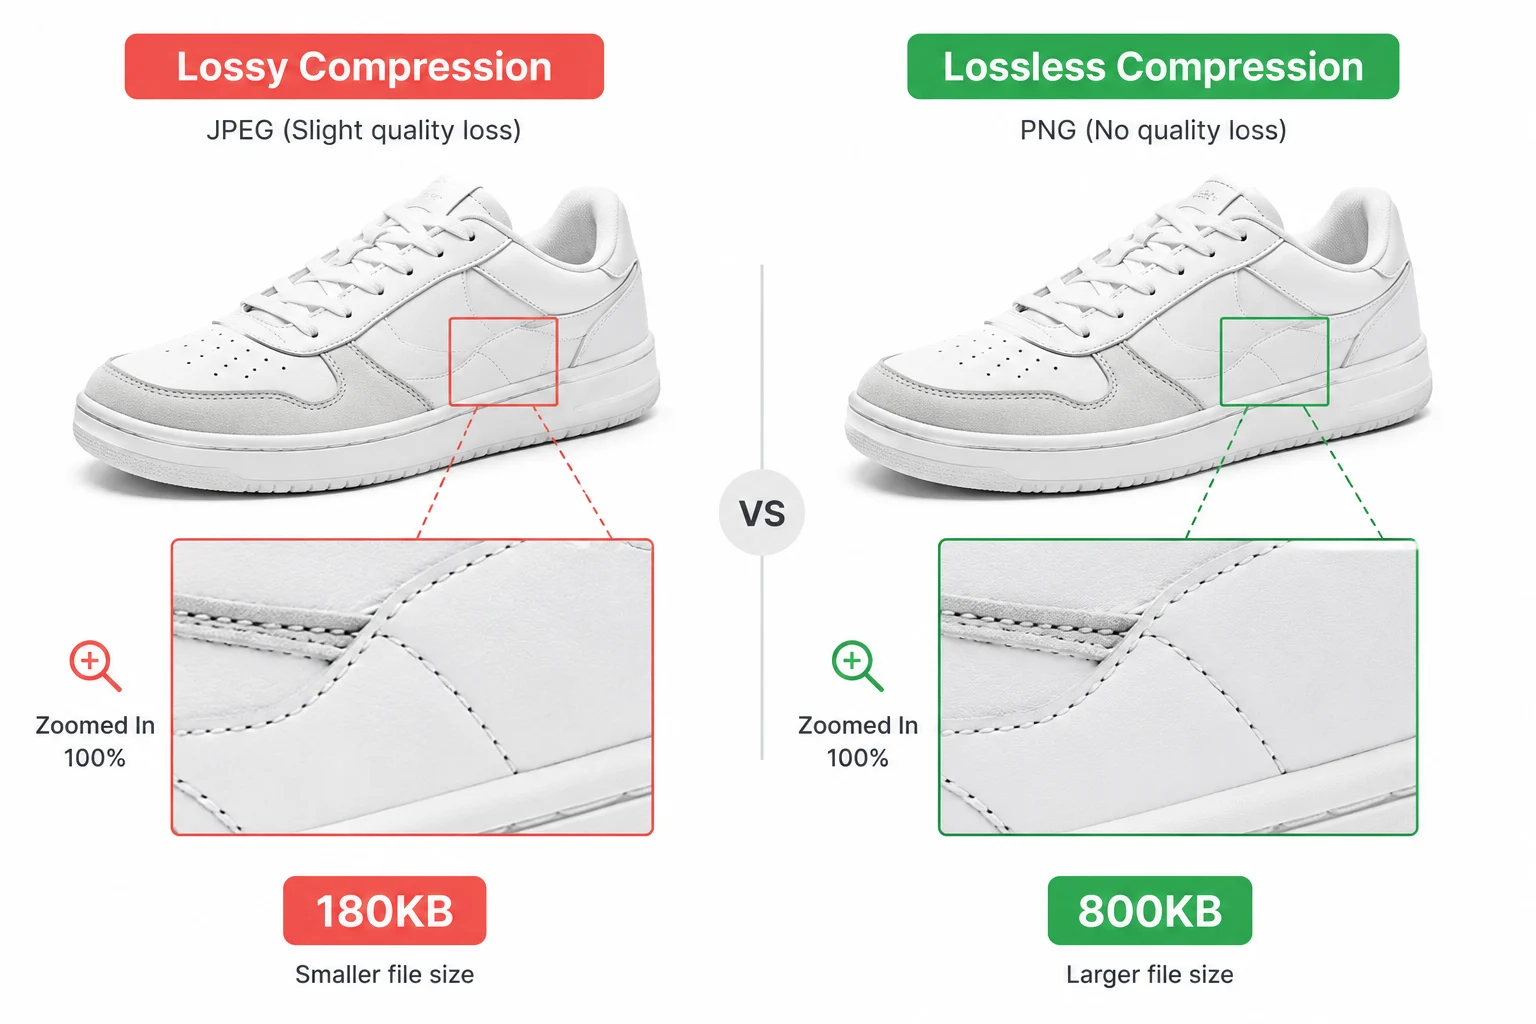
What is Lossy Compression?
Lossy compression removes some image data permanently. The file becomes much smaller, but a tiny amount of detail is discarded.
Good lossy compression is designed so that most people can’t notice the difference during normal viewing.
Example
A 2 MB product photo compressed to 180 KB as a WebP or JPEG file.
Pros
- Much smaller file sizes
- Faster loading pages
- Excellent for photos and product images
Cons
- Repeated editing and saving can reduce quality over time
- Not ideal when pixel-perfect accuracy is required
What is Lossless Compression?
Lossless compression reduces file size without removing image data. When decompressed, the image is identical to the original.
Example
A PNG screenshot compressed from 1.2 MB to 800 KB with no quality loss.
Pros
- No quality loss
- Great for logos, screenshots, and graphics with sharp edges
Cons
- File sizes are usually larger than lossy alternatives
- Less effective for photographic content
Image Format Comparison Table
| Format | Type | Compression | Transparency | Best Use Case |
| JPEG | Lossy | Excellent | No | Photos, product images |
| PNG | Lossless | Moderate | Yes | Logos, icons, text graphics |
| WebP | Both | Very good | Yes | Almost everything on the web |
| AVIF | Both | Best | Yes | Modern browsers, high-quality photos |
| GIF | Lossless | Poor | Partial | Simple animations only |
Check out our guide on AVIF vs WebP vs JPEG to understand the differences in quality, compression, and browser support.
How Image Compression Actually Works (Step by Step)
Most guides skip this part or make it sound like rocket science. Here’s what actually happens:
Step 1: Analyze the Image
The compression tool examines the image and identifies patterns, colors, and repeated information.
For example, a blue sky contains many similar pixels. That repetition can be stored more efficiently.
Step 2: Remove Redundant Data
Instead of storing every pixel independently, the algorithm stores patterns and relationships.
Imagine writing “blue” 1,000 times. It’s more efficient to write “blue × 1,000.”
Step 3: Reduce Detail (Lossy Only)
With lossy compression, the encoder removes details that are less noticeable to the human eye.
This is why a well-compressed photo can look almost identical while being dramatically smaller.
Step 4: Encode the Data Efficiently
The remaining information is packed into a compact file format such as WebP or JPEG.
Step 5: Deliver to the Browser
When someone visits your site, the browser downloads the smaller file. Less data means faster delivery and rendering.
How ThumbPress Handles WordPress Image Compression Automatically
Most image optimization tools force you to compress images manually before uploading them to WordPress. ThumbPress provides you with flexible options and handles everything based on the settings.
ThumbPress gives you three ways to compress images:
- Bulk Compression
- Compress on Upload
- Single Image Compression
What happens behind the scenes
Once you install and activate ThumbPress, you’ll see a dashboard. It gives you a quick overview of your site’s health and image status, including total images, thumbnails, large files, unused images, compressed images, and more, all in one place.
To keep things simple, the dashboard shows exactly how many images still need compression, so you can quickly take action and keep your site optimized without guessing.
Option 1: Bulk Compress Existing Images
Already have hundreds or even thousands of images on your website?
Instead of optimizing them one by one, you can use ThumbPress’s Bulk Compress Image feature.
Navigate to: WordPress Dashboard → ThumbPress → Compress Image
Choose your preferred Chunk Size & Compression Level. Then click Compress Now.
This will initiate the compression process right away. To keep the process running in the background while you roam other pages, use the Compress in Background button.
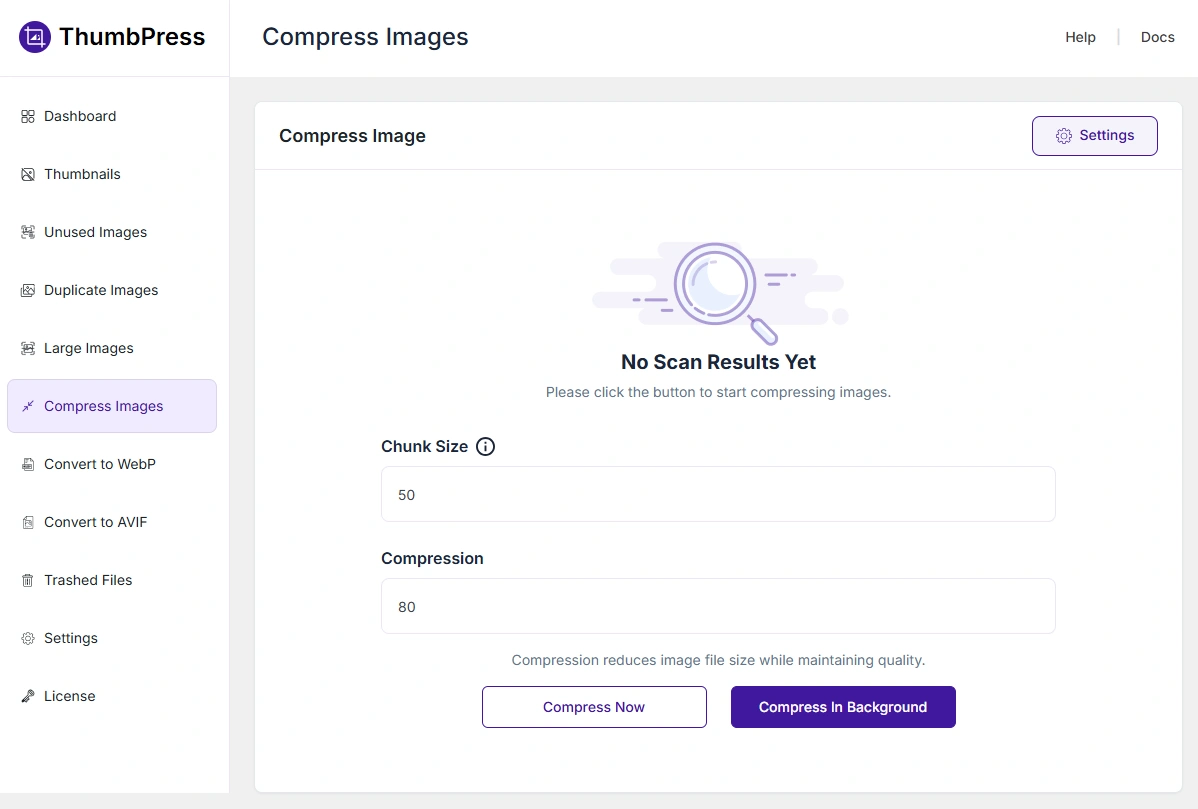
ThumbPress will scan your Media Library and optimize images in bulk, helping reduce storage usage and improve page speed without requiring you to re-upload anything.
Option 2: Compress New Images Automatically During Upload
If you want a completely hands-off workflow, ThumbPress can compress images as soon as they’re uploaded.
To enable automatic compression:
WordPress Dashboard → ThumbPress → Settings → Compress Image
Turn on the During Upload option and save your changes.
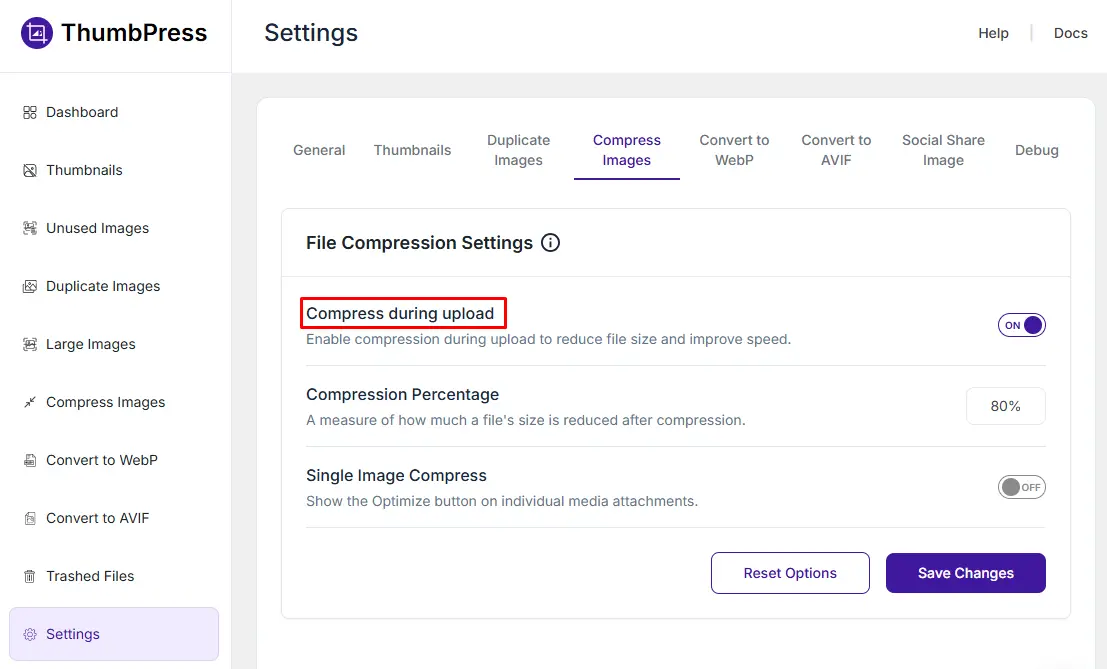
Once enabled, every newly uploaded image is optimized automatically, reducing file size without requiring any manual work. This is especially useful for websites that frequently publish blog posts, product photos, or marketing graphics.
Option 3: Compress Single Images When Needed
Sometimes you only need to optimize a specific image rather than process your entire media library.
The Single Image Compress feature lets you compress individual images directly from the Media Library.
To enable it:
WordPress Dashboard → ThumbPress → Settings → Compress Image
Enable the Single Image Compress option and save your settings.

When set, you’ll have the option to compress unoptimized images from the media library one by one.
Best Practices for WordPress Image Optimization
Resize Before Uploading
Don’t upload a 4000-pixel image if it will be displayed at 800 pixels.
A good workflow:
- Resize the image to the maximum size needed on the site.
- Then compress it.
This usually provides a larger benefit than compression alone.
Use Modern Formats
Whenever possible, serve WebP or AVIF formatted images. They are often 25–50% smaller than equivalent JPEG files.
Choose Reasonable Quality Settings
For most ecommerce photos:
- WebP quality: 70–85
- JPEG quality: 75–85
Going above 90 often increases file size significantly while providing little visible improvement.
Enable Lazy Loading
Lazy loading delays images that are below the fold until the user scrolls. This improves initial page load speed.
Use a CDN
A Content Delivery Network serves images from servers closer to the visitor. Combined with compression, this can make a noticeable difference.
Check out our guide to the 7 Best WordPress Image Compression Plugins, where we compare some of the most popular options for optimizing images automatically.
4 Common Mistakes Store Owners Make
1. Uploading images directly from a phone or camera: Modern cameras produce very large files. Always resize and compress first.
2. Using PNG for every product photo: PNG is excellent for graphics and transparency, but product photos are usually better as WebP or JPEG.
3. Compressing the same image repeatedly: Repeated lossy compression can gradually reduce quality. Keep an original master file.
4. Ignoring thumbnails: WordPress generates multiple image sizes. Optimize all generated thumbnails, not just the original upload.
Our guide on How to Fix Common Image Issues in WordPress walks through the most common image issues and their solutions.
Final Thoughts
Image compression helps reduce image file sizes without sacrificing the visual quality your website needs. For sites that rely on product photos, blog images, screenshots, or galleries, it can significantly reduce page weight and improve loading times.
A good image compression strategy starts with using the right image format, resizing images before upload, and applying the appropriate compression method for each image type. These steps keep pages lightweight while preserving image clarity.
Large images are often one of the biggest contributors to slow-loading pages. Making image compression part of your publishing workflow can help keep your website fast, efficient, and easier for visitors to browse.
FAQs
Will compression make my images look blurry?
Not at sensible settings. The visible artifacts show up when quality drops too low – typically below 60 for WebP or JPEG. Stay in the 70-85 range we covered above, and the compressed version will be visually indistinguishable from the original on product pages. If you can see degradation, your setting is the problem, not compression itself.
Should I use PNG for product images?
No, and the old “use PNG for transparency” rule no longer holds either. WebP supports transparency at a fraction of PNG’s file size, so even transparent product cutouts are better served as WebP. Reserve PNG for cases where you specifically need lossless source files, like design assets you’ll keep editing.
How do I know if images are the problem?
Run your product page through PageSpeed Insights and check two things: whether your LCP element is an image (it almost always is on store pages), and whether the audit flags “Properly size images” or “Serve images in next-gen formats.” If either appears, image optimization is your highest-leverage fix.
Is AVIF better than WebP?
AVIF compresses better, often 20-30% smaller than WebP at the same quality and browser support is no longer the blocker it once was. The trade-off is slower encoding and patchier tool support across the WordPress ecosystem. WebP remains the pragmatic default; AVIF is worth it for image-heavy stores chasing every kilobyte. Our [AVIF vs WebP vs JPEG guide] breaks down when each wins.
Can I compress images in bulk on WordPress?
Yes. ThumbPress can bulk compress your entire existing media library, including all the thumbnail variants WordPress generated, without re-uploading anything. It also skips already-optimized images, so re-running it only processes new files. If you want to compare tools first, see our [7 best image compression plugins] roundup.
Subscribe to Our Newsletter
Get the latest WordPress tutorials, trends, and resources right in your inbox. No Spamming, Unsubscribe Anytime.

Thank you for subscribing to our newsletter!


Table of Content
- What is Image Compression?
- Why Image Compression Matters for WordPress Stores
- 1. Faster Page Load Times
- 2. Better User Experience
- 3. Improved Mobile Performance
- 4. Lower Bandwidth Costs
- 5. Better SEO Signals
- Lossy vs. Lossless Compression: The Real Difference
- What is Lossy Compression?
- What is Lossless Compression?
- Cons
- Image Format Comparison Table
- How Image Compression Actually Works (Step by Step)
- Step 1: Analyze the Image
- Step 2: Remove Redundant Data
- Step 3: Reduce Detail (Lossy Only)
- Step 4: Encode the Data Efficiently
- Step 5: Deliver to the Browser
- How ThumbPress Handles WordPress Image Compression Automatically
- What happens behind the scenes
- Option 1: Bulk Compress Existing Images
- Option 2: Compress New Images Automatically During Upload
- Option 3: Compress Single Images When Needed
- Best Practices for WordPress Image Optimization
- Resize Before Uploading
- Use Modern Formats
- Choose Reasonable Quality Settings
- Enable Lazy Loading
- Use a CDN
- 4 Common Mistakes Store Owners Make
- Final Thoughts
- FAQs
- Will compression make my images look blurry?
- Should I use PNG for product images?
- How do I know if images are the problem?
- Is AVIF better than WebP?
- Can I compress images in bulk on WordPress?